Pages

Friday, August 31, 2012

The People We Meet

I have been struggling to play along in the Mojo Monday 256 challenge. I loved the sketch and knew what s my focal point.  I created my banners which I really liked too and then spent a day and a half messing with the rest.

I hate when that happens.  I can't walk away usually. I set it aside and keep coming back thinking I can fix it or I will have some major breakthrough. :)   This time I settled. I added a few more things and felt a little better about it and I am going to call it a tie. I have another project that is calling me with a bunch of different ideas!

Here is the end result:

The sentiment is from the new Verses Rubber Stamps Cling sets - Along the Way.  The backgrounds are Hero Arts (Antique Map, Around the World).  The airplane is part of the Verses set.  The inks I used included: Ranger Archival Black, Ranger Distress Inks (Antique Linen, Vintage Photo).

Thanks for stopping by!

Suzz

Tuesday, August 28, 2012

Gallon, Quart, and Pint

Cathy is hosting a series of challenges over on Moxie Fab World using design rules. The Gallon, Quart, and Pint rule is all about the proportions of colors.  Typically I only use two colors and a neutral, so this challenge sparked my thought process and design. 

The main color was derived by stamping the image using a teal ink. (My Gallon)  The flowers are perfect for the next splash of color(quart) and the pink pops.  I finished with the touch of light green(Pint).  The embellishments bring back a hint of my strongest color mixed in with the neutral.  The flowers and ribbon are really white I promise. :)  Obviously they must have a warmer undertone because when I did my photo editing it turned more ivory.

Products: Stampendous I Love Paris, Flowers(Prima, My Moments),  May Arts - White Silk Ribbon, Spellbinders Die, Sizzix Embossing Folder

Thanks for stopping by.

Suzz

Sunday, August 26, 2012

Art Deco


I have been loving the new Ranger Seasonal Distress Inks.  The colors are so vibrant and fun.  This week at Simon Says Stamp and Show the challenge is to be inspired by the new Summer Ranger Distress Inks. 

The bright colors made me think of stained glass and Tiffany lamps which led me to an art deco project.

I knew I needed to find an image to stamp that would use the colors and reflect the art deco feel I was looking for.  I had just received the beautiful woman image from Crafty Secrets and knew she would look lovely painted in the bright colors.

I stamped the image using Ranger black Archival Ink on white cardstock.  I then smeared the inks onto my craft mat and used the waterbrush to pick up the color and paint the image. The body is colored using  watercolor pencils and highlights from the distress inks. 

After everything was painted and dry, I covered the surface of the image using Versamark watermark ink. I then heat embossed the image using clear embossing powder.  I repeated this about four times and then waited for it to cool completely and cracked the surface.

I mounted the image on white and black cardstock.  I cut the the label from black cardstock and cut it in half and attached to the top and bottom of the black rectangle.


I finished off my art deco piece with crystal brads and a dangling set of pearls and pink gem.

Products: Crafty Secrets - Believe, Ranger Distress Inks Seasonal (Summer, Spring),  Sakura - Koi - Small - Waterbrush, Spellbinders Fancy Labels 2, Bling, Ranger Archival Ink,Versamark Watermark Ink, Clear Embossing Powder

Are you inspired to play along?   Everyone who plays along in the challenge has an opportunity to win a $50.00 Gift Voucher to Simon Says Stamp.


Thanks for stopping by! 

Suzz

Saturday, August 25, 2012

Asymmetry

Today I used the  Moxie Fab World Challenge - Asymmetry challenge as my inspiration to create a card using one of my favorite stamps.

The background is stamped with the "Lord is My Shepard" and the butterfly bush is stamped over.  I colored with watercolor pencils and waterbrush.  I then tore the page across from right to left.  I left the background to put in my verse.

Products: Our Daily Bread Designs: Bookmark Prayers, Faith, Ranger Distress Inks Vintage Photo, Ranger Archival Ink Coffee

Thanks for stopping by..

Suzz

Thursday, August 23, 2012

Amaryllis

 Cathy over at the Moxie Fab World is hosting a week of  Card Design Handbook challenges.  Each challenge talks about design elements.  I chose the Focal Point challenge for my card today:


The jumbo cling flowers (Stampendous Amaryllis)  lend themselves to being the main focal point with their size.  I stamped the image on tissue paper and colored with watercolor pencils and glimmer mists and a water brush.

To enhance (or support the image)  I tore the edges and embossed them in gold embossing enamel.  I repeated the embossing around the edges of the card base.  The layer under the flowers is distressed with brown dye ink to soften and darken the edges which also supports the brightness of the main image.
 
A fairly simple card for me. :) Have a wonderful day!

Suzz


Tuesday, August 21, 2012

Sweet Simple Things

I love buying pattern paper but am so bad at using it all up.  I started today with a sketch from Mojo Monday #255 and bold colored pattern paper. After much cutting and re-sizing I ended up muting the paper with a soft coat of sandal acrylic paint.

I coordinated my lovely bird and flowers to match the paper tones.  The bird flowers and sentiment are from Our Daily Bread Designs (Simple Things, Sing to the Lord)

The sketch provided the layout.


Have a wonderful day!

Suzz


Sunday, August 19, 2012

Parisian Domino Book

This week at Simon Says Stamp and Show it is Anything Goes.  I took the opportunity to try something new and create a Parisian Domino Book.


I participate in an Art Swap group and they were sharing domino books. They were so inspiring that I decided to try to make my own.

I  painted the covers of the domino surface using StazOn Metallic - Silver Ink.   
 
I stamped the images inside and on the book cover using  the  Stampendous Charm Collection.   The cover is decorated with gems, feathers and a pretty Kaiser Resin Flower.    The metallic trim is embossed using silver embossing powder. 
 
Here is the book opened:  (Click on it to see it enlarged)


 I cut a strip of cardstock slightly smaller than the length of the domino and 13 times the width. I scored at the width measurement until I reached the end of the strip of cardstock.  I folded the scores back and forth to create an accordion fold. I sponged the edges of each fold and around the outside  using blue dye ink.

The end pieces were stamped using the lace stamp and black ink. 


I stamped the chandelier and the roses using black ink along the left side. I stamped the butterfly and bird twice to pop them and add a layer. 

The music score was added intermittently along the middle.  The script and postmark were stamped in the middle.

The Eiffel tower was stamped on acetate using black StazOn.


I added flourishes the cameo and more butterflies and flowers. 

Everything was colored with a touch of watercolor pencils and a waterbrush. There are some gems and pearls added as touches to the images.

Products:  
StazOn Metallic - Silver Ink,  
Stampendous Charm Collection
Kaiser Resin Flower.
Silver embossing powder. 
Ranger Distress Ink - Broken China
Bo Bunny Black & White Gems


The design team has some wonderful projects and tons of inspiration.  Come join us and play along in the challenge.  Everyone who plays along in the challenge has an opportunity to win a $50.00 Gift Voucher to Simon Says Stamp.


Thanks for stopping by! 

Suzz


Garden Angels

When I saw the challenge at Fashionable Stamping Challenge was ice cream I knew I wanted to pair it up with Cathy's Moxie Fab World Challenge The Minty Fresh Challenge to create a mint chocolate chip inspired card.  Even better yet is Mint Ice Cream with Oreo Cookies!  I ended up creating a card which I am calling a Garden Angel.

The background started as mint with a combination of green dye inks smeared on the craft mat and spritzed to create an inky puddle which I smeared onto the white cardstock.  I repeated it on the cardbase.  I then took my Dylusion sprays (Brown) and spritzed along the edges to add my chocolate.

The next step was to blend a few different stamps together.  I stamped a new B Line Designs stamp over the background using brown dye ink.

After I added the background I stamped the Winged Collage Angel from La Blanche using black ink and heat embossed her with clear embossing powder to help the black pop a bit more.  I added a touch of color to her face, eyes and hair.  I also highlighted with a white gel pen.

I created a mask for her using copy paper and stamping her on it and cutting it out.  I wanted to layer some flowers in the background.  After I placed the mask over her face, I stamped the Hero Arts Hydrangea, Elegant Weeds in the background using black ink. I heat embossed them as well to help the color pop.

I added some color to the flowers using watercolor pencils.  I then stamped the lovely Verses Rubber Stamps - Kiss of the Sun on tissue paper and trimmed to fit in the corner and added a touch of the brown dye ink.

After all that I decided to add my swarm of butterflies.  They are from the Stampendous Charm Collection.


Have a wonderful Sunday!

Suzz

Saturday, August 18, 2012

Christmas Angel Bear

I am back today with the final day of the Action Wobbles and Stampendous hop... I decided to use the sweet angel bear.  He reminds me of the vintage Christmas toys my mother would have on display during the holidays (and actually all year round in her china cabinet)


I tried to take a few different angles of the project to show how he wobbles. (He really wobbles in such a fun way!)

Here is a picture from the side to show you the wobbler in action:

 And the full card:


I cut the shape using the Triptych template.  I cut white cardstock to fit inside the template.I stamped onto the white cardstock using brown ink and the beautiful Christmas Background

I stamped additional stars from the Teddy Bear image to string along the sides. I added some of the color fragments on the bottom to add texture.  (Ochre, Chiffon)

My angel bear was stamped in black ink and colored with watercolor pencils.  I added a touch of white gel pen for highlights.  I also added a touch of white fun flock to give his crown a touch of softness.

The sentiment is from the Christmas Wishes Set.

Here is all the important details about the prizes and hop:

There are two fabulous prizes being given away.   The first one contains: 


and
 
The second prize package contains:
] 
and


How can you win? Comment on the blogs below! At the end of the weekend (you have until Sunday night) they will choose from two of the blogs below at random. They will then choose a random winner and notify you.

Thanks for stopping by!

Suzz

Wednesday, August 15, 2012

School Days

Welcome to the June Artistic Outpost Blog Hop!   Today the Artistic Outpost Design Team  is sharing projects for school days! .


I started from this cute notebook. It had chipboard cover and bottom:


I covered the surface with Gaffer's Tape from 7 Gypsies.  I added a touch of color with Ranger Distress Ink Peacock Feathers.  I added a slight smudging of white acrylic paint. 

I stamped the sweet image from the Favorite Book and colored with the distress inks and shaded with color pencils.  I stamped the house frame from the Whimsical Melange using StazOn and cut out using detail scissors.   The letters are from the Secretary Pool and are stamped and cut out.  I added a ring for the pencils.

To see all the other fabulous projects from the design team:


Thanks for stopping by! 

Suzz

Tuesday, August 14, 2012

Nevermore

One of the new stamps from Stampendous is this fabulous Raven with the background script from Poe. The DT from Stampendous are hopping this week using the super fun Action Wobbles.  You can buy these super fun wobblers at The Scrapbooking Queen.

I was inspired to make a steampunk wobbling Halloween card..

I started with misting an embossed piece of white cardstock using gray, green, purple and orange mists.  I distressed the edges.  I then repeated the process on a larger piece of cardstock to create my background.  I stamped the raven and quote on white cardstock.  I treated that background to a touch of orange and green glimmer mist.  I sponged the edges with a touch of black dye ink.

I stamped the raven a second time and cut him out using my trusty detail scissors.  He also received a little orange bath of mist.

Than the fun began with adding wobblers under the bird and the clock faces.  I added additional gears to the clocks along with the hands.  I finished it off with a few clips embossed in aged gold embossing enamel.

When you hold it upright the bird really wobbles with the chain on his hat making it really move.

Now you don't want to miss out on all the fun, hop along to see all the inspiration: 

Here's who is playing today:

We'll choose one of the above bloggers at random and they will choose one commenter on their blog at random (so be sure to comment on all of them) to win:


          6 Action Wobbles Springs
and

CRQ157 Cling Lion Baby


Have fun!

Suzz


Sunday, August 12, 2012

My Favorite Technique

The Simon Says Stamp and Show Challenge this week  is to use your favorite technique. I had to think about it for awhile as I love trying new techniques.  Usually my favorite technique is the latest one I have been playing with.  After I stopped to think about it,  I realized that I pull out my mists almost everyday and use them in a variety of ways.  This prompted me to do a project using one of my favorite techniques of spraying glimmer mist on tissue paper. 


My family lives near Lake Michigan which made an easy decision of where to take Prom pictures this year. My son and his girlfriend look wonderful and the sky was overcast which provided the perfect lighting in addition to the gorgeous beach.  I knew the Patina Glimmer Mist - Tattered Angels was the perfect shade to partner with her beautiful dress.   I spritzed multiple layers of tissue paper to create a soft background.
 
The cardstock and tissue paper are sprayed with glimmer mist.  After the they dried I attached the layers of tissue paper onto the cardstock using tape.  I then brushed white acrylic paint over the edges and across the surface.  
 
I added a twist of twine around the edges and added touches of flowers, leaves and seashells to provide a layer of texture and softness.

Can you see the tissue paper and shells peeking out?


To finish off the layout I added a little lock and key with a heart shape in the corner.  I left room for my journal / notes in the center. 


Products: Prima (Laraine,Tasha). Patina Glimmer Mist - Tattered Angels,   My Mind's Eye - On the Bright Side     Adirondack Snow Cap Paint Dabber

Come join us and play along in the challenge.  Everyone who plays along in the challenge has an opportunity to win a $50.00 Gift Voucher to Simon Says Stamp.


Have a wonderful Monday!

Suzz

Saturday, August 11, 2012

Enjoy Simple Beauty

Happy Saturday!  It's raining rubber at my house!  I have a few new releases just hit my desk that I am creating with. Of course that means not sharing anything too much on my blog. :)

I took a break from my other projects to create a tag for the Fashionable Stamping Challenge of Anything Goes
I used a combination of Artistic Outpost Sets to create my tag.  (Keeper, Whimsical Melange, Old Grist Mill) The background was supposed to emulate the flannel shirt. I had embossed using a Sizzix embossing folder and smeared a combination of blues, reds and brown distress inks over the surface.  My favorite was creating the string of fish. I stamped, colored with the coordinating distress inks and cut them out to attach to the twine.

Of course I had to add the ruler as every fish needs to be measured!

We are celebrating my youngest birthday with a family party. A little delayed due to our vacation.  Things are wrapping up for the summer. My older kids are back in school next week.  Maybe it will quiet down a bit after that.

Have a lovely weekend!

Suzz

Tuesday, August 7, 2012

Happy Anniversary

We took our vacation this past week with my SIL and BIL and it is their anniversary this week. I had to put together a card for them today to pop in the mail.  I started from the Mojo Monday Sketch #253 and some lovely Authentique papers to create my card for them.


 The idea started with using the main focal points as hearts die cut form old sheet music.  I then layered up the papers with distressed edges and added the lovely sentiment from Verses Rubber Stamps called: Grow Old QQ0806-C

The sketch:


Have a wonderful Tuesday! 

Suzz


Sunday, August 5, 2012

Over the Limit


My project today is for the Simon Says Stamp and Show challenge  Paint it Up. My project started from a piece of muslin with white acrylic paint smeared over the surface.  I grabbed a piece of muslin in the midst of project to whitewash a cupboard door.  I was excited to see what I could do with my leftover muslin scrap. 

The theme for my project was inspired by stamping the number 65 in the corner using black ink. My middle daughter has just gotten her permit to drive and has been begging to drive everywhere and I think that had me thinking speed limits, guardian angels and cars.

After the number was stamped I traced circles around the numbers using a black marker and punched two holes to allow me to string the twine onto the faux tag.

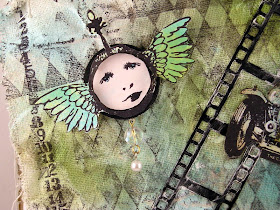
I stamped the harlequin pattern in the background using black ink. I stamped the time piece with wings two times to create a frame for the sweet girl image.  I stamped the card on white cardstock.

I framed out the girls face using a time piece stamped frame.
 The girl is stamped on white cardstock and colored with color pencil.  The wings are misted in coordinating colors.

I stamped a row of numbers along the left side.  I used a strip of filmstrip stickers in the background behind the car. The car is stamped on white cardstock using black ink and colored with the blues and greens and touches of white. 

I finished the piece by layering the muslin with images onto a piece of corrugated cardboard.
The background is torn and painted with white acrylic paint.  I added a piece of twine to create a hanging.

I added a few charms to the piece for texture.  The sentiment is stamped on a piece of tissue paper spritzed with glimmer mist. The edges are distressed with a touch of brown dye ink and white paint. 

Products: Artistic Outpost - Diesel Punk, 7 Gypsies - 17920 Number Barcode, Tattered Angels - Glimmer Mist - Patina, , Adirondack Snow Cap Paint DabberArtistic Outpost - Think and Wonder

Join in on the fun this week to have an opportunity to win a $50.00 Gift Voucher to Simon Says Stamp.


 Thanks for stopping by! 

Suzz

Singing Birds & Dreams

I have been on vacation this week with my family and it was really wonderful to be off exploring together. We went on a lovely cruise ship which had some fantastic artwork.  The artwork had me missing my craft space.  Early this morning I pulled up Tim's August  tag and sat down to play.

I made two different tags... I had a hard time deciding which to share first...


I followed Tim's lead on the background but used the Pearl Adirondack Acrylic paint which is fun as it has a shimmer to it which you can't see in the picture but adds a lovely glossy finish IRL. 

Images: Artistic Outpost's Loverly London, Flower Market, and Songbirds.  Embossing folder Sizzix. Maya Road Organza Flowers.  The blue ink is the Ranger Distress Ink - Salty Sea. 
 
My second tag went sideways on me: 

 Images from Artistic Outpost - Songbirds.  I added some Prima flowers and Maya Road Organza Flower trim.  I used the Ranger Distress Ink - Lilac.

Have a lovely Sunday!

Suzz


Friday, August 3, 2012

Midwinter Snow

Bring on the cold!  Our weather has been really hot this July!  Working with the new Artistic Outpost set Midwinter definitely helped me think cool thoughts!

I went with a simple white card with just a hint of icy blue and a touch of glitter. 

When I finished my main scene I decided to emboss the background with a Stampin Up embossing folder and then cambe back in with a touch of the blue around the edges.

A pretty CAS card for me!  I loved the serenity of the scene and the matching sentiment!

Happy Friday!

Suzz
Thursday, August 2, 2012

Soar


I created this at the same time I was working on my other project for the Simon Says Stamp and Show challenge "What do You Say"  this week. Another beautiful sentiment and even more inspiring because of the obstacles  that Helen Keller  had to overcome to soar.

I used this beautiful quote and created another bird and nest with some branches cut from the Memory Box die on cork paper.

The background is created with a combination of glimmer mist, white acrylic paint and white cardstock.  I sprayed the background first and then smeared the paint over the surface. I added a layer of letters stamped in a faint brown dye ink over the background.

I tore the edge and added a doily peeking out of the edge. I decided to tear the edge off the corner. I don't know if the recipient will appreciate a torn card. LOL!

Products:  Artistic Outpost - Quote and Quotables, Crafty Secrets - Fairyland, Memory Box - Branch, Stampers Anonymous, Glimmer Mist, Purple Dye Ink.

Thanks for stopping by!

Suzz