Hello! Welcome back, I am sharing a new post for the current The Funkie Junkie Boutique Challenge called "Bits and Bobs".
I am hosting the challenge this time and here is the inspiration for the challenge:
"Do you have a pile of leftover scraps from projects previously made or
even a half finished project waiting for you to get the time to complete
it? This is the challenge for you! It is time to pull out
those scraps, remnants or half finished projects and pull them together
into a fabulous shabby chic or vintage project. Make sure to mention in
your post what part of your project was a scrap or remnant."
I am always creating scraps and ideas that never get completed. I set them aside and review them at a later date and if I want to keep them I store them in a hanging folder.
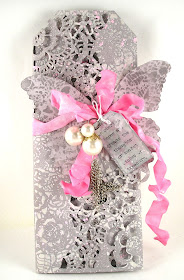
This challenge had me digging through that folder and I found this wonderful tri-fold created waiting to be used up.
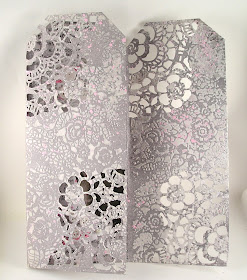
The tri-fold was already inked up, die cut and embossed with the pretty flowers. I decided to finish it off with a few other leftover bits and bobs.
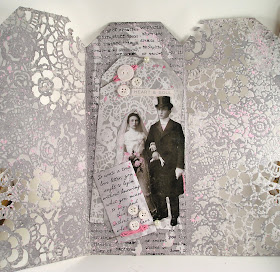
As you open the pages you see they all have the same texture and colors. I added a hint of pink paint to the surface to coordinate with the ribbon.
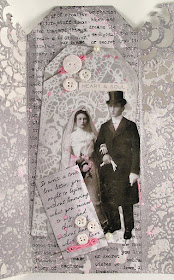
On the inside there is another tag sprayed with hickory smoke distress ink spray. After it dried the doily stencil was laid over the surface and sponged with distress oxide Hickory Smoke.
I dug through the buttons and picked up some pins from a boutonniere from a wedding we just attended to use as accents.
The Ribbon and butterfly were leftover from another project and were color coordinated to match the final tri-fold.
I hope this has you digging into your scrap pile to pull together something fun to share!
The
winner will earn a chance to be a Guest Designer at a future date at
The Funkie Junkie Boutique blog, and everyone who enters and
follows the rules will go into the draw for the chance to win a $25
spending spree at The Funkie Junkie Boutique. There are also Top 3 Badges for three additional outstanding entries, chosen by the Design Team.
Thanks for stopping by!
Suzz
Products:
Ranger Tim Holtz Layering Stencil - Doily
Ranger Distress Oxide Ink - Hickory Smoke
Ranger Distress Stain Spray - Hickory Smoke
Idea-Ology Baubles
Idea-Ology Halloween Paper Dolls
Idea-Ology Metallic Quotations
Stampers Anonymous - Stuff to Say
Seam Binding
Ranger Distress Oxide Stain Spray - Picked Raspberry
Wendy Vecchi Embossing Paste - White
Ranger Archival Ink - Jet Black
Stampers Anonymous - Nature Walk
Sizzix Thinlits Mixed Media Dies
Dina Wakely White Acrylic Paint
Pages
▼
Wednesday, August 28, 2019
Wednesday, August 14, 2019
Let's Do it Again
Hello again! It's time for a new Funkie Junkie Boutique Challenge. The talented Sara Emily is hosting and she is challenging us to "Let's Do it Again". Here is how she describes the challenge:
"Have you ever made something that you wish you could do over? Perhaps it was a technique you tried and didn't get the results you were hoping for. Maybe you didn't have just the right product you wanted to make your project just perfect. Or maybe a friend asked you to make something like it for them. Now's your chance for a do-over. Choose one of your own posted vintage or shabby chic projects and do it over with a bit of a twist. Be sure to link back to the post of the project you are making over and tell us why you wanted to do it a second time and what's different about it this time. We like to see your entry be in the vintage or shabby chic style we prefer. "
I took a scan through some of my recent posts and I found this cute bag I created in February. I liked it when I created it but when I looked at it again, I wanted to spin it a little differently.
I decided to replace the bird with a butterfly but stick with the idea of wings. :) I wanted to try an idea of piecing together the filmstrip and cutting the butterfly from the filmstrip.
I taped the film strip to a sheet of acrylic. I die cut the butterflies from the filmstrip. I then decided the filmstrip needed a coat of the white acrylic paint on the backside to make it pop.
After that I stamped script over the front with a StazOn ink. I inked the edges with the same ink to make it pop.
I die cut the clock from kraft paper and painted it black. I then splattered the background with distress Oxide spray and died the twine to match.
I cut apart the quote and inked the edges with black ink. I added rub-ons on the front and added splatter all over all the card.
Go check out the design team's fabulous re-dos and join us in the challenge. The winner will earn a chance to be a Guest Designer at a future date at The Funkie Junkie Boutique blog, and everyone who enters and follows the rules will go into the draw for the chance to win a $25 spending spree at The Funkie Junkie Boutique. There are also Top 3 Badges for three additional outstanding entries, chosen by the Design Team.
Thanks for stopping by!
Suzz
Products:
Sizzix Tim Holtz Bigz Die - Timekeeper
Sizzix Tim Holtz Die - Tattered Butterflies
Stampers Anonymous - Entomology
Idea-Ology - Countdown Brads
Idea-Ology - Quote Chips
Idea-Ology - Tim Holtz Halloween Rub-Ons
Idea-Ology - Tim Holtz Filmstrip
Ranger Distress Oxide - Picked Raspberry
Twine
Dina Wakley Media Paint
Distress Paint Black Soot
StazOn - Jet Black Ink
Acetate
"Have you ever made something that you wish you could do over? Perhaps it was a technique you tried and didn't get the results you were hoping for. Maybe you didn't have just the right product you wanted to make your project just perfect. Or maybe a friend asked you to make something like it for them. Now's your chance for a do-over. Choose one of your own posted vintage or shabby chic projects and do it over with a bit of a twist. Be sure to link back to the post of the project you are making over and tell us why you wanted to do it a second time and what's different about it this time. We like to see your entry be in the vintage or shabby chic style we prefer. "
I took a scan through some of my recent posts and I found this cute bag I created in February. I liked it when I created it but when I looked at it again, I wanted to spin it a little differently.
This had me thinking about using some of the same pieces and how to spin them up a little differently.
I decided to replace the bird with a butterfly but stick with the idea of wings. :) I wanted to try an idea of piecing together the filmstrip and cutting the butterfly from the filmstrip.
I taped the film strip to a sheet of acrylic. I die cut the butterflies from the filmstrip. I then decided the filmstrip needed a coat of the white acrylic paint on the backside to make it pop.
After that I stamped script over the front with a StazOn ink. I inked the edges with the same ink to make it pop.
I die cut the clock from kraft paper and painted it black. I then splattered the background with distress Oxide spray and died the twine to match.
I cut apart the quote and inked the edges with black ink. I added rub-ons on the front and added splatter all over all the card.
Go check out the design team's fabulous re-dos and join us in the challenge. The winner will earn a chance to be a Guest Designer at a future date at The Funkie Junkie Boutique blog, and everyone who enters and follows the rules will go into the draw for the chance to win a $25 spending spree at The Funkie Junkie Boutique. There are also Top 3 Badges for three additional outstanding entries, chosen by the Design Team.
Thanks for stopping by!
Suzz
Products:
Sizzix Tim Holtz Bigz Die - Timekeeper
Sizzix Tim Holtz Die - Tattered Butterflies
Stampers Anonymous - Entomology
Idea-Ology - Countdown Brads
Idea-Ology - Quote Chips
Idea-Ology - Tim Holtz Halloween Rub-Ons
Idea-Ology - Tim Holtz Filmstrip
Ranger Distress Oxide - Picked Raspberry
Twine
Dina Wakley Media Paint
Distress Paint Black Soot
StazOn - Jet Black Ink
Acetate
Sunday, August 4, 2019
Bird Life
Hi! The birds are always flocking around our neighborhood. We get great enjoyment out of seeing their antics. The new Darkroom Door Bird Life set designed by Godelieve Tijskens is charming and reflective of the views we have from our porch. I was lucky enough to receive the stamp set form Darkroom Door and wanted to share a few projects I created using the new set.
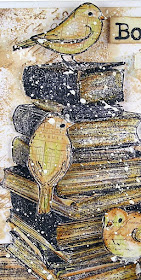
I am sharing this one first because it use the book stacks stamp which I love. Rachel has designed a few different stamps with books and book related sentiments and I couldn't resist blending them with the birds.
The birds perch perfectly on the stack of books:
I started by stamping the birds on a pattern paper. (The soft text gives them a lovely layer of texture). I then colored them with watercolor pencils and a waterbrush. After they dried I cut them out to place on my book stack.
I stamped the books using black archival ink and then cut them out to place on the card base. The books were colored with the sames watercolor pencils and waterbrush.
I inked up the background of the card with a little bit of dye ink and stamping. I also stamped the nest with eggs and colored to coordinate.
I stamped the sentiment and cut it up into pieces to place along the side of the card.
For my next set of cards I wanted to play with mixed media tape and stamps!
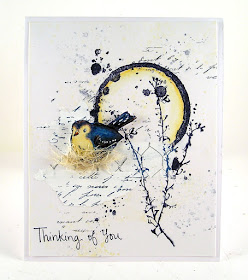
I started by taking some of the Dina Wakley Media Tape and tearing off multiple strips. I taped them to my craft mat. I painted them with white acrylic paint and waited for them to dry.
I took the French Script and chicken wire and stamped using archival ink onto the painted surface. I heat set the ink to make sure it didn't smear.
I then started working on the background of the card. I started by smearing a little scattered straw dye ink onto the craft mat and spritzing it with water. I dragged the background paper through the inky mat.
I then stamped the coffee stain with a cobalt blue ink onto the background. To finish the background I stamped partially the splatter and French Script with coordinating blue ink. I stamped the birds multiple times and colored them with watercolor pencils and a waterbrush. After they dried I added highlights using white gel pen.
I cut out the birds and placed them in a cheese cloth and washi tape nest. (Leftover golden bits from an old project that were easy to shred up and place under the birds.
When I saw the cute bird bath and bird houses I immediately thought how cute they would be as a focal point for place cards on the dinner table.
I created a set of four little place cards with different sentiments and same color scheme to be set out on the table for a dinner party.
I could hand write the names of the guest on the bird house. I cut the width of the base but left the top long to allow for stamping and cutting out the bird house. I could have just cut the bird house out as well and taped it to the base.
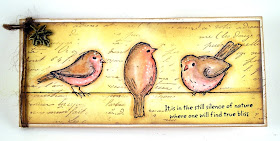
My final project was just a scrap but I loved how it turned out so I turned it into a simple book mark. It is folded like a card but I can slide it over my page and keep my page in the book.
The only thing with this is to make sure to seal the distress inks because you wouldn't want it to get wet and mark up the book pages! :)
Hope you enjoyed the birds as much as I did! Thanks for stopping by!
Suzz
Product List (all linked to Darkroom Door)
Darkroom Door Rubber Stamp Set: Bird Life
Darkroom Door Texture Stamps: French Script, Splatter
Darkroom Door Photo Stamp: Book Stack,
Darkroom Door Eclectic Stamp: Coffee Stain
Darkroom Door Rubber Stamp Set: Garden Greetings
Darkroom Door Rubber Stamp Set: Wings
Darkroom Door Rubber Stamp Set: Bookworm
Darkroom Door Rubber Stamp Set: Nature Walk
Ranger Distress Oxide Ink: Peeled Paint, Walnut Stain, Vintage Photo
Ranger Archival Ink - Cobalt Blue, Jet Black, Potting Soil
Ranger Distress Ink - Scattered Straw, Peacock Feathers
Staedtler Watercolor Pencils
Waterbrush
White Gel Pen
Twine
White Acrylic Paint


