Pages

Wednesday, September 25, 2019

Treats Not Tricks

Hi and Welcome back to a Funkie Junkie Boutique Challenge post!  The challenge this time around is hosted by Maggi and she has challenge us to create Treats not Tricks!

She describes the challenge as:

"Choose a theme and make something that will hold a treat for someone.  It could be a Halloween treat bag, a Valentine's candy box, a birthday card for a special person that holds a treat (could be a gift card "treat" or a bite of chocolate), anything that can hold a treat.  So, for this challenge, choose a theme and make a vintage or shabby chic treat project to treat your someone special!"

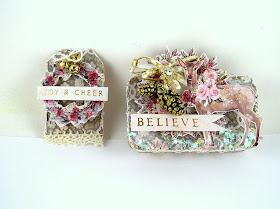
I had a sweet mint tin that I have been holding onto and thought this would be the perfect time to bring it out and decorate it up!

Prima Christmas in the Country Stamperia Oriental Garden Idea-Ology Tim Holtz Pine Cones For The Funkie Junkie Boutique
 The decor was chosen by some beautiful Country Christmas paper from Prima.  I saw the pretty images and decided to use them as decor on my tin and my little tag that fits sweetly inside.


Prima Christmas in the Country Stamperia Oriental Garden Idea-Ology Tim Holtz Pine Cones For The Funkie Junkie Boutique
I didn't realize how fun it would be to decorate this tiny gift box.  I think it will be great for a gift of jewelry for one of my girls.


Prima Christmas in the Country Stamperia Oriental Garden Idea-Ology Tim Holtz Pine Cones For The Funkie Junkie Boutique
The tin slides open and I gave it a quick white wash with a piece of pretty paper on the bottom. 
Prima Christmas in the Country Stamperia Oriental Garden Idea-Ology Tim Holtz Pine Cones For The Funkie Junkie Boutique
I created a tag to fit inside the tin as an additional surprise for the recipient.


Prima Christmas in the Country Stamperia Oriental Garden Idea-Ology Tim Holtz Pine Cones For The Funkie Junkie Boutique

The tin was covered in the Stamperia Oriental Garden paper.  I added a hint of white acrylic paint and distressed the edges to give it a softer effect.  

I cut out the deer, wreaths and the sentiments from the Christmas in the Country to accent the tag and tin cover. 

The tin got layered with the images and a dusting of mica flakes along the bottom.  The pine cones and raffia bow were painted with a lovely metallique gold effect. 

Hope this has you thinking of what type of treats you can create so you can join us in the challenge! 
The winner will earn a chance to be a Guest Designer at a future date at The Funkie Junkie Boutique blog, and everyone who enters and follows the rules will go into the draw for the chance to win a $25 spending spree at The Funkie Junkie Boutique. There are also Top 3 Badges for three additional outstanding entries, chosen by the Design Team.

Happy Wednesday!

Suzz

Products: (Links to the Funkie Junkie Boutique)
White Raffia

Sunday, September 22, 2019

Suzz Sells Sea Salt

Hi!  I decided to share what I was playing with this weekend!  I didn't finish anything but had fun playing around with Sea Salt and Ranger Distress Sprays.  

Here's what happened....   

I started with trying to figure out what I could send in a few packages.  I was thinking about Halloween/Fall inspiration. 

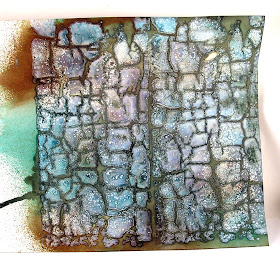
I grabbed a new Ranger Layering Stencil that has been begging me to try it!  I decided to smear some crackle paste in the crackle stencil on mixed media paper. 
Ranger Distress Ink Evergreen Bough Sea Salt By Stampersuzz
 
While it was still wet I pulled out Ranger's Evergreen Bough and Walnut Stain Distress Ink Sprays and started to ink it up.  I kept spritzing and adding some water to blend the colors.

It had so much extra spray I tipped it and let it drip onto my craft mat.  I never leave my leftover ink and I always try to use it up.  I grabbed a few sheets of mixed media paper and started to soak up the ink onto the extra sheets. 

Ranger Distress Ink Evergreen Bough Sea Salt By Stampersuzz
I had so much ink on the first page I decided to pull out the sea salt and absorb the ink and pull some of the ink into the salt. 

If you click on the photo you will see the close up details and how it pulls the ink out. 

Ranger Distress Ink Evergreen Bough Sea Salt By Stampersuzz
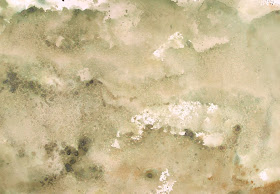
This was my second sheet of taking up the ink off the craft mat.  I also sprinkled with sea salt with a lesser effect because you need pools of ink for it to be able to absorb the ink.

Next you have to let it dry.  I usually can't wait so I get out the heat gun and try to dry it all up as quick as possible.

In the process of this inky fun I decided that my embossed background could also use a sprinkling of sea salt.  That is why you see the spots of white on the embossed section.  I love how this turned out, it looks like something ate away part of the color/texture!

After I had dried out the salt on all my pieces you can pull the salt off.  I usually use a ruler and scrape it off onto my craft mat. 
Ranger Distress Ink Evergreen Bough Sea Salt By Stampersuzz

For the embossing paste background, I used my fingers as I didnt' want to scrape off any embossing paste.

Next I wanted to use the inky salt to create more backgrounds.  I spritzed all the left over salt with water to re-activate the ink and laid cardstock on top of it. 

Ranger Distress Ink Evergreen Bough Sea Salt By Stampersuzz
Here is the effect of the inky salt on the first sheet.  I then decided to put a second sheet down on the inky salt and added more spritz of water.

Ranger Distress Ink Evergreen Bough Sea Salt By Stampersuzz
Because I moved the paper it had more tendrils of color.  I can't wait to cut these backgrounds into sections to capture different looks.

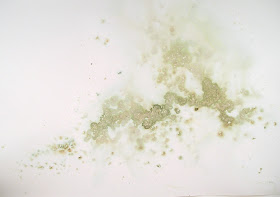
For my final sheet I ended up added more salt and water to the darkest areas on the original salt background.  I sprinkled fresh sea salt into the brown areas. 

Ranger Distress Ink Evergreen Bough Sea Salt By Stampersuzz

I spritzed with water and then dried it out with the heat gun.  When I finished I scrapped off the dried salt onto another sheet of cardstock. 

Ranger Distress Ink Evergreen Bough Sea Salt By Stampersuzz
I spritzed the dried salt on the cardstock until the color spread and then dried the paper again and scrapped off the salt.

I had so much fun I decided to share it with you!

Suzz 


Saturday, September 21, 2019

Saturday Showcase - Tiny Toadstools

Hi!  Just popping in to share a few toadstools!  The full post is over on The Funkie Junkie Boutique!

Happy Saturday!

Suzz

Wednesday, September 11, 2019

Tag Magic

Time for The Funkie Junkie Boutique Challenge!  This week's challenge is hosted by the talented Ginny and she has chosen "Terrific Tags" as her challenge.  She describes the challenge as:

"Add it to a gift, label a homemade tasty treat, or display it with your favorite home decor, tags are not only fun to create they also have a million uses.  For this challenge create a tag that's big or small, mixed media or layered, or added to a project as a fabulous focal point."

I love tags!  They are fun to play with as they give you a chance to try new ideas, techniques or stamps in a smaller design format.
Stampers Anonymous The Professor, Stampers Anonymous On The Farm Idea-Ology - Halloween Adornment Idea-Ology Remnant Rubs For the Funkie Junkie Boutique

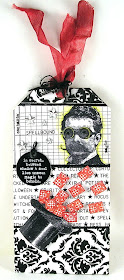
I started with about 5 different tag backgrounds and ended up creating what I call my magician tag! 

After I had all these beautiful backgrounds on these tags, I ended up going with a plain white tag and blocking the design. :) 


Stampers Anonymous The Professor, Stampers Anonymous On The Farm Idea-Ology - Halloween Adornment Idea-Ology Remnant Rubs For the Funkie Junkie Boutique
For this tag I took a section of the Halloween rub-on remnants and placed it in the middle of the tag. I adhered them with the Popsicle stick.    I then decided to use the stencil with black embossing paste to add texture to the bottom and top of the tag. 

My next step was to stamp the professor in between.  I used scrap cardstock to mask the other areas.  I then masked the professor and stamped the ledger over the professors section of the tag.  I finished with some lines drawn with versamark and embossed with black embossing powder. 

I wanted something fun so I stamped and cut out the top hat. I tilted it on it side.  I then stamped a background stamp in red ink and cut out mini cards.  They also were embossed with clear embossing powder to give them the glossy finish you see on cards today.  (I so wanted a mini bunny to pop out of the hat!) 

The stars were painted silver and attached.  The Halloween adornment was painted with white paint first and I rubbed off the excess paint.  I let that dry and then I smeared black stazon ink over the surface to make the front black.

Please go check out the rest of the fabulous Design Team's creations!  They are really beautiful!  Come join  us and share your tags! 

The winner will earn a chance to be a Guest Designer at a future date here at The Funkie Junkie Boutique blog, and everyone who enters and follows the rules will go into the draw for the chance to win a $25 spending spree at The Funkie Junkie Boutique. There are also Top 3 Badges for three additional outstanding entries, chosen by the Design Team.

Thanks for stopping by!

Suzz

Products:
Stampers Anonymous On the Farm
Stampers Anonymous The Professor
Stampers Anonymous - Fragments
Ranger Clear Embossing Powder
Black Molten Embossing Powder
Wendy Vecchi Black Embossing Paste
Stampers Anonymous Tim Holtz Gothic Layering Stencil 
Versamark Marker
Idea-Ology Halloween Remnant Rub-On
Idea-Ology Halloween Adornment 
Rayon Seam Binding
Ranger Archival - Vermilion Ink 
Ranger Archival Jet Black Ink 
Watercolor Pencils
Tim Holtz Water brush
Idea-Ology Tim Holtz Jute
Small Metal Keys
Black StazOn Ink
Dina Wakely White Acrylic Paint
Tim Holtz Idea-ology Stars
Prima Art Alchemy Metallique Silver Spoon Paint