Pages

Saturday, December 14, 2019

Saturday Showcase - Christmas Tags

Happy Saturday to you!  Christmas is rapidly approaching so the team over at The Funkie Junkie Challenge decided to do a special Saturday Showcase and everyone created a tag!  You need to pop over there to see what wonderful designs they cooked up for this very special showcase!

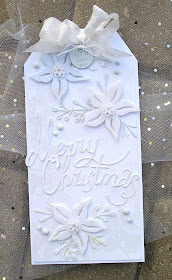
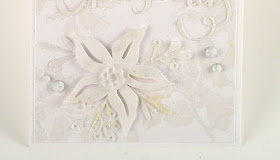
I was inspired by a cooking challenge that asked the contestants to do a white on white baked display.  It had me thinking about what I could create with layers and dimension all in white!

Sizzix Christmas Ribbon Sizzix Festive Greens Stampers Anonymous Yuletide Greetings For The Funkie Junkie Boutique

I decided to start with an stamped and embossed background to give a layer of soft texture before I even layered on the die cut bits and pieces.

Sizzix Christmas Ribbon Sizzix Festive Greens Stampers Anonymous Yuletide Greetings For The Funkie Junkie Boutique
The hardest part of this tag was getting a photo. :)  The white on white is hard to capture the beauty of the shimmer, glimmer and softness.

I stamped the background with Versamark and heat embossed the image with clear embossing powder.

I die cut all the various pieces and then covered them with versamark and heat embossed them with clear embossing powder.

It gave them a lovely sheen.  I then assembled my poinsettias with pop dots between the centers and when I attached them to the tag.

I took a few of the metallic droplets and painted them white and then sprinkled them with distress crystal glitter.


 I finished the tag with a white bow and painted a charm white to coordinate.

I wish you and all your loved ones a very blessed and happy holiday!

Suzz

Products:
Sizzix Thinlits Tim Holtz Festive Greens 
Sizzix Thinlits Tim Holtz Christmas Ribbon
Stampers Anonymous - Yuletide Greetings 
Idea-Ology Tim Holtz Metallic Droplets
Prima Art Basics - White Gesso
Distress Stickles Dry Glitter Clear Rock Candy
Ranger Clear Embossing Powder 
Rayon Seam Binding 
Idea-Ology Tokens Christmas

Wednesday, December 4, 2019

It's The Holidays!

Welcome back for the last challenge of the year for The Funkie Junkie Boutique!  The talented Maggie is hosting and she has challenged us with "It's The Holidays!". 

She describes the challenge as:

"I know everyone is super busy this time of year so I've settled on a practical challenge that hopefully will give you some needed crafting time while making something that is useful for the holiday season that is upon us!  Create a vintage or shabby chic card, tag, gift box or bag that you can use over the holidays."

I was inspired to look for something to use as a repository for a holiday gift.  I started something fun(to be shared later) and this project:

Stampers Anonymous Advert Sizzix Crochet Sizzix Flurry 1 For The Funkie Junkie Boutique
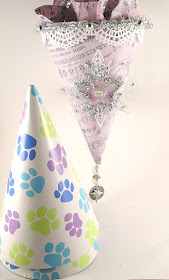
I was cleaning up the gift closet (A combination of party supplies, future gifts, wrapping paper, etc) and found some little party hats left over from one of the kids parties. Mind you my kids are all over 18... :) 

It had me thinking I will hold onto those party hats and use for a future project. Well today is that day!

Victorian Cone Stampers Anonymous Advert Sizzix Crochet Sizzix Flurry 1 For The Funkie Junkie Boutique

I wish I could be transformed like this. :)  From a paw print party hat to a Victorian beauty! 

 To create this it took a few steps:

1.  Paint the hat with white Gesso.  (It took about 5 coats and I had to wait in between to dry!)
2.  Spray tissue paper with lavender distress oxide spray.  Let dry.
3.  Stamp background text using black archival ink.
4.  Attach the tissue paper to the cone.  I wrapped the tissue paper around the cone before  applying
     and cut the tissue paper close to the size.  Apply tissue paper with clear glue. 
5.  Cut out three pieces of the doily trim from white cardstock.
6.  Cut out star and snowflake from white cardstock.
7.  Paint covered cone, lace trim, and snowflake with a mix of white glue and water.
8.  Sprinkle in glitter.  Let dry.
9.  Spray star with lavender distress oxide spray. Let Dry.
10.  Add tinsel trim to star.  (I used hot glue gun and cut small pieces.
11. Spray crystal heart with distress oxide spray. Let dry.
12. Edge joy with silver pen.
13. Accent snowflake with metallic pearls.
14. Assemble decoration on Cone.  (I used hot glue because the glitter makes it difficult to stick!)


Victorian Cone Stampers Anonymous Advert Sizzix Crochet Sizzix Flurry 1 For The Funkie Junkie Boutique
I poked a hole in the bottom of the party hat and strung a few pearls and charms on the bottom.  The charms were embossed with tinsel embossing powder to give it a shimmer. I filled the inside with the leftover tissue paper from the outside.  There is also a lovely handle to hang this with from seam binding and tulle.

I hope this has you inspired to come and join us in the fun!  The winner will earn a chance to be a Guest Designer at a future date at The Funkie Junkie Boutique blog, and everyone who enters and follows the rules will go into the draw for the chance to win a $25 spending spree at The Funkie Junkie Boutique. There are also Top 3 Badges for three additional outstanding entries, chosen by the Design Team.

Thanks for stopping by! 

Suzz

Products:
Sizzix Chapter Two Tim Holtz Crochet Die
Sizzix Flurry #1 Snowflake
Ranger Archival Ink Jet Black 
Idea-Ology - Holiday Adornment Yuletide
Idea-Ology - Christmas Token
Idea-Ology - Tim Holtz Metallic Droplets
Idea-Ology - Tinsel
Ranger Distress Oxide Spray - Milled Lavender 
Ranger Distress Stickles Dry Glitter Clear Rock Candy
Glue
Tim Holtz Assemblege Bauble Mix Charms
Idea-Ology Tim Holtz Metallic Stickers Holiday Talk 
Idea-Ology Mirrored Heart
Stampers Anonymous Music and Advert Background Stamps 

Wednesday, November 20, 2019

Lovely Leaves

Hi!  Welcome back for a lovely fall inspired post!  The ever so talented Jenny is our host this time around for The Funkie Junkie Boutique Challenge and she has challenged us to show off "Lovely Leaves".
Sizzix Fall Foliage Ranger Distress Stain Sprays Dylusions Lemon Zest for the Funkie Junkie Boutique

She describes the challenge:

"At this time of year leaves take over from flowers as the stars of Nature's display - the deciduous ones take on beautiful Autumnal hues before falling to the ground, whilst the evergreen ones keep our gardens from looking bare as we wait for new flowers to appear in the Spring. For this challenge make sure to add leaves (or even Pine Needles if you like) to your vintage or shabby chic projects."

Well I am always up for creating with leaves, especially fall leaves!
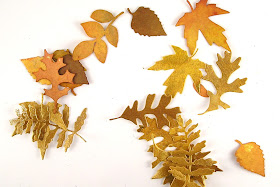
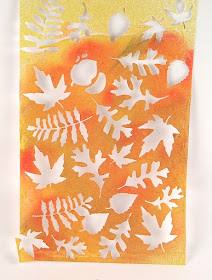
I had this vision of a little wreath using the smaller leaves from the Fall Foliage Dies.  I ended using a long strip of cardstock to cut out a series of leaves.  

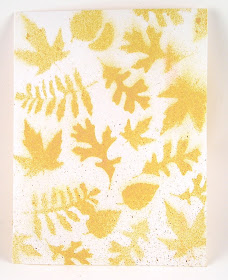
cutting them out of that long piece of cardstock created a fun stencil:
 
Sizzix Fall Foliage Ranger Distress Stain Sprays for the Funkie Junkie Boutique

Which I used to create this:
Sizzix Fall Foliage Ranger Distress Stain Sprays  for the Funkie Junkie Boutique

 and this:

Sizzix Fall Foliage Dies Ranger Distress Stain Sprays Wendy Vecchi White Embossing Paste

 I now have two more backgrounds for fall inspired cards!

To create my wreath I took a few steps:
Sizzix Fall Foliage Ranger Distress Stain Sprays for the Funkie Junkie Boutique

1. Die cut leaves.
2. Spray with a mix of colors.  I also dragged them through the inky mess after I sprayed to even out the colors.
3. Trace a circle the size of the wreath you would like.  Cut it out.
4.  Poke a hole in the middle of the circle and cut out the middle.  (I could have done this with two different sized circle dies. I was lazy and didn't want to pull out the die cutting machine. :)
5. Spray the circle with a yellow inky spray.
6. Layer in the leaves.  I used some thin foam dots to pop up some of the leaves.

I hope you enjoyed the fall leaves here on the blog.  Come join us in the challenge!  The winner will earn a chance to be a Guest Designer at a future date at The Funkie Junkie Boutique blog, and everyone who enters and follows the rules will go into the draw for the chance to win a $25 spending spree at The Funkie Junkie Boutique. There are also Top 3 Badges for three additional outstanding entries, chosen by the Design Team.

Thanks for stopping by!

Suzz

Products:
Sizzix Fall Foliage Die
Ranger Tim Holtz Layering Stencil Woodgrain
Ranger Distress Stain Spray - Mustard Seed, Wild honey, Aged Mahogany, Ground Espresso
Ranger Distress Oxide Ink - Frayed Burlap
Idea-Ology Remnant Rub-on
Wendy Vecchi White Embossing Paste
Prima Marketing Memory Hardware Pearls 
Natural Jute Twine

Monday, November 18, 2019

Buzzing Bees

Hi! I just received this beautiful Buzzing Bees Rubber Stamp Set from Darkroom Door.  There are certain stamps that I can create all the time with and this is one of those sets!  I love bee images and this has a mix of all different size bees! 

Darkroom Door Buzzing Bees Rubber Stamp Set
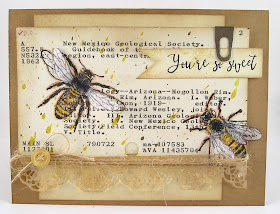
I mixed up the bees with an old library catalog card.  I have had these sitting in my drawer and thought what a great background for my buzzy friends...

I stamped the bees twice to give a layer on the wings.  The wings were stamped on vellum to give a beautiful effect.

While I had the kraft cardstock out I decided to stamp and color on the kraft with the flower and bees.
Darkroom Door Buzzing Bees Rubber Stamp Set
I stamped a soft script background first using brown ink.  I stamped the flowers and bees and sentiment.  I finished with the cute sentiment. :)

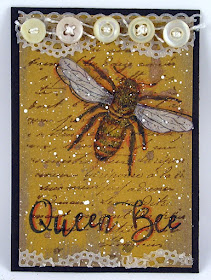
I have to admit I love this little ATC. 
Darkroom Door Buzzing Bees Rubber Stamp Set
I started with a kraft cardstock with a coat of yellow paint. I let it dry and then stamped the script over the background.  I added the butterfly with the second set of wings and the Queen Bee stamp.

I finished it with a little vellum lace trim and some cute vintage buttons!

Darkroom Door Buzzing Bees Rubber Stamp Set
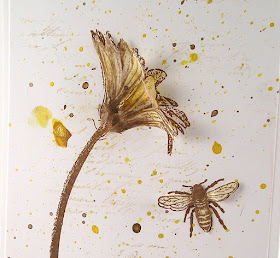
I liked the kraft card so much I replicated it with a white cardstock background and some simple splattering of the lemon zest and melted chocolate sprays!


Darkroom Door Buzzing Bees Rubber Stamp Set
I added a few vellum petals to the flower.  I simply stamped the flower a few times on vellum and cut it out to add the layered petals.

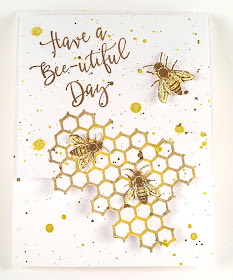
For my final card I used the honeycomb image:
Darkroom Door Buzzing Bees Rubber Stamp Set
I thought how fun it would be to cut along the edge of the honeycomb and use it as the bottom of the main panel.

I stamped everything on a panel and then cut straight lines up to the honeycomb and then cut the rest out by hand.  I then added foam tape behind the panel to put on the card base.  A fun way to give texture. 

I hope you enjoyed all the fun bees! 

Thanks for buzzing by!

Suzz

Products:  Darkroom Door
Darkroom Door Rubber Stamp Set - Buzzing Bees
Darkroom Door Texture Stamps French Script 
Dylusions Shimmer Spray - Lemon Zest, Melted Chocolate
Ranger Archival Ink - Potting Soil, Sunflower, Jet Black
White Gel Pen
White Acrylic Paint, Wild Honey Acrylic Paint
Vellum
Sizzix Tim Holtz Chapter Two Crochet
Vintage Buttons
Kite String
Twine


Thursday, November 7, 2019

Honeycomb & Bees Wax

Hi!  I am back today with a post featuring the new Darkroom Door background stamp Honeycomb!  There is a new background stamp and a stamp set Buzzing Bee's from Darkroom Door which had me pulling out my melt pot and some bees wax!
The bees wax was calling my name when I saw the Honey Comb background Stamp.  I decided to melt up some pieces and try to create a textured beeswax with the honeycomb imprint.
Steps:

1.  Stamp honeycomb background on white cardstock using versamark.
2.  Emboss the stamped background with Ranger Distress Embossing Powder Antique Linen.
3.  Spray over the background with a mix of the lemon zest and melted chocolate.
4.  Spray lemon zest over white cardstock.  Let Dry.
5.  Stamp french script and cut a background panel.
6.  Stamp sentiment using brown ink and cut out.
7.  Distress edges of all panels with distressing edges.
8.  Stamp flower and bees on white cardstock.  Color with waterbrush and inks.  (Distress Ink, Watercolor Pencils, Sprays)
9.  Let dry completely and cut out.
10.  Sponge Versamark over bees and flower and heat emboss with clear embossing powder.
11. Die cut the crochet trim and spray with dark brown ink spray.
12. Beeswax instructions (see below)
13. Assemble card.

How to create the beeswax impressions:
 

Steps:
1.  I used a meltpot to melt my vintage beeswax embossing paste and beeswax.
2.  Pour beeswax into melt pot and let the beeswax turn liquid.
3.  To create the beeswax pieces:
      a.  Pour a little of the beeswax on a craft mat.
      b.  Ink up the honeycomb stamp with versamark or an ink color you want to impress onto the
           beeswax.
      c.  Wait for the beeswax to cool off.  You need to watch it turn from clear to waxy but you don't 
            want it to completely harden.  While it is still slightly warm you will push the stamp into the
            wax and leave it to completely harden.
      d.  For the vintage beeswax embossing powder you will want to do the same method. Only for
           the embossing powder you can stamp right after you pour.  Let cool completely and lift the
           stamp.  The versamark helps keep it from sticking to the embossing powder.
4.  You can also pour the wax liquid over the stamped background.  The wax may be cloudy and you can use a heat gun to thin it out.

Background with a wax overlay:

This is a background with Seth Apter Vintage Beeswax Embossing Powder:

Steps: 

1.  Sponge Versamark over surface where honeycomb is desired.  
2.  Pour on embossing powder.  
3.  Heat from underneath.  (I found with the chunky powder or if you don't shake off excess it will blow everywhere.  If you heat from underneath it takes a little longer to warm up but saves on the mess.) 
4.  Repeat until you have  a thicker consistency of the embossing powder.  
5.  Ink up the honeycomb stamp with either Versamark or any colored ink. 
6.  Heat up the embossing powder until you see it moving. 
7.  Place stamp into the honeycomb and press in and leave until the embossing powder cools. 

Next up was to use some various pieces in a few cards:
 
Darkroom Door Rubber Stamp Set Buzzing Bees Background Stamp HoneyComb

I love the strip of honeycomb on this card.  I created it using a piece of blank media tape that was covered in white gesso.  I stamped the honeycomb with versamark on the tape.  I heat embossed with brown embossing powder.  I finished it with a mix of the lemon zest and melted chocolate and it was such a beautiful shimmery honeycomb.

The card is just a mix of vintage beeswax honeycomb, bees and some strips including the media tape.  All assembled on a white cardstock splattered with the lemon zest and melted chocolate.

The next card uses a piece of that vintage beeswax embossed background.
 This card just uses a bit of the media tape, honeycomb and stamped bee to create a mixed media card.

Finally I didn't get to use this bee but love how he looks and he may get added to another project in the near future!  :)

Thanks for stopping by!

Suzz

Products: (Links to Darkroom Door)
Darkroom Door Rubber Stamp Set Buzzing Bees
Darkroom Door Rubber Stamp Background Honeycomb
Darkroom Door Rubber Stamp Set Simple Sayings Vol 1
Darkroom Door Rubber Stamp Texture French Script
Seth Apter Vintage Bees Wax Embossing Powder
Versamark Watermark Ink
Ranger Clear Embossing Powder 
Heat Gun
Melt Pot
Bees Wax
Ranger Archival Ink - Sepia, Acorn
Ranger Distress Inks - Ground Espresso, Fossilized Amber 
Dylusions Spray - Melted Chocolate, Lemon Zest 
Dina Wakley - Blank Media Tape 
White Gesso
Ranger Distress Embossing Powder - Antique Linen 
Tsukeniko Ink - Delicata Gold
Gold Paint
Sizzix Thinlit Chapter 2 Crochet
Twine
Linen
Sizzix Bigz Tattered Bee

Wednesday, November 6, 2019

Fabulous Fall

Hi!  Fall is my favorite season!  I love the crisp air and the beautiful painted landscape of yellows, oranges, reds and brown.  Ginny is hosting the challenge at The Funkie Junkie Boutique Challenge this time and she has challenged us to be inspired by Fabulous Fall!  Here is how she describes the challenge:

"It's the wonderful season where the leaves are changing and the air is crisp and our thoughts turn to pumpkin spice everything.  For this challenge create a Fall inspired project."

I just love playing with leaves.  I created a series of leaf inspired ATC's. 
Sizzix Fall Foliage Ranger Mini Layering Stencils Set 22 Leaves and ATC's For The Funkie Junkie Boutique

For my first couple I started with some Silver Embossing Paste and the Leaves Stencil.  I always think of the glorious leaves falling in Autumn!
Ranger Mini Layering Stencils Set 22 Dylusions Melted Chocolate Wendy Vecchi Silver Embossing Paste Leaves and ATC's For The Funkie Junkie Boutique
This one and the next one started with a silver embossing paste on white cardstock.  I heat set this one and kept heating until the paste started to bubble and give it a little extra texture. I added a few drops of glue and a few glass beads for effect.
Ranger Mini Layering Stencils Set 22 Dylusions Melted Chocolate Wendy Vecchi Silver Embossing Paste Leaves and ATC's For The Funkie Junkie Boutique

The background is the new Dylusions ink spray melted chocolate. It has a beautiful sheen and looks like copper. I finished with a remnant rub-on.

Ranger Mini Layering Stencils Set 22 Ranger Iced Spruce Distress Oxide  Wendy Vecchi Silver Embossing Paste Leaves and ATC's For The Funkie Junkie Boutique
For this one I used the silver embossing paste through the mini leaves stencil. While it was wet I dropped a bunch of the glass beads all over the embossed surface.  I pushed them into the embossing paste and let them dry.
Ranger Mini Layering Stencils Set 22 Ranger Iced Spruce Distress Oxide  Wendy Vecchi Silver Embossing Paste Leaves and ATC's For The Funkie Junkie Boutique
After they were dry I rubbed off some of the glass beads to leave pockmarks!  I love how it turned out!  I then sprayed the entire ATC with the distress oxide Iced Spruce spray.  (Still no Hickory Smoke in the house!).  I finished with a splatter of white paint.  This is because we had 3 inches of snow on Halloween!  Our poor fall leaves were buried in snow and ice. :)

The next couple of ATCs are more traditional in colors for Fall.
Sizzix Fall Foliage Ranger Mini Layering Stencils Set 22 Ranger Distress Inks  Leaves and ATC's For The Funkie Junkie Boutique
For this one I used the layering stencil but used the clear crackle paint over a sprayed background.  It gave a soft effect which I amped up with a little white gel pen.  The main leaf is sponged with a mix of dye inks and then painted with the same crackle paint.  I added a remnant rub-on and a few mica flakes and glitter. 

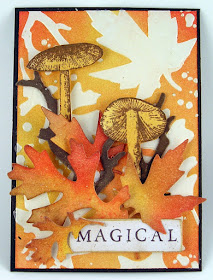
The tiny toadstools popped up on my next ATC. 

Sizzix Fall Foliage Ranger Mini Layering Stencils Set 22 Ranger Distress Inks  Leaves and ATC's For The Funkie Junkie Boutique
The background is sponged with versamark over the stencil and then clear embossed to keep the leaves white.  Then sponged over with reds, orange, and yellow dye inks.  The leaves were coordinated with the background and a few little toadstools popped up in the midst.

Finally some bits and pieces from my Saturday showcase made it into my last ATC.
I used some of the blank media tape to create a strip on one side and some vellum and crochet vellum pieces on the other.  A bit of Iced Spruce splattering on the background and my leaves with a slight sponging of brown around the edges gave definition. 

I think this one was a tie for my favorite with the silver leaves ATC!  I hope this has you inspired to share your Fabulous Fall art with us at the challenge.  The winner will earn a chance to be a Guest Designer at a future date at The Funkie Junkie Boutique blog, and everyone who enters and follows the rules will go into the draw for the chance to win a $25 spending spree at The Funkie Junkie Boutique. There are also Top 3 Badges for three additional outstanding entries, chosen by the Design Team.
Thanks for stopping by!

Suzz


Products:
Ranger Mini Layering Stencils - Set 22
Dylusions Ink Spray - Melted Chocolate Spray
Sizzix Tim Holtz Chapter 2 Crochet
Stampers Anonymous - Tiny Toadstools
Ranger Tim Holtz Layering Stencil Nordic
Wendy Vecchi - Silver Embossing Paste 
Prima Glass Beads 
Sizzix Fall Foliage
Crackle Paint
Ranger Distress Sprays Inks - Ground Espresso Wild Honey
Ranger Distress Inks - Wild Honey, Fossilized Amber, Festive Berries, Ground Espresso
Dina Wakley White Paint
Tim Holtz Remnant Rub-Ons Tiny Text
Ice Resin Glitter Shards Sterling (I substituted this for the glitter on my ATC)
Distress Mica Flakes
Ranger Distress Glitter
White Gel Pen
Stampers Anonymous -  Stuff to Say
Idea-Ology Metallic Quotes

Monday, November 4, 2019

Merry Mail

Hi!  Who doesn't love getting mail from someone?  We all get excited when we get real mail in the mail box not just junk, bills or advertisements.    The new Darkroom Door stamp set Merry Mail has a beautiful mix of Christmas and mail images. 

This had me inspired to create a variety of projects inspired by Christmas tags, Envelopes and a Postcard template.
Darkroom Door Small Stencil Star Rubber Stamp Set Merry Mail Christmas Reindeer Tag
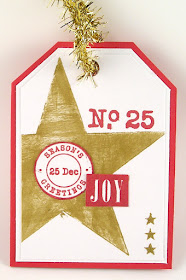
My first tag started with a leftover star from playing with the new Small Stencil.  I had brushed onto white cardstock this star using gold paint.  I cut that out into a shape of a tag.  (I actually mounted the tag onto a tag card base made from red cardstock.

I stamped the post mark onto white cardstock and cut it out to place in the center of the start.  I stamped the No.25 in red ink on the tag.  I added a stamped joy and a few more stars sponged on in gold paint.

A quick and easy tag/card to attach to a gift.  That had me thinking of other tags that I could whip up with a few different stamps. 
Darkroom Door Rubber Stamps Merry Mail Brushed Christmas Vol 1 Tag
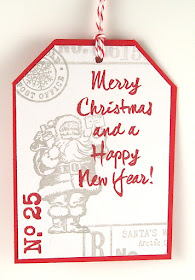
On this tag I went with a soft silver ink for Santa and a few other background stamps.  I then added a pop of red with the sentiment and the No. 25.  Framed it out with a red background and added some fun red and white striped twine.  Another sweet tag to put on one of the gifts under the tree!

Darkroom Door Rubber Stamps Merry Mail Tag

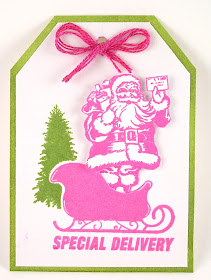
Next up another tag but this time I wanted to switch to non-traditional colors and decided to go pink and green.  I stamped the sleigh first onto the tag.  I stamped the sleigh onto a second piece of scrap paper. I cut it out to use as a mask.  I placed the mask over the sleigh and stamped the tree in green.  It left a little outline But I liked how it made the sleigh pop! 

Next I cut a slit into the top of the sleigh.  I stamped santa onto another piece of cardstock.  I cut him out. I actually cut the top half of santa from his legs.  I did this so I could put pop dots under the top half and have santas belly hanging over his legs.  I stuck his legs into the slit on the sleigh. 

This would be really cute with one of those pop ups that move.  :)   I then sponged a background tag and mounted the stamped image onto the sponged background and added a coordinating bow.

After my tags I decided to make some envelope art.  I took some plain white envelopes and stamped and stenciled them. 
Darkroom Door Small Stencil Star Rubber Stamp Set Merry Mail Festive Ornaments Envelope

First I stamped santa in the corner with red ink.  I then stamped the sentiment along the left side of the envelope.  I finished by tracing the star stencil around santa.  
Darkroom Door Merry Mail Small Stencil Star Envelope

 Next I stamped Santa again in a corner of a white envelope.  I stamped a second Santa and cut him out to use as a mask.  He turned very yellow very quickly. :)  I placed the mask over Santa first.  I then placed the star stencil over the masked Santa.  I sponged all around Santa and into the star yellow dye ink.

I then took the small stars stencil and sponged a mix of stars all over the front of the envelope.  I stamped the Merry Mail and Deliver to using archival ink and drew a few lines for the address.

I like this so much I made a second envelope only using black ink for Santa.

Darkroom Door Merry Mail Small Stencil Star Envelope

My final project was to make a postcard.  I set up the mailing side of the post card: 

Darkroom Door Rubber Stamps Merry Mail Christmas Reindeer Postcard

 Just stamped Santa in silver added a happy Merry Mail in red ink. I stamped the Carte Postale along the top and drew a dividing line. 

I stamped the front of the postcard just like the envelope but used silver for the stars. 

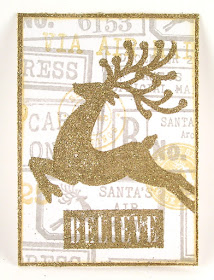
I also created two more tags from a background I created with a mix of silver and gold ink.
Darkroom Door Rubber Stamps Merry Mail Christmas Reindeer Tag
 I started by creating the front of what I thought was going to be a postcard.  But when I added the deer and the sentiment I was inspired to cut them down and use them as tags. 


Darkroom Door Rubber Stamps Merry Mail Brushed Christmas Vol 1 Tag

 I mounted the tags on a background created by sponging versamark around the edges and heat embossing with the gold embossing powder.

Well I hope this has you thinking of fun mail or tags you can create for the holidays!

Suzz

Products: (Linked to Darkroom Door)
Darkroom Door Merry Mail 
Darkroom Door Brushed Christmas Vol 1
Darkroom Door Christmas Reindeer
Darkroom Door Festive Ornaments
Darkroom Door Small Stencil Star
Darkroom Door Small Stencil Starry Night
Tsukeniko Delicata Silver & Gold Inks
Ranger Embossing Powder Gold
Ranger Embossing Powder Gold Tinsel
Versamark Watermark Ink
Ranger Distress Ink - Fossilized Amber
Ranger Archival Ink - Vermillion, Leaf GreenMagenta Hue, Jet Black
Gold Paint

Tuesday, October 29, 2019

I'm Seeing Stars

Hi!  I am back to share a post highlighting the new Darkroom Door Star Small Stencil!


 I had some linen material on my desk from my last project and reached out to that first.  I applied gesso to the linen and  had to wait until that dried.  While that was drying I spent some time making stars with the stencil on paper with embossing paste.   After the painted linen dried I created stars on the painted linen with embossing paste. 

I waited for a few to dry and stamped on the star by placing the stencil back in place and stamping over the stencil with script.

I added a hint of stamping in the background with a gold ink and a music stamp.   I stamped the believe stamp onto a piece of leftover linen and embossed with gold embossing powder.  It is a little difficult to see on this angle but looks beautiful IRL.

I sewed the golden star onto the center of the embossed star.  It actually worked really well with the embossing paste. It was like sewing through a soft batting. :)

I added a stamped No. 25 from the Merry Mail stamp set.

On my next linen background I used a few different sprays to add some color to the background and star.

While the embossed star is wet I sprayed a variety of brown, ivory and gold inky sprays.  After it dried the script was stamped over the star.  Then I stamped the Believe onto a scrap of painted linen with Versamark.  I heat embossed using gold embossing powder.  I then inked up the edges with the brown inky spray.

The rest were fun embellishments that were painted with gold metallic paint and attached to the linen background.

While everything was drying at different times I spent some time using the stencil with distress inks.


I started with yellow stars sponged on a white background.  I then pulled out the cobalt blue ink and started to add accents to the background.


Then I accented with some splatters in the background and some stars and accents from different sets.
 
My final card mixed the sunshine stencil with the star mask/stencil.  I placed the star mask under the sunshine stencil on a piece of white cardstock. 

I sponged over the entire layered stencils with a yellow die ink.  I then removed both stencils and placed the star stencil over the white star and sponged in the ink. It leaves a little white line around the star which I highlighted with white gel pen to accent. 

I added a few coordinating stars and sentiment in a soft orange ink.

Thanks for stopping by!

Suzz

Products: (Links to Darkroom Door)
Darkroom Door Small Stencil Star
Darkroom Door Small Stencil Sunshine 
Darkroom Door Rubber Stamp Set Merry Mail 
Darkroom Door Rubber Stamp Set Christmas Reindeer
Darkroom Door Rubber Stamp Set New York Vol 1
Darkroom Door Rubber Stamp Set Stars 
Darkroom Door Rubber Stamp Set Simple Sayings Vol 1
Ranger Distress Inks - Fossilized Amber, Ground Espresso, Wild Honey
Ranger Archival Ink - Cobalt
Dylusions Shimmer Spray - Melted Chocolate
Ranger Distress Stain Sprays - Antique Linen, Ground Espresso, Fossilized Amber, Tarnished Brass
Versamark Watermark Ink
Ranger Wendy Vecchi - Embossing Paste
Tsukeniko Delicata Gold Ink
Ranger Gold Embossing Powder 
Dina Wakely White Gesso
Prima Alchemy Gold Metallique Paint


Wednesday, October 23, 2019

It Looks Real


Hi... I'm back.... In time for the new Funkie Junkie Boutique Challenge "It Looks Real" hosted by the talented Cec!

Here is how she describes the challenge:

"There are so many ways to make something look real when it isn't.  For this challenge, make a vintage or shabby chic project with one or more faux elements.  Those elements could be faux rust, leather, stitching - to name a few.  Make sure you tell us what the faux element is and how you made it because it will look real."

Sizzix Fall Foliage Stampers Anonymous Tiny Toadstools Stampers Anonymous Layering Stencil Decayed For The Funkie Junkie Boutique

You may remember my post from a few weeks ago where I was playing the Decayed stencil, some texture paste and salt.   That immediately came to mind when I saw the challenge.  We have this bench in our yard that we don't use except for decor. 

The moss on here reminds me of the decayed pattern and ended up being my inspiration for my faux lichen.
Sizzix Fall Foliage Stampers Anonymous Tiny Toadstools Stampers Anonymous Layering Stencil Decayed For The Funkie Junkie Boutique

I started by trying to replicate the colors on the mossy bench:

Unfortunately I realized when I sat down to work on my post that my Hickory Smoke Distress Stain Spray was empty.   I decided to mix up a bunch of different colors to get this:
Stampers Anonymous Layering Stencil Decayed For The Funkie Junkie Boutique

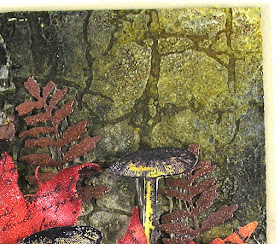
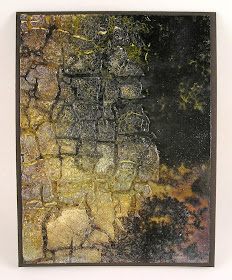
I took a mix of greens, black, brown, white, to get a variagated color.  I ended up with two backgrounds.  This is the partial decayed stenciled background.  I used the other on my card.

Stampers Anonymous Layering Stencil Decayed For The Funkie Junkie Boutique
Here are the steps to get to this point:

1.  Spread texture crackle embossing paste over a mixed media cardstock with the decayed stencil.
2.  While it is still wet spray distress inks and oxide sprays over the surface mixing the colors as desired.
3.  While the ink is still wet pour the salt over the surface.  I moved up to sea salt from regular salt. :)
4.  Now the hard part you have to wait until everything dries.  You can speed up the process by using a heat gun but it will still take awhile.  Best to let it dry overnight.
5.  When it is completely dry you shake off the salt and rub it off.  Normally I use my plastic ruler to scrap off the salt.  With the textured paste it might pull off your paste.  (I put my paste on unevenly and didn't scrape off the excess while the stencil was on which left a very cool surface but limited my scraping.)  I used my fingures to rub off the salt bits. 
6.  After that your surface is ready.  I had a few chunks of my embossing paste break off of my background.  I just added a few drops of inks into those areas and they blended beautifully.

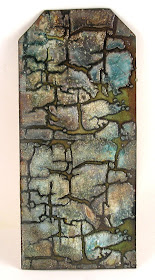
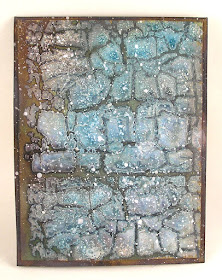
When you are done you can choose to leave it muted or you can cover the entire surface with clear embossing powders to give it a geode effect.

My tag was embossed with clear embossing powder which makes the colors really shine.
Stampers Anonymous Layering Stencil Decayed For The Funkie Junkie Boutique
For this base I splattered with white paint at the end to highlight areas. 
Stampers Anonymous Layering Stencil Decayed For The Funkie Junkie Boutique
A close up of the clear embossed background and the texture:

Stampers Anonymous Layering Stencil Decayed For The Funkie Junkie Boutique
Next I painted linen cloth with gesso.  After it dried I cut a series of leaves from the painted cloth.
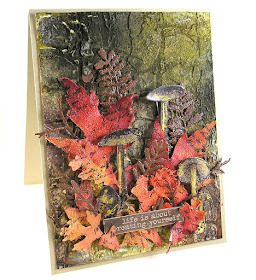
Sizzix Fall Foliage Stampers Anonymous Tiny Toadstools Stampers Anonymous Layering Stencil Decayed For The Funkie Junkie Boutique

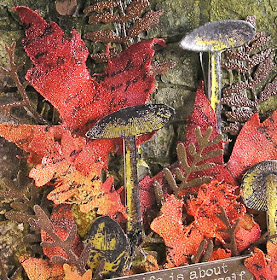
After that I sprayed with a mist of yellow, orange and red distress inks.  After they dried I stamped some script onto the leaves.  I then versamarked the surface of the leaves and embossed with Frosted Antiquities.

The leaves were cut form cardstock and sponged with brown dye inks.  Then they were also embossed with the Frosted Antiquities.  I finished the forest scene with a mix of tiny toadstools.

Sizzix Fall Foliage Stampers Anonymous Tiny Toadstools Stampers Anonymous Layering Stencil Decayed For The Funkie Junkie Boutique

I hope this has you inspired to come play along in the It looks Real Challenge at the Funkie Junkie Boutique Challenge.

The winner will earn a chance to be a Guest Designer at a future date here at The Funkie Junkie Boutique blog, and everyone who enters and follows the rules will go into the draw for the chance to win a $25 spending spree at The Funkie Junkie Boutique. There are also Top 3 Badges for three additional outstanding entries, chosen by the Design Team.


Thanks for stopping by!

Suzz


Products: (The Funkie Junkie Boutique)
Sizzix Thinlits Fall Foliage
Stampers Anonymous - Tiny Toadstools
Tim Holtz Layering Stencil - Decayed
Ranger Distress Stain Sprays - Fired Brick, Spiced Marmalade, Ground Espresso, Crushed Olive, Black Soot, Hickory Smoke, Peacock Feathers, Iced Spruce, Pumice Stone
Ranger Distress Oxide Sprays - Fossilized Amber, Ground Espresso
Ranger Distress Oxide Ink - Ground Espresso
Ranger Distress Inks - Crushed Olive
Prima Art Basics - White Gesso
Wendy Vecchi Texture Crackle Paste
Frosted Crystal Antiquities Embossing Powder
Versamark Watermark Ink Pad
Sizzix Funky Foliage
Sizzix Funky Floral 3 Die 
Salt
Idea-Ology Tim Holtz Word Bands