Pages

Sunday, March 31, 2013

Mini Album

Happy April Fools Day!  I hope you all had a wonderful Easter!  Today is another fun Simon Says Stamp and Show challenge.  The challenge is NO RULES!  So create anything this week and join in on the challenge for an opportunity to win a $50.00 Gift Voucher at Simon Says Stamp.

I recently acquired the Jenni Bowlin Mini Album clear stamps and couldnt' wait to create a mini-album using these stamps. 
The front image is so lovely that all I did was mount it on embossed cardstock sponged in a coordinating color. I colored the images using STAEDTLER watercolor pencils.   I added a Studio Calico wooden bird inked to match.


I stamped the frame on multiple pieces of white cardstock for each of the pages in my mini-album.  I also created a mask and reverse mask by stamping the image on copy paper and cutting the center of the frame out.

I created mats for each of my pages by cutting white cardstock for each of my pages and embossing them with different embossing folders.

I then selected coordinating quotes to go with my images.  I also picked a background for each image and quote.

Page 1 and 2
 
Page 3 and 4  
 Page 5 and 6 
Page 6 and 7


Products: Artistic Outpost - Think and Wonder, Artistic Outpost - Birds of a Feather, Artistic Outpost - Flower Market, Artistic Outpost - Oz Collage, Artistic Outpost - Whimsical Melange, Artistic Outpost - Favorite Book, Artistic Outpost - Quote and Quotable, Artistic Outpost - Paris Exposition, Artistic Outpost - Bluebird, Hero Arts - Old French writing,  Artistic Outpost - Secretary Pool, Artistic Outpost - Kudzu Kafe, Artistic Outpost - Serenity, Memory Box - Music,  Artistic Outpost - Ephemera BackgroundJenni Bowlin Mini Album, Memento - Sweet Plum, Ranger Distress Ink - Vintage Photo, Ranger Archival Ink - Black, STAEDTLER watercolor pencils, Prima - Clock Parts, Idea-Ology - Gears, Idea-Ology - Pen Nibs, Vintage Buttons, Owl Charm, Studio Calico - Wood Birds, Twine, Paper Flowers

Come play along with us for a chance to win a Simon Says Stamp  $50.00 gift voucher.


Thanks for stopping by!

Friday, March 29, 2013

I Believe

Awhile ago I was playing with inks and messy backgrounds and created a art journal page:


I started with Dylusions sprays in pink and purple. My hands were pink and purple for a few days! 
 I sprayed the two colors onto the paper overlapping until it was covered.   I applied white paint across the surface. I added a layer of water spritzes and let it  dry.  I sprayed the entire surface with water.I threw a bunch of sea salt on the surface and let that dry.  I scraped off the salt and attached the butterflies.


I stamped the sentiment from the Artistic Outpost - Quote and Quotables  in versamark and heat embossed in white embossing powder.  I also added the Hero Arts Flourish around the edges using the same method. The edges were distressed with a distressing tool.

I love this quote from Audrey Hepburn. I ended up using this for my blog header.

Thanks for stopping by...

Suzz

Wednesday, March 27, 2013

Bluebell Woods

Today we are visiting Bluebell Woods and my fairy house.  I created this for my last post over at PaperArtsy this month.

I started with this beautiful door stamp in the Hot Pick 1011plate which to me meant creating a doorway with something to see.  The doorway made me think of creating a fairy house by adding flowers taller than the doorway and a view inside.

For all the details and step by step instructions click here.

Products: PaperArtsy Hot Pick 1011, Hot Pick  1009, Ink and the Dog - Architecture Plate 3, STAEDTLER Watercolor Pencils, PaperArtsy Smoothy White Stamping Card, Ranger Archival Coffee Ink, Stampendous Crushed Glass Glitter Bronze

Thanks for stopping by!

Suzz

Tuesday, March 26, 2013

Gift Tin

This is my second project for PaperArtsy this week.  I started from a tin that I recycled.  I wanted to use the ultra-cool Hot Pick Xtra 05 - Hardware stamps because there are hinges, keyholes and they have coordinating dies.


If you visit the PaperArtsy blog you can get all the details on my project.   I wanted to share a few other photos so you can see the different angles.


And when you open it up a little surprise message inside:


Other products used include: PaperArtsy Metal Card 12 x 12 (I love that it comes in 12 x 12 sheets), Hot Pick XTRA 01 - Backgrounds, Ranger Archival Ink - Black, StazOn - Jet Black Ink, Fresco Paint - Ice BlueFresco Paint-Pewter

Tomorrow we are going to visit Bluebell Woods.  A touch of spring for us all.

Suzz

Monday, March 25, 2013

Wander

This week I am sharing some new projects and cards over on the PaperArtsy blog.  I wanted to play with the fabulous Fresco paints again and they provided a beautifully blended background.


I used the Hot Pick #1207  with the cool car and old roadside advertising.  I also stamped the map from the Hot Pick Xtra01 Backgrounds   to finish off the background.

For all the details go here.  Leandra is providing an opportunity to win some of her wonderful Fresco paints if you play along this week.  Go here to find the details and the link for the challenge.

Thanks for stopping by!

Suzz

Sunday, March 24, 2013

All Zipped Up

Simon Says Stamp and Show Challenge this week  is all about quotes. I do love to use verses and quotes.  I didn't have to look far to find one of my very favorite quotes.


This quote is from Emily Dickinson and  is such a lovely verse that I find myself using it quite often. There have been so many cool zipper projects on-line and I thought I would give it a try.

I used some lovely lavender paper from Graphic 45  Secret Garden collection. . I had bought a few old zippers and pulled out one of them to use on my card. 
I cut the paper down the center.  I ripped along the edges and taped the zipper to the inside of the paper. I folded the edges back to show the inside. This took several attempts to figure out how to open up my zipper enough to show some of the inside.  I layered this over the reverse side of the same paper.

I stamped the sentiment using a lavender ink on white cardstock. I cut the sentiment apart.  I die cut a coordinating bird to nestle in the array of white flowers, ribbon and leaves.

Products:
Graphic 45 Secret Garden, Artistic Outpost - Quote and Quotable, Prima Flowers, Prima Flowers - FiestaPrima Leaves, Ribbon, Memory Box - Branches, Memory Box - Bird, Ranger Archival Ink - Blue Violet,

Don't forget to go check out all the other inspiration from the DT!

Come play along with us and share your favorite quote for a chance to win a Simon Says Stamp  $50.00 gift voucher.

Thanks for stopping by!


Suzz

Thursday, March 21, 2013

Vintage Office


The new Darkroom Door Vintage Office set has a variety of vintage office images which are fun to play with.  I created three cards using the new set. 

My first card  uses a Photobooth - Ladies image and the new Office stamps: 
Background:
  1. Stamp the  script stamp using brown water resistant ink on white cardstock. Repeat until background is covered.
  2. Distress the edges with a distressing tool.  Sponge edges using brown dye ink.  
  3. Smear brown dye ink on craft mat / acetate and spritzed with water. 
  4. Take top of container or any circle and rub over inky water. 
  5. Stamp circle onto background.  Repeat with smaller sized circles. 
  6. Pick up excess ink and water by dragging stamped background through ink to add water spots. 
Other steps:
  1. Stamp the typewriter and other images  using black ink on white cardstock.  I typically use Ranger Archival ink or Versafine.  
  2. Cut out images by hand. 
  3. Sponge images with brown dye ink. 
  4. Stamp script onto the Photobooth image  using  brown ink. Wipe the face to remove the stamping. Sponge brown dye ink around edges.
  5. Embossed a metal label frame with Stampendous Aged Gold Embossing Enamel and attach  to card.
  6. Insert the  Rush and First Class stamped labels into the pocket. 
  7. Attach nibs using staples and add twine knots. 
For my next project I continued with the same background and colors but added a splash of blue:

The background was made from the same process on the first card.

Steps:
  1. Stamp script using brown ink on white cardstock. 
  2. Stamp rubber stamp images using black ink over stamped background. 
  3. Add color to the image with a watercolor pencil and waterbrush. 
  4. Cut rectangle from stamped background. 
  5. Line up circle punch in center of stamped rectangle and punch half of a circle from the background. 
  6. Distress edges with distressing tool and sponge with brown dye ink. 
  7. Cut card base from white cardstock.  Stamp background of the card using script and brown ink. 
  8. Distress edges of card. 
  9. Cut cardstock to fit along top of card. Punch edge of cardstock using border punch. Stamp numbers along edge using the Home Sweet Home set. 
  10. Attach to card top and punch hole and add twine. 
  11. Create mini tag card to fit in pocket.  
  12. Cut cardstock to fit in the pocket. 
  13. Stamp background to coordinate with card. 
  14. Stamp telephone using black ink. 
  15. Stamp No. using black ink. 
  16. Cut top for the mini tag from white cardstock. 
  17. Punch edges with border punch. 
  18. Stamp First class on top edge. Color lines with blue watercolor pencil and waterbrush. 
  19. Stamp nibs and cut out. Sponge with brown dye ink. Attach to card.
My last card is clean and graphic with pops of color:

  1. Stamp the script on white cardstock using Versafine Toffee. 
  2. Stamp the ink and quill in black ink over the gold script. 
  3. Stamp the NR. 2420 using  Verasfine Majestic Blue on the right of the ink pot. 
  4. Splatter ink using  Dylusions ink spray across the stamped panel and the base card.
  5. Mask the word block stamp with scrap paper and apply Versafine blue ink to the sentiment. Remove the scrap papers and stamp the sentiment on white cardstock.  The sentiment is from the Journey Word Block Stamp.
  6.  Attach  black feather over stamped quill. Cut a tiny slit in the top of the ink jar and slide the end of the feather into the jar of ink.
  7. Pop Dot panel and attach to card base. Pop Dot Sentiment and attach to the card base. 
That's it for me this month.

Happy Inking,

Suzz


Tuesday, March 19, 2013

In the Birdhouse

Today the Artistic Outpost Design Team is hopping showing projects that use the Quotes or Backgrounds from AO.

I decided to pull out one of my favorite images from the Whimsical Melange
I started from the birdhouse shape and added the row of birds from the Songbirds along the bottom. I colored the images using STAEDTLER watercolor pencils.   I added the flowers from the Flower Market. The background has a soft text backround from Birds of a Feather.I cut a frame around the image with black cardstock and created a cardbase using the shape of the house.

A view of the card standing up:

 Hop along to see all the other fantastic creations by the Design Team:


Thanks for stopping by!

Suzz


Sunday, March 17, 2013

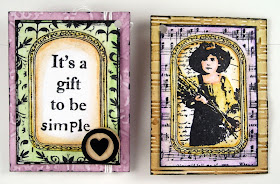
Easter ATC Arches

The challenge at  Simon Says Stamp and Show this week is water. You can use water as part of the technique to create your project or use water based images in your project. You decide how water plays in your project.   I used the inspiration to create a new technique and series of Easter ATC arches.


My new technique is tie dye alcohol ink.  I started with an extra cookie sheet.  This would work in any container that you are willing to stain.  I used this cookie sheet because I had bought it for the purpose of decorating it.  I poured a layer of water on the bottom.


I then dripped the alcohol inks into the water.  I put a layer of pink in the water and swished it around. I then dripped in yellow and red.  Then I laid the paper onto the surface of the water and pulled it up.


I switched out the regular cardstock to glossy cardstock to see what the effect was as well as swirling the water around more.
I then cleared the water by soaking it up int paper towels and started a fresh batch with different colors.


I die cut arches and backgrounds from a few of the different papers:

I stamped over the surface using a StaZon ink:

I added highlights with white gel pen.  I added a cute little chick on the front colored with watercolor pencils.


I used a different die for the next arch:


On the next two I switched up the papers to use the purple, yellow and green colors:


The shimmery arches are coated with Versamark and a Stampendous Crystal Embossing Powder. 

Products: Poppy Stamps - Gothic Window Die, Stampendous Feather Bonnet Baby, Stampendous Floral Bonnet Baby, Stampers Anonymous - Spring Sprung, Memory Box - Nature Sings, Stampendous Crystal Embossing Powder, Pearls, Flowers, Stampendous Micro Glitter, Tim Holtz - Seasonal Chit Chat, Hero Arts - Cherry Blossom,  Hero Arts Papillion, Hero Arts - Fluerettes,  Ranger Alcohol Inks - Watermelon, Yellow Sunshine, Raspberry, Purple, Lettuce, Stazon Fuschia, Ranger Archival Ink - Black, Signo White Gel Pen, Memento - Dandelion Ink


Simon Says Stamp is offering up a $50.00 gift voucher to one randomly selected  lucky participant who joins us in the challenge this week.


Thanks for stopping by!


Suzz

Saturday, March 16, 2013

Carrots Anyone?

Salutations!   I have been playing around with ATC's this week for a swap.  The swap was to create any themed ATC with tiny banners.   I never realized how tiny the banners were going to be  until you try to create banners for a 3 1/2 x 2 1/2 sized project. :) 

The other requirement is for the ATC's to use digital, illustrations, or photos.  These images are from a cute little book  called The ATC collection - Spring.

I embellished the image with a few little details and pop dotted the bunny buying his dinner. ;)   I used some of my Websters Pages papers I have had forever for the background of a few of my ATCs.

I stamped the 4 Sale using black ink on coordinating scraps.

My second Tiny Banners ATC uses paper from the new Graphic 45 Secret Garden 12 x 12 papers: 

I mixed in the image from the same ATC book as well as the flowers.  The glitter is Stampendous Micro Glitter - Crystal and the banners cut by hand.

My final Spring ATC uses another piece of the same Webster's Pages paper:

I cut the boy and girl out from an image a friend sent me. I put the boy inside the bucket and added a few dragonflies.  I stamped the letters using a Stampendous - Tiny Alphabet letters set.  The tiny alphabet is perfect for this project because they are clear stamps.  I could position it on my banners easily.  The hardest part is keeping those little letters corralled.

Have a fabulous Saturday!

Suzz


Wednesday, March 13, 2013

Happy St. Patty's Day

Happy St. Patty's Day (A little early)!  My DH has a brother and sister (Twins) that were born on St. Patty's Day.  Every year I am looking for a way to incorporate St. Patty's Day into their birthday cards.


 I had an idea of a design that came to me last night. I was inspired by Cath's Moxie Fab World Card Creations Challenge of Emphasize the Negative.   I wanted a clean and simple design for my BIL and I was thinking about using the negative space from a couple of clover dies.


I knew I wanted to cut the card with a strip cut out of the front on the right side with a few clovers (Memory Box)  cut into the front.  The rest was looking for a paper to use on the inside and what stamp to use with the clovers.   I found a Studio G set I purchased just for this time of the year. :)


My second card was a quick and easy card too:
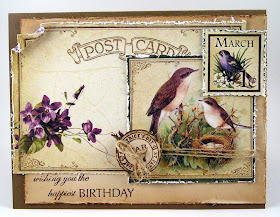
 I took a sheet of the March paper from the Graphic 45 calendar collection and cut a few of the images out and distressed the edges.  I just layered them and added a few stamped sentiments and done.  The sentiments are from the Studio G set and Memory Box.

Hope your week is going well!

Suzz


Sunday, March 10, 2013

Memories

Chic to be Shabby  is the challenge this week at Simon Says Stamp and Show.  

I was excited to play along as shabby chic is something I really enjoy..  I decided to create a wedding keepsake box.

The base of my project is a Graphics 45 Altered Art Box. 
I covered the surfaces with a variety of lovely soft pastel papers distressed and smeared with white paint. I coordinated with a variety of pinks, black, and soft greens.   The front is covered with a variety of roses which have been misted with pink glimmer mist. The ribbon was also died to pink color as well.

The box has two openings which allow for photos inside and out: 

Inside I mounted a frame die cut from pink vellum.  The frame is for additional photos or to add a keepsake.

Here is a picture of the box fully open. 
I added a pocket with the Hero Arts doily stamped using versamark and heat embossed with white embossing powder.  I created a tag to fit in the pocket with lace trim.

The box open standing up:
I love collecting papers and was happy to use them on this beautiful keepsake perfect for an anniversary gift.

Products: Authentique Festive, Authentique Lovely Prima Flowers, 
Spellbinders Grand Ovals Die, Hero Arts Starburst Lace, White Embossing Powder, Ranger Dabber - Snow Cap, Ribbon, Tattered Angels Glimmer Mist,Tim Holtz Idealogy Lavish Trim, Gem Flourishes


Come join in the challenge this week for a chance to win a $50.00 gift voucher from the ever generous Simon Says Stamp:


Thanks for stopping by!


Suzz

Friday, March 8, 2013

Say Hello to My Peeps!

Happy Friday!  These little Stampendous Chicks are some of my favorite peeps!  I love their Easter finery.   Tim's awesome March tag inspired me to create an Easter tag using the chicks.  

 I started with the chicks who were stamped, colored and cut out. 
The egg is hand drawn and the center cut out using an oval die.  I embossed the egg frame using an embossing folder. I sponged on pink and brown dye inks and added a hint of the glimmer mist used in the background.

The inside of the egg is covered with tinsel. The tinsel was Pink and I added a  hint of the orange Alcohol Inks.  I pop dotted the frame to allow me to fit the one chick inside the egg an the other on the outside.  I die cut a stand from the Sizzix Cloche set. I added a little doily to the stand and pop dotted the egg onto the stand.

The background of the tag was is a mix of pink dye ink and a yellow glimmer mist. I sprayed the glimmer mist onto the craft mat added some water and dragged the tag through it.  I waited for it to dry and repeated the process with pink dye ink.

I stamped the sentiment on a scrap piece of cardstock died in the inks.  I cut it to a tag shape. The ribbons and flowers were spritzed to coordinate. (I actually did this first so I could use the leftover ink from the spray on my cardstock/tag)

Products: Sizzix Bell & Cloche Die, Sixxiz Embossing Folder, Spellbinders - Oval Dies, Stampendous Easter Joy Stamp, Stampendous Posie Bonnet Baby , Stampendous Floral Bonnet Baby,  
STAEDTLER Aqua Karell Watercolor Pencils

Hope your weekend is wonderful!

Suzz