Pages

Saturday, April 30, 2016

Wise Owl

Over on the PaperArtsy blog the challenge is about White Space.     The post is very inspiring showing various ways to use negative space or white space in  your art.  This is one area I really struggle with as I love to fill in the space with more colors, stamping, etc. 


I decided to play around with the concept this morning and this is what I came up with.  I know there isn't a lot of white space but I do love the effect of the splattered mists. 

I have used the following Paper Artsy stamps: HotPick 1011Hot Pick Xtra 01 Background, and Tattered Angels Glimmer Mists - Patina, Bubble Gum.  I also added a hint of little gold embellishments.

Thanks for stopping by!

Suzz

Wednesday, April 27, 2016

Frilly and Funkie - It's Not Easy Being Green

Hi! I am hosting a challenge in honor of Earth Day, which is April 22nd on the Frilly and Funkie Challenge Blog.  The Funkie side of the team is sharing their projects today and you do not want to miss out on what they are sharing!   For this challenge you can create any type of project as long as you UPCYCLE or re-cycle something. Re-purpose an existing item, recycle an element that usually would be thrown away or use your paper scraps in a creative way. 

The winner will earn the chance of a Guest DT spot here at Frilly and Funkie, and everyone who enters and follows the rules will go into the draw for the chance to win a $25 spending spree at The Funkie Junkie Boutique.


I had an empty Halo box that I thought would be perfect to house a few plants for my MIL for Mother's day.

I am really pleased with the way this turned out.  Here is what I started from:


I had to do some trimming to take of the halo. :)  And then I cut pieces of mixed media cardstock to the shape on the box.

Then I got busy trying to re-create a wood grain on the cardstock.

Pretty cool... I mixed distress stain spray with white embossing paste to tint the paste. I laid the stencil on and put a coat of wood grain on all four pieces.  I had to let them dry in between to cover the complete sides so this process took a few days. (I don't like to wait for things to dry!) After the paste dried I kept applying coats of spray of brown, gray, and orange. I kept misting until I got the color I liked.

  Here is a picture of the finished outside.


With the halo box it had the corners folded back and leaving a weird shape on the corners. I didn't need the extra structural support so I pulled it off the sides and cut out the extra cardboard.

For the insides I wanted the woodgrain but not the texture.  I decided to spray the cardstock with a lighter mix of colors and then sponge a black dye ink over the stencil to create the grain.
After that I just die cut flowers which were misted with yellows and purples. I sponged the edges with brown dye ink and stamped a very fine script in brown over the surface.  I punched a few little birds and layered the flowers across the front and back of the box.


To cover my edges I decided to moss it up!  I pulled out the hot glue gun and covered the edges with moss.

Here is the finished box. 
Here is an angle to show you the finished inside of the box.

The wet spots on the stone are from the puppy running up the steps before I stopped to take my pictures.
Here is a close up of the flowers in their pot.

To finish off her gift I stamped on the newsprint paper a mix of the typewriter, butterflies, wildflowers in a mix of the colors on the box.  I used two sheets to tie around the planter with twine and set them in the box.

Thanks for stopping by!

Suzz

Products:


Monday, April 25, 2016

Spring Inspired

Hello!  I was playing this weekend with Glimmer Mists and some new stencils and stamps.  I ended up with so many fabulous backgrounds and figured I better finish one of them.

I just purchased these jumbo journalling tags from Ranger and wanted to play with that as my surface.

 I actually started with a stamped background with the fine print painted in white paint to create a resist.  After that dried I stenciled the numbers using crackle embossing paste. (I had to let that dry) 


 Then the fun began with dripping, spraying, and splattering the Tattered Angels Glimmer Mist over the surface.  I kept trying various effects until I got the background I wanted. 


 Then this morning I added the sentiment, circles, flowers and dragonfly to finish it off.  

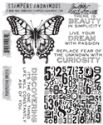
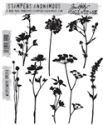
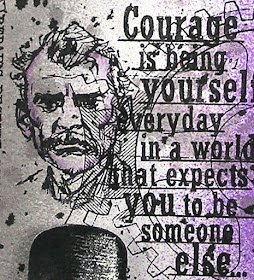
Products: Tattered Angels Glimmer Mist  - It's Brown, Patina, Olive, Tim Holtz - Stampers Anonymous - Wildflowers,    Tim Holtz - Layering Stencil - NumericStampers Anonymous - Classics #1,  Stampers Anonymous - Courage ,  Wendy Vecchi - Crackle Embossing Paste, Ranger Archival - Coffee, Stampendous - Brown Embossing Powder, Vellum, Sequins, Mini Pearls, Watercolor Pencils

I would like to enter this in the following challenges:

Anything but Cute - Earth Day Challenge:  (Look at the pretty mood board which had me thinking flowers, earth, nature and of course greens and blues)


 Mixed Media Place April Challenge -Creative Gym #18


Thanks for stopping by!

Suzz


Friday, April 22, 2016

Shimmer & Shine

Hi!  I am sharing the Friday Focus over on the Frilly and Funkie Blog!  That means for the next two weeks all gel mediums and pastes will be on sale in the Funkie Junkie Boutique with an additional 15% discount available right now.

I share a variety of techniques using Wendy Vecchi's Embossing Paste including how to create this effect:


On this card:

Pop over to the Frilly and Funkie blog for all the details and check out the deals at the Funkie Junkie Boutique! 

Suzz

Tuesday, April 19, 2016

Golden Canvas

Hello... It's Tuesday and I am back with a canvas bag that I used to decorate with dimension. I am entering this in the Mixed Media Monthly Dimension Challenge.


The new Darkroom Door  Fleur De Lis stamp had me thinking of rich textiles and of long ago times where the gold on fabric was prevalent in the designs. I decided to stamp the image using gold paint and added a hint of gold embossing powder.  I then added the flower garden texture stamp randomly with the same process to ad more color.  I also stamped the french text over the background. To add dimension I added the golden butterfly with the resin head.  I stamped the sentiment on tissue paper and edged it with gold embossing powder.

Products:  Darkroom Door - Eclectic Stamp - Fleur De Lis,  Darkroom Door - Texture Stamps - Flower Garden, Darkroom Door - Texture Stamps - French Script, Darkroom Door - Melody, Ranger Embossing Powder, Stampendous Luxe - Gold, Tissue Tape, Feathers, Butterfly, Resin Artifacts, Canvas Bag.

Thanks for stopping by!

Suzz

Monday, April 18, 2016

Notes

Hi!  The start of a new week and we are full swing in our beautiful spring weather.  I even got a little sun burnt on Saturday watching my daughter playing in a tournament.  Darkroom Door has a new release of stamps and I was thrilled to be able to play with them.

I haven't had a chance to create a matchbook note pad in awhile and the fun Eclectic Pencils stamp reminded me of taking notes.


I am always looking for as scrap of paper by the computer to jot down notes and thought this would be  a great addition to the desk. 
 I decided to use scraps of white paper cut down for the inside and I stamped on them with a softer ink the pencils and some script.  I can still write my notes over the stamped background.

 I Stamped the pencils twice in a lovely saffron and cut them out and pop dotted them to add dimension and for a fun textured effect.

Products: Darkroom Door - Eclectic Stamps - Pencils, Darkroom Door - Floral Post, Darkroom Door - Texture Stamp Script, Ranger Archival Ink - Saffron, Coffee, Ranger Distress Ink - Vintage Photo, Antique Linen

Have a lovely day!

Suzz

Saturday, April 16, 2016

Flowers

Hello! It's Saturday and we are having some beautiful spring weather.  What better inspiration than that to create a spring bouquet of cards?

Both cards are simple and easy to create. This takes me back to when I first started stamping with the Hero Arts stamps.  I was happy to see the new silhouette wildflowers form SA along with the doily stamps.

I used versamark in the background with the doily stamp to create a very soft shadow with a hint of mist sprayed from the bottom right corner. 

I inked up the flowers with two dye inks and stamped them over the background and added one of my many Verses Rubber Stamps sentiments.

These flowers are so lovely in their silhouette that I didn't want to distract from them other than a few glossy accents as dew drops.
My second one was a scrap from playing with a lovely flower stencil and blending the mists across the stencil.  I just added a few pearls and a tiny sentiment and a lovely card created quickly.

Thanks for stopping by!

Suzz

Friday, April 15, 2016

Courage

Happy Friday!  I had some time to play and a new set courtesy of Tim Holtz and Mario.  I was lucky enough to be selected as a winner from the #12Tagsof2016 and they sent me the Dapper Stamp Set which was on my list to acquire.

I started spraying some mists on a piece of scrap cardstock and ended up here:


I misted and splashed the inks and then started mixing the stamps into the background.

Nothing too complex just lots of stamping which I enjoy.  Entering this into the Mixed Media World - Get in Gear (The Dapper set has some large gear stamps which I used in the background) and the Mixed Media Monthly Challenge #23 which is Dimension.

Toodles!

Suzz