The winner will earn the chance of a Guest DT spot here at Frilly and Funkie, and everyone who enters and follows the rules will go into the draw for the chance to win a $25 spending spree at The Funkie Junkie Boutique.
I had an empty Halo box that I thought would be perfect to house a few plants for my MIL for Mother's day.
I am really pleased with the way this turned out. Here is what I started from:
I had to do some trimming to take of the halo. :) And then I cut pieces of mixed media cardstock to the shape on the box.
Then I got busy trying to re-create a wood grain on the cardstock.
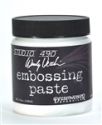
Pretty cool... I mixed distress stain spray with white embossing paste to tint the paste. I laid the stencil on and put a coat of wood grain on all four pieces. I had to let them dry in between to cover the complete sides so this process took a few days. (I don't like to wait for things to dry!) After the paste dried I kept applying coats of spray of brown, gray, and orange. I kept misting until I got the color I liked.
Here is a picture of the finished outside.
With the halo box it had the corners folded back and leaving a weird shape on the corners. I didn't need the extra structural support so I pulled it off the sides and cut out the extra cardboard.
For the insides I wanted the woodgrain but not the texture. I decided to spray the cardstock with a lighter mix of colors and then sponge a black dye ink over the stencil to create the grain.
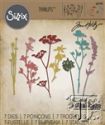
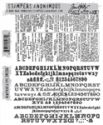
After that I just die cut flowers which were misted with yellows and purples. I sponged the edges with brown dye ink and stamped a very fine script in brown over the surface. I punched a few little birds and layered the flowers across the front and back of the box.
To cover my edges I decided to moss it up! I pulled out the hot glue gun and covered the edges with moss.
Here is an angle to show you the finished inside of the box.
Here is a close up of the flowers in their pot.
Thanks for stopping by!
Suzz








Truly beautiful recycling Suzanne! Loving the wood effect coverings and wildflower decorations and the fact that you've gone the extra mile to stamp on the plant pot wraps demonstrates your unswerving attention to detail. Fabulous make xx
ReplyDeleteSpring is bustin' out all over! Wow, I love this, Suzz! It's such a clever upcycle, and your techniques are just fabby! You really turned trash into a treasure! You are just so talented!!!
ReplyDeleteEpic upcycle idea! Love the woodgrain and the floral die cuts, but the paper that holds the plants is just that final touch that makes this project AMAZING! <3
ReplyDeleteSo beautiful, I just LOVE the woodgrain effect, it looks so realistic! x
ReplyDeleteFantastic Suzz ! What a transformation and perfect for a gift. Sue C x
ReplyDeleteWhat a loving gift for your Mother in Law! Your wood grain came out perfectly and the florals and birdies really set it off! Gorgeous upcycle! Hugs!
ReplyDeleteGorgeous Suzz and what a great recycling idea! I love the bright colours, so perfect for a planter! Sorry I'm late to visit, was off having fun with my Mom. hugs :)
ReplyDelete