At the end of the challenge the team will choose their top four picks. Our first place winner will be invited to join us in a Guest DT spot here at Frilly and Funkie. Three additional talented participants will receive badges to display on their blogs. Everyone who enters and adheres to the challenge guidelines will be entered into a drawing to win a $25 spending spree at The Funkie Junkie Boutique!
I have had a few glass jars with metal tops sitting on my craft table for awhile and that inspired me to create a mini winter scape intended only for an electric tea light as I have flammable items inside my jar.
I didn't take many photos of the steps along the way but I will share a few tips.
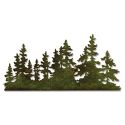
1. I die cut the trees from a lightweight cardboard which gave me flexibility in setting them around the edges inside my jar. I painted them white and then added snow along the bottom with tape.
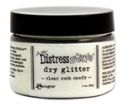
2. The snow is a mix from Stampendous which I love because it has white embossing powder, mica flakes, and glitter all mixed together. It gives a beautiful wintery mix for you all ready to spoon out and layer the bottom of the jar. (Again highly flammable and not intended for wax candle!!) I have linked up products from the store that will make a pretty snowy mix as well!
3. I painted the top of the metal jar with a light white wash and then actually heat embossed the mix on the top. I repeated this multiple times.
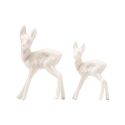
4. I then glued my deer onto the top and while the glue was wet I threw more snow mixture onto the glue.
4. I painted my trees with white paint and then rolled them in crystal glitter while wet.
5. I painted my stars which were blue gem stars to match the trees.
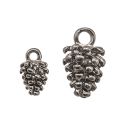
6. I coated my pewter pine cones and Christmas token with white paint.
7. I attached the trees with glue and added a layer of glue on the base and sprinkled the magical snow all around the trees.
I didn't take a picture of the tree lit up as getting the shot is tough to show off how it lights up. If you want more translucence you could cut the trees from vellum.
Don't forget to pop over and see all the other beautiful projects by the design team!
Suzz








This is just so adorable Suzz! I love that you've decorated the lid as well as the inside and can imagine it looks absolutely stunning with the addition of the little light xx
ReplyDeleteLove it, love it!
ReplyDeleteI absolutely love this! Every single detail is perfection. I bet it's amazing all lit up!
ReplyDeleteGorgeous, I love it xxx
ReplyDeleteJust fabulous, Suzz - snowy delight in and on a jar! I love it.
ReplyDeleteAlison x