Happy Halloween! The Frilly and Funkie Challenge this time is called "Impress Us" and is hosted by the creative and talented Sara Emily. She describes the challenge as follows:
I'm calling my challenge 'Impress Us'. Who doesn't want to make a great first impression? For this challenge, we would like you to use your embossing folders or any other way you can make an impression on your vintage or shabby chic project. Go ahead and 'Impress Us' with your creativity!
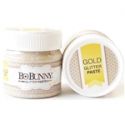
In hindsight I should have realized that today is Halloween and created a spooky impression and share it! But I had this cool new icing paste from Prima and all I could think of was impressing something into it and created a golden background.
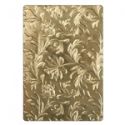
I created a variety of background pieces using the following method:
I cut my circles first and slathered them with the icing paste. You decide how much you want to put on but when you impress it the excess will ooze out the sides. :)
After you put the icing on cut a piece of tissue paper to lay over the icing. Excess tissue paper will help keep some of the icing from getting on your embossing folder. I put tissue paper under and over my icing circle or paper.
Lay the tissue paper wrapped icing paper into the embossing folder. Close the folder and press down to emboss the icing paste. You could use a heavy book, rolling pin or anything else to put the pressure on and get the image.
Open the folder and pull the embossed image out. Clean off the folder with any excess icing paste.
I then took a variety of distress ink sprays to ink up the white cardstock and tissue paper. I decided on my bigger pieces to pull off the tissue paper while it was wet with the distress spray inks. On one of the pieces you can see it reflects the pull of the paper from the icing.
I then took the pieces and cut any excess tissue paper and trimmed down the pieces to pull together my card. I used extra gold ink and gold icing to add more touches of gold around the edges of the layered pieces.
I hope you are inspired to try out some new ways of impressing images! Come join us in the challenge this week! The winner will earn the chance of a Guest Designer spot at Frilly and Funkie, and everyone who enters and follows the rules will go into the draw for the chance to win a $25 spending spree at The Funkie Junkie Boutique. And there are Top 3 Badges for three further outstanding entries, chosen by the Design Team.
Thanks for stopping by!
Suzz






A girl's gotta do what a girl's gotta do when the urge strikes to try something! LOVE how you've used the embossing folder and paste to create such a vintage gilded background and highlights for this beautiful card Suzz! Thank you for sharing how you did this xx
ReplyDeleteSounds like a fun challenge.I loved seeing the layers of embossing in your background. Beautiful card, Suzz.
ReplyDeleteKate
Wow! Am I impressed with your technique and resulting card! Beautiful, elegant card, Suzz! And now, I think I've been properly enabled, and off to add that icing paste to my wish list! Hugs!
ReplyDeleteSuzz. this is really a wonderful technique! I love how "old" the embossed panels turned out. You are such a whiz when it comes to techniques like this, and I always learn something new and delightful when I visit. Thanks so much for sharing this process and the gorgeous result with us! xo
ReplyDeleteThis is lovely! So rich and so vintage, what a great technique!
ReplyDeleteLove all the impressive layers you created for this gorgeous vintage collage. Thanks for sharing how all this loveliness came to life.
ReplyDeleteHugs!
Cec
I just learned a new technique... THANKS!!!!!
ReplyDeleteFrom the first time I looked at this, it really DID impress me & I even stopped the ChiefHubby as he passed by me in our walk-thru office to check this out; such pretty detailing & a prfect touch with the wording U chose!!
Ok, I admit this is my 3rd time checking it out. ��