"Because it's that time of the year when we're all thinking about the perfect gift for our friends and families, let's combine our crafting passion with our "to do" list by creating a vintage or shabby chic gift for a special someone in your life. Your gift could be as simple as a handmade card or tag, or an elaborate piece of home decor. Maybe you like to place your gifts in handmade boxes? Your imagination is the only limit on this challenge!"
Well when I saw creating a tag I thought of Artist Trading Coins and how they make a perfect size for a gift tag.
I started by cutting out circles about 2 3/4" across. I cut out white cardstock and cardboard to back my tags with some sturdy materials.
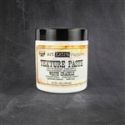
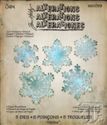
For my first tag I decided to use the layering stencil and emboss with crackle paste a series of snowflakes. I let those dry and then misted the circle with blue distress stain spray. After that I had to think awhile about how to dress it up. First I decided to cover the surface of the circle and the surrounding snowflakes with a clear coat of versamark and then heat emboss them with the frosted embossing powder. (This turned out beautifully and you can't get the full effect from the photo but it added a gorgeous sheen) I found some smaller snowflake dies and cut about 5 extra snowflakes. They all got gussied up in blue ink too and then I cut them into pieces to frame out the circle. The final step was to stamp the sentiment on acetate and heat emboss with white embossing powder. (Let's just say this step took about 5 times as the acetate tends to gather powder and I had the brilliant idea to moisturize my hands before I sat down to craft)
Next up was the plaid stencil!
I really love the plaid stencil and the black with red is so pretty! I paired it with the Tim Holtz Trophy antler and some fun holly trim. Quick and easy!
The next tag used a mix of the pretty bird stamp with the music background. I colored the bird with watercolor pencils and added a few highlights with a white gel pen. The tag is again framed out with the same holly trim.
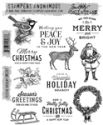
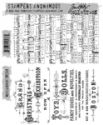
For my last tag of this series I used the fun St. Nick from the festive overlay set and the advertisement stamp in the background.
I did a little whitewash after stamping the background to soften the print. I added some foam behind santa to give him some depth. The trim was some pretty silver tinsel with a touch of white paint. Santa also has some frosty highlights with glitter but just not showing up in the photo!
Now I have a series of tags for my presents ready to be added to the packages!
I hope you are inspired to play along in the challenge! The winner will earn the chance of a Guest Designer spot at Frilly and Funkie, and everyone who enters and follows the rules will go into the draw for the chance to win a $25 spending spree at The Funkie Junkie Boutique. In addition, the Design Team will select three further outstanding entries and those creators will receive a Top Pick badge to display on their blogs!
Thanks for stopping over!
Suzz
Products:













Suzz, these are incredible gift tags, and I loved reading about your process. I have to say, the snowflake is my favorite and I got a giggle out of your bad timing with the moisturizing! Sounds like me! What a fabulous idea and now you've got my creative gears turning! Sending hugs!
ReplyDeleteThese are gifts all on their own! I can see these hanging on the tree. My favorites are the snowflake (the color!!!) and the sweet woodland bird. Just so gorgeous!
ReplyDeleteWhat lovely little tags with such pretty embellishments. I love that father Christmas tag.
ReplyDeleteKate
These are adorable Suzz, each one is unique and perfectly put together to create gorgeous tags for Christmas xxx
ReplyDeleteEach one is so unique and I love the idea of using ATC's as tags! They could be saved and added to your tree the following year too xx
ReplyDeleteIt amazes me how much wonderful detail you were able to put into such a small space. Each one is a tiny treasure.
ReplyDeleteHugs!
Cec