Monday, March 14, 2016

Purple, Rust and Gold

My morning started out with a quick check in with some of my crafty friends and I was struck by the beautiful background and art that Astrid created using a technique from Blanche Siegmann.  It had me inspired to try out some ideas.

"A Vintage Journey" is celebrating their birthday and have a recipe provided for their March challenge which encompasses Purple, Chipboard, and Rust.  A very strong influence for my tag. :)
 I started with playing around with the background technique.  A few of my different attempts:


I used the gold distress stain with the dusty concord ink over the surface to create my backgrounds. I tried a variety of stamps in the background.  

 You might recognize the butterflies as they were the leftovers from my tag made for Tim's March tag. They already had a beautiful mix of white, black and gold on the surface.  I just added the Stampendous Aged Metallic to the edges of the tag and the butterflies.

The stencil is one of  the new Tim Holtz Idea-ology Layering Stencils.  I added gold embossing powder to the metallic numbers and added them to the butterflies.  The sentiment is from Verses Rubber Stamps.


Thanks for stopping by!


Suzz


Saturday, March 12, 2016

Bazinga!

Happy Saturday to you!  I am busy playing with other projects that I can't share right now but I wanted to share this simple card I made for my hubby.

 When I saw the new Indigo Blue stamps I had to have a few of the science sets.  I am still waiting for my periodic table stamp but got the calculus and the science set.
My DH and I watch the Big Bang Theory on t.v. and I was inspired to create him a card using the new stamps.  I distressed the background with dye inks after I had stamped my main image.  I did emboss it with black embossing powder to help keep it night and bold.

I then decided to add Sheldon's favorite "Bazinga" to the front and I sponged the inside in yellow. 

Have a wonderful weekend!

Suzz

Tuesday, March 8, 2016

Shimmering Butterflies

Good Morning... More butterflies.. :)  I guess all this 60 degree weather has me thinking spring and summer.

This actually started from a scrap pile that I had leftover from one of Tim's tags.. I was playing with different backgrounds and had quite a few leftover and this was one of them that I had cut to card size and set aside.  Usually when I am working on a project I can't walk away and play with other projects but I have one on my desk that is going to take a week to work on so I put it aside and decided to play with some new stamps.

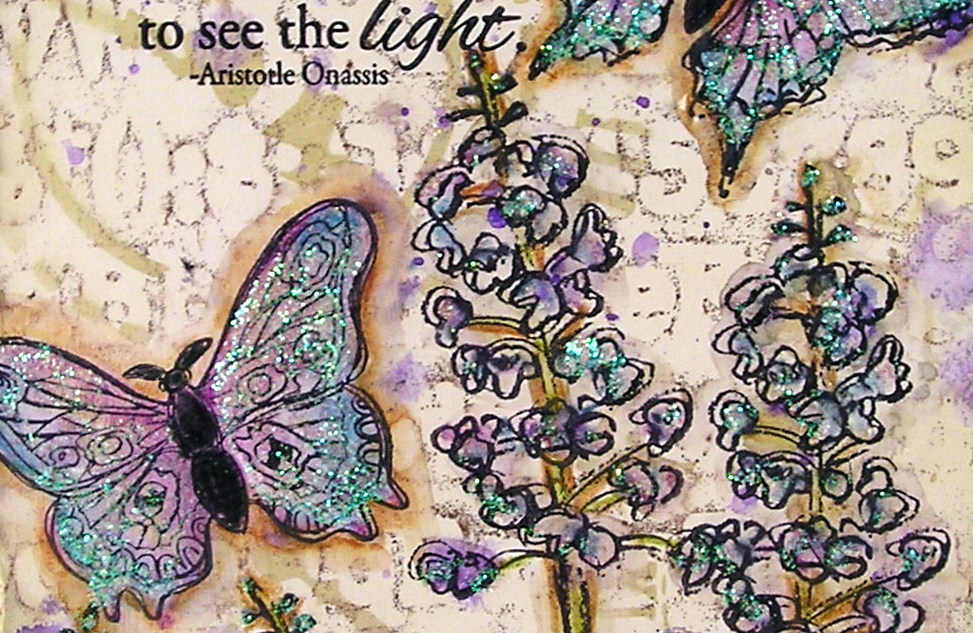
The background is a mix of paints with an embossing folder and a stencil overlay on top of that.  I then stamped the flowers and butterflies onto that with archival ink.  I colored them with the watercolor pencils and waterbrush. I wanted to make the coloring very splotchy around the flowers and on the butterflies to give it a very ethereal effect.  

I added a hint of shadowing and then the sparkles to give the shimmer.  I finished it off with this beautiful sentiment from Inky Antics. 

Thanks for stopping by!

Suzz

 I am entering this into the following challenges:

Words & Paintery February Challenge - Colors & Glitter
The Mixed Media Monthly Challenge - Photo Inspiration  (Check out this pretty picture)
Anything but Cute Challenge - Crazy for Color

Products:  Inky Antics - Sentiment, STAEDTLER watercolor pencils, The Crafters Workshop Stencil, Ivory Cardstock, Crystal Stickles


Saturday, March 5, 2016

Butterflies

Every creation is a journey. I start with the inspiration or idea which today is Tim's March tag for 2016.  I then end up creating many different variations of ideas because I want to explore different avenues and at the end try to bring it all back together into a finished piece. Sometimes I can't end up at a destination but even when that happens I learn along the way. 

 I ended up with two versions of the tags but wanted to explore more because the underlying elements are so beautiful I hated to cover them up.
 Here are my two finished tags. 


 and my second version


 Here are a few of the pieces before assembled:


I die cut a tag using the dies and laid it over a stamped background. Then I used the watercolor crayons to create a mix of pinks, purples and yellows to color the background.
 I also played around with embossing the background with the same dies.  I wanted to see the effect.  A more subtle effect and the white areas don't pop as much.


 I tried something different with the cardboard overlay and painted it white on one of them to bring in a lighter background and on the other I switched out the splatters to pink and white paint to add more highlights. I wish I had tried one more with the white painted background and the light pink and silver splatters.


 Here are my leftover butterflies waiting to be used on another project.


A very fun Saturday morning play session! Have a wonderful day!

Suzz

Wednesday, March 2, 2016

Hats off to You!

Nancy is hosting the fun "Layer it Up" challenge at the Frilly an Funkie challenge blog.  She described it as "create any type of vintage or shabby chic project featuring multiple layers."   I have had this fantastic stamp set with the cool masculine image that I have been wanting to layer up for quite awhile and this was the perfect opportunity to play around with the image.


I started by stamping this image multiple times using black ink.  I then colored and cut the pieces out to layer.
Of course I had to have a card base to use as my background and just happened to have one of the new Tim Holtz layering stencil on hand to use in the background.  

I sponged a mix of Antique Linen with a touch of vintage photo left over on my sponge. :)  that gave me a nice soft background to frame out my image. 

I added some of the new Idea-Ology Tissue tape in the background for accents along with some bits and bobs of metal. 

Don't forget to play along with us for a chance to win a  $25 spending spree at The Funkie Junkie Boutique!

Thanks for stopping by!


Suzz

Friday, February 26, 2016

Small Things with Great Love

Friday!  Yeah! I have been having a dry spell with my creative juices.  Today I decided that I was going to create something, anything to keep me creating.  I decided to use a new stencil with ferns and glimmer mist to start the art!
I misted the ferns in the background and then added a layer of stamped text.


I did this three times because I tried different effects on the ferns and ended up muddying them up. I persisted and on my third attempt I added the lovely Verses Rubber Stamps sentiment and wanted to have a flower coming across in in a different direction and the PaperArtsy flower was the right length and fit perfectly.

Of course I went to stamp it and it didn't get an even image.  Easy enough to fix with a second stamping on a second piece of cardstock.  Color, cut and pop onto the top of the original image.

Products:  The Crafters Workshop - Fern Stencil, Tattered Angels - Kiwi Glimmer Mist, 7 Gypsies stamp (text),  PaperArtsy Flower - Hot Picks, Ranger Archival - Potting Soil, Verses Rubber Stamps - Great Things, Stampendous Bronze Crushed Glass Glitter

Well I hope you have a fabulous Friday!

Suzz


Wednesday, February 24, 2016

Heartful of Coffee

Howdy!  I have been playing a little in my craft room but mostly had a bad cold which has kept me out of my craft room.  Since I started feeling better  I decided to try my hand at playing with coffee.  I am not a coffee drinker so I had to mix up a little paste with some grounds and warm water to kick this off.

I actually laid out my project two different ways and wanted to share the first layout because you can see the coffee background which started my project.

 I started with making a paste of grounds and water which I used to paint over a stencil on mixed media paper.  I then added a layer of glimmer mist sprayed over the surface and splattered in spots to add a lovely coral color to the background. 

After that I wanted to keep the texture of the grounds on my background before they completely dried and blew away from the paper.  I left the grounds on the paper and used a trick taught to me by Fran at Stampendous by pouring my clear embossing powder over the surface and heating underneath.  This captured the grounds and kept them on the surface of my paper to add a coffee texture.

After that I cut my shape of the heart from the background. I distressed the edges and used Aged gold embossing powder to give a golden tint. 


 I decided to stain a white doily with the coffee and then embossed the frame with the gold embossing powder.  I cut the center and stamped the image of the little girl over the surface.  I heat embossed this with clear embossing powder after splattering some coral color mist on the background. 

I then put the center back into the middle of the gold frame and added a mix of black and gold glitter around the edges.

The flowers were misted and then embossed with the gold embossing powder. I stamped the sentiment on a remnant of my coffee background and embossed the edges in gold.

This project was created with a few different challenges in mind:
Mixed Media Place - Creative Gym #17 - Coffee 

Vintage Journey - Industrial

Anything but Cute - Grungy Love


Thanks for stopping by!

Suzz