Showing posts with label Sizzix. Show all posts

Friday, February 2, 2024

Steampunk Lovebirds

Hi!  The design team at The Funkie Junkie Inspiration Ave is showcasing the latest Sizzix Release by Tim Holtz called Out of the Vault!  I was lucky enough to receive the beautiful LoveBirds! 

I decided to stamp up my die cuts to add a pop of texture to the surface.  I created a flock of birds before I realized what I wanted to use on my card.

I cut the birds from inky backgrounds and using the Idea-Ology Tim Holtz Backdrops.  I spritzed the backgrounds using the same colors I used on the card.  They were a mix of Seasonal Distress Mica Stains along with a distress oxide. 
The backgrounds were created by first applying a layer of opaque crackle texture paste over the flourish stencil. This was done on the backdrops paper and white cardstock.


 While the crackle paste was wet the sprays were sprayed multiple times along with water to help mix the colors and thin out in areas the density of the color.  Then a heat gun was used to dry out the crackle paste.  There was a mix of some areas crackling and others not because of the wetness when applied. 

After that the background was cut for the card from one of the pieces.  Then the birds were stamped using black archival ink with the various images on some inky remnants.  The birds and feather were covered in versamark ink and then a layer of clear embossing powder heated up.  This made the colors more vibrant and added another pop to the color on the cut out images. 

Happy inking! 

Suzz

Products: 

Friday, December 22, 2023

Holiday Homecoming!

Welcome to the holidays!  The team at The Funkie Junkie Inspiration Ave is sharing their holiday homecoming a celebration of the holidays with family and friends.  

I was inspired by wreaths that my mother and I made years ago for holiday craft shows. It was fun picking out different flowers, garland, and embellishments to decorate the wreathes.  

My wreath of joy started from a collection of poinsettias cut from white cardstock.  I started by cutting many different shapes to play with in different mediums and ended up with poinsettias on white cardstock because of how I wanted the colors to saturate and stand out.

Next up was making the beautiful colors on the flowers and branches.  The flower pieces were all sponged with a red dye ink.  After that they smaller pieces received a distressing with a brown dye ink and the larger flowers were sponged around the edges with the brown dye ink.  

The branches were sponged with versamark and embossed with a shimmery silver.  (I am still glittering in random spots on my face and hair!)  

I next cut out a circle to hold onto my wreath from cardboard.

I sponged the front of the circle to match the flowers in case any of the cardboard peeked through the flowers. 

Then I heat set the flowers before attaching the layers as the distress ink can remain damp and cause the tape to not stick properly.  I attached the layers to the flowers petals.  Then the flowers were alternated on the frame of the wreath using tape for the bottom flower and pop dots to create depth on the alternating flowers.


After all the flowers were placed on the wreath the various branches were tucked into the wreath around the edges using tape and glue dots.  Then a lovely little sentiment was placed on the banner on the front with a few extra twigs. 

The centers of the flowers were a mixture of embellishments.  

Have a happy holiday! 

Suzz

Products: 

Friday, March 3, 2023

Aren't We Lucky?

 Hi!  I am back today to share a post for the Funkie Junkie Boutique Inspiration Ave.  The team are sharing their inspiration around Aren't We Lucky?  

In my family we have a few St. Patty's Day birthdays coming up and it had me thinking about the 3 leaf clovers and how they bring luck.  I decided to use the hearts dies to create the leaves of the clover and  a few flowers. 

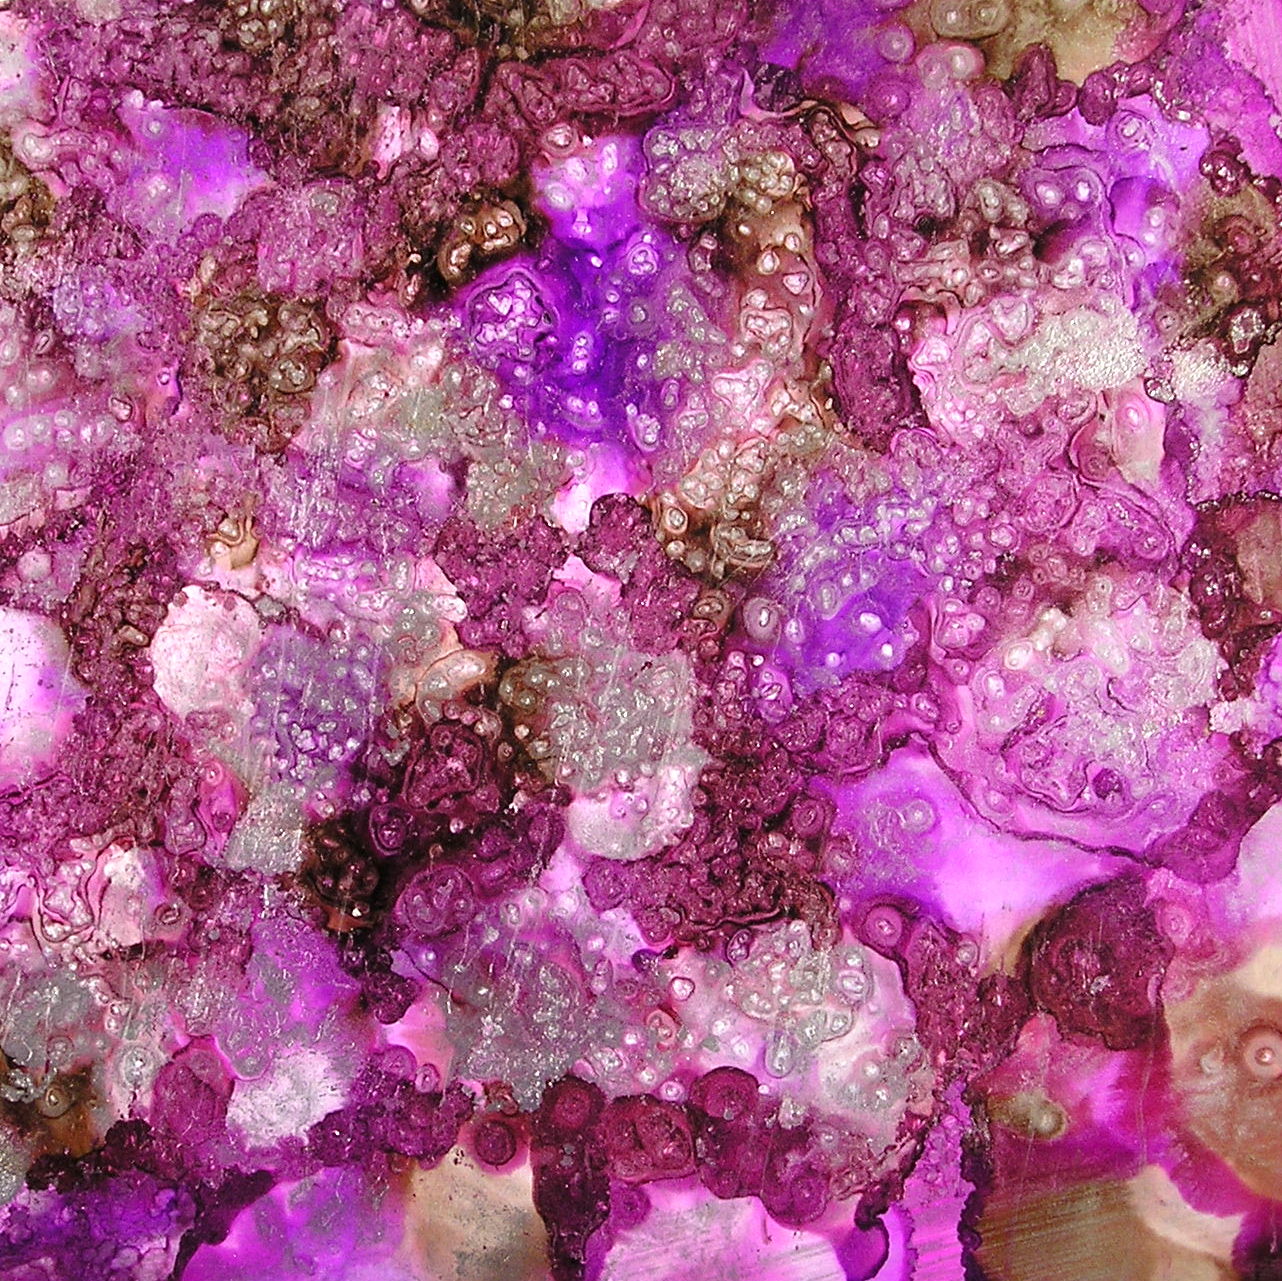
I thought it would be fun to use alcohol inks and yupo paper to create some clovers and flowers using the stacked hearts dies. 

The alcohol inks are magical in how they apply to glossy surfaces.  I have found that playing with them is the best way to get to something that you like.  For this effect I will give you just a few tips and let you explore and see what effect you can achieve.
  1. Start with Yupo paper.  This will help the inks move on the surface.You can use translucent or white Yupo.  
  2. I usually put down a base of alcohol blending solution to allow the alcohol ink I am applying to spread.  
  3. Then I will drip on the different colors allowing them to spread.  I will usually let the circles I drip dry. 
  4. Next drip a different color or the alcohol blending solution over the original circles and by themselves. Let the second layer dry. 
  5. Repeat with as many layers until you have beautiful circles overall. 
  6. Using the alcohol application tool drip several drops of blending solution onto the felt.  Dab over the surface
  7. This wills soften the edges of the circles and give the small bubbles of white across the surface.  If you blend too much you can always come back and add more drips of color and blending solution.


For the purple alcohol ink background I did two additional steps.  I added an alloy to give a silvery metal effect and I added salt to the pools of alcohol ink.  After it dried I brushed it off and it removed the pockets of color. 
 
Then I decided to cut out my many many hearts in varying sizes to make my flowers and clovers. 


Assembling them was easy as I took a big circle glue dot and attached it to a scrap piece of cardstock.  I then arranged the hearts around the circle.  I cut little stems from the extra pieces.  

I also decided to use some mica stain sprays to create a series of hearts and made a second card.

I stamped a mix of images using coordinating brown and green dye inks and then attached a few of the clovers along with a few embellishments.  

Thanks for stopping by! 

Suzz

Products: 

Friday, January 20, 2023

Celebrate

 Happy New Year!  Welcome back!  Today I am sharing from the newest Sizzix Tim Holtz Release.  I picked the fun Celebrate Colorize dies.  I am always in need of birthday cards and these dies are perfect for celebrating!  

 
I wanted to use balloons using text based inspiration!  I pulled out my old torn up dictionary and looked up a few different pages with definitions from celebrations and birthday to cut out my layered balloons. 


I had fun pairing them with some accessories in a shimmery yellow.  The background was created using the layering stencil with a mix of the same ranger die inks used on the balloons. 
 
 I cut out additional balloons and tried different effects with them with stamping and sponging on inks. 


 I also tried various backgrounds to highlight the balloons.  First there was a general misting of the shimmery yellow mica stain spray. 
Next was a series of numbers stamped across the background using versamark on white cardstock.
 

Then the numbers were embossed with clear embossing powder.  Yellow mica stain spray was spritzed across the entire surface.  After the spray dried brown dye ink was sponged across the surface to highlight the numbers.  Tiny text from a stamp was stamped over the surface.  To finish off the effect a dry buff of the background was done to remove any excess ink on the embossed numbers. 

The next background used a stencil to add some texture.


The background was embossed with distress paste and a stencil.  After it dried the background was spritzed with mica stain over the entire surface.  After the spray dried then brown dye ink was sponged around and over the raised background.  Then a script was stamped using the same brown ink over the surface.  To finish the background a splattering of brown and yellow sprays were splashed across the background. 

Hope this has inspired you! 

Suzz

Products: 

Friday, December 16, 2022

Envelopes of Fun!

 Hi! Time for some holiday fun!  I was inspired by the Sizzix Chapter 3 Thinlits Tim Holtz Postale dies! I love the idea of mini envelopes!  


I pulled out a mix of papers, stamps, and embellishments along with my dies to cut out the envelopes and embellish them. 

I cut out a series of envelope shapes from white cardstock and then played around with stamping different images.

For my first mini envelope, I created a woodland scene using a few different stamps with brown and green archival ink.  I cut out a mask of the deer to allow me to place a tree in the background.  


Next I used the papers from the worn wallpaper to cut the envelope from and then embellished it with stickers from Christmas sticker book.   

A little embellishment with some paper flowers behind the sticker flower along with some white gel highlights to make flower the focal point. 

The papers were so pretty I decided to create a second envelope from another pattern. 

Only this time I lined the inside of the envelope! 

Then I went back to stamping and used the festive collage stamps to drape the boughs of holly across the front of the envelope.

The little sprigs of holly along with the sentiment filled out the rest of the envelope.  The berries were all stamped twice and pop dotted to raise them up and add a little texture.  Then a sprinkle of glitter was added all over the branches and berries.   

The next envelope used some pretty mica sprays over a stenciled background. 


The envelope was laid flat and crackle embossing paste was  used with the layering stencil to add the festive words.

After the embossed background had dried the spray was misted over the front and then a different mica spray was spritzed over the back. I am going to add a lovely snowflake to the front when I get a few minutes! 

Next up is jolly St. Nick!

He was stamped on the white envelope while it was open and then colored with a hint of watercolor.  He has a little shimmer on his fur to highlight his lovely hat!  


Now I have a set of mini envelopes ready to put a special message and attach to a gift!


Thanks for stopping by!

Suzz

Products: 

Wednesday, March 9, 2022

Rather Blustery Day

 Hi!  Time for another challenge at The Funkie Junkie Boutique Challenge blog.  This time I am hosting and I am inspired by our windy spring weather and have called it "Rather blustery day".  Don't panic it isn't about the weather. :)  The challenge is: 

"I am inspired by Pooh Bear's quote from A A Milne of "It's a rather blustery day."   Pooh Bear struggled against the windy day and you can share something you struggle with in your art!  It can be a technique, color palette, tools, or supplies that you find difficult to use.  Share them with us along with your story on what you struggle with!  I can't wait to see your blustery day!"

So bring on your difficult techniques or things that challenge you!  I am afraid of white space. :)  Being a grungy, shabby, and collage inspired artist that white space or negative space is very hard for me. 

It takes me 4 or 5 times to get a simple card done.  When it has to be clean and neat I always have a smudge or cut that causes me to redo it.


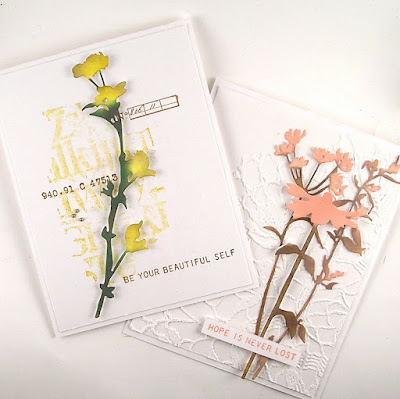
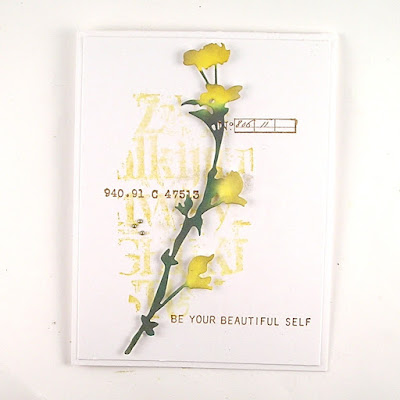
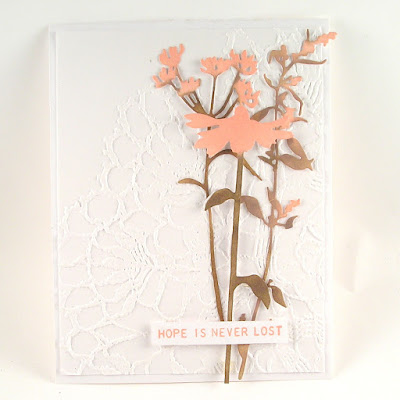
I thought I would highlight the wildflower die cuts as the focal point with a soft quiet background.


I also had the new embossing folder with the doily and love the texture it provided behind my simple bouquet. 

I hope this has you inspired to come show what you struggle with in your crafting.  The overall winner will be offered the chance to be a Guest Designer at a future date at The Funkie Junkie Boutique Blog, and everyone who enters and follows the rules will go into the drawing for the chance to win a $25.00 spending spree at The Funkie Junkie Boutique. There are also Top 3 Badges for three additional outstanding entries, chosen by the Design Team.

Thanks for stopping by!

Suzz

Products: 

Friday, December 31, 2021

Happy New Year!

 Wishing you all a very blessed and  joyful New Year!  

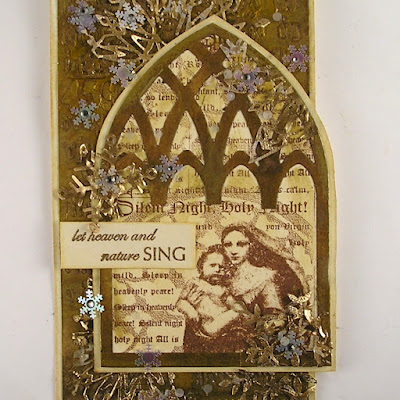
I started this before Christmas but couldn't find the backdrop to make this image shine.  I finished it this morning and was hoping it could bring us joy in the new year! 

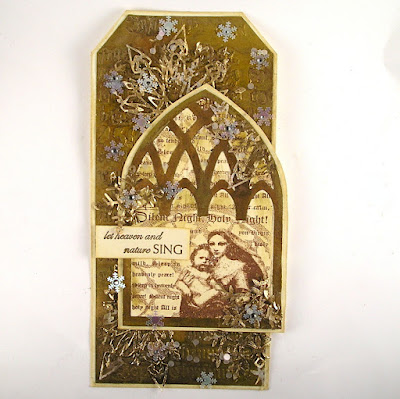
This is one of my favorite images and is an old stamp from Hero Arts in their ArtStamps collection. 


I spent a lot of time trying to frame it in a way that would make it shine.  I embossed the background of the tag with embossing paste and the gothic lettering.  I sprayed it with a mix of Antique Linen, Mica Spray, and Tarnished Brass.  After that I added random spurts of gold paint.  I die cut the frame and mixed the same colors.  I cut out the area for the stamped image.  I love this sentiment stamp as well which is from Memory Box and an older stamp as well. 

I then glitzed up the background with die cut snowflakes from tissue paper which were embossed with Ranger Queen's Gold.  I then sprinkled on snowflakes and gems.  

My wish for everyone in the New Year is a healthy pandemic free world.  :) 

Suzz

Wednesday, May 13, 2020

Oh Man!

Welcome back to another Funkie Junkie Boutique Challenge!  The talented Jenny is the host for the challenge this time and she is challenging to think masculine with a "Oh Man!" challenge.  Here is how she describes the challenge:

"Fathers Day may be a way off yet but there are always other occasions and reasons for making something for the men in our lives. For this challenge create something which you feel has a more masculine look."

I decided to have the professor as my focal point in a fun flip book!


 I have been having so much fun with my new stamps.  There is nothing like inking up and stamping on all different shapes and sizes!  I stuck with a series of more male related colors like blue, green and a deep plum all aged with distress inks.

I started with a few die cuts and then cut random shapes and sized to layer.  I laid them out on the table and tried different combinations until I got the layers I wanted.  Once I had that I started stamping images.

I took all these photos of the flip pages and just realized I didn't flip the little butterfly down to show you the bigger butterfly. :)  So I will show you what the page behind the big butterfly looks like.


I took and created a little tab with a little pocket and some circles stamped and cut out to create my mask for my professor.  :)


 When you flip that down you see the professor and I clipped him to a timekeeper clock with a tiny clip. 

When you flip that you get to another short tab:


A fun circle with a game spinner and the label that folds over to the other side.

 I kept using the same colors and variations of the stamped images to add a different view.


The last tag is stenciled with embossing paste and stamped over with text. 

The reverse flip goes like this:

The back side of the last tag.  I inked up all the tiny text with a few pulled out of the sheet.  I stamped them onto a inky background. 

The english gentlemen (from an old Stampers Anonymous set made it on the tags in two different sizes)  I have him in a cling mount and wood mount set. ;)


Then I had the back of the timekeeper die which I didn't show again.  And then onto the umbrella man.


 Then the short tag with the circles. (I stamped these twice to make sure the circle was full on both sides of the tag.


And back to the butterflies:
To the back of the baby butterfly. 

I put them all together with an accordion fold:

I used a clip to get it to hold the fold to start with:
I hope this having you thinking of masculine inspired projects to share with us in the challenge! The winner will earn a chance to be a Guest Designer at a future date at The Funkie Junkie Boutique Blog, and everyone who enters and follows the rules will go into the draw for the chance to win a $25 spending spree at The Funkie Junkie Boutique. There are also Top 3 Badges for three additional outstanding entries, chosen by the Design Team.  There are always good deals at The Funkie Junkie Boutique and Linda and her team are busy working away and getting orders out to everyone!

Thanks for stopping by and please keep safe!

Suzz

Products:
Stampers Anonymous Tiny Text
Stampers Anonymous Glitch 1
Stampers Anonymous Professor 2
Stampers Anonymous Field Notes
Ranger Mini Layering Stencils #48
Ranger Archival Inks - Thistle, Bluebird, Fern Green,
Ranger Distress Ink - Antique Linen, Ground Espresso
Sizzix Timekeeper
Sizzix Tattered Butterflies
Idea-Ology - Game Spinner
Idea-Ology - Machinery Head
Idea-Ology - Tiny Clips