Thursday, June 30, 2016

Dare to Dream

Good Morning!  I have been busy with so many things and having little time to create.  I decided to sneak in a little time this morning and create a quick card inspired by the Mixed Media Place Creative Gym #19 - Courage to ask for. 

 I wanted to play with layers and had this lovely piece of background I created for something else an didn't use.  I had done some resist techniques and ironed off the embossing resist to bring back the yellow through the pinks. 

I die cut the honeycomb on the corners and added some tissue tape to the background. I matted it on a card base with a hint of purple peeking through.

I added the frame with the sweet couple and a few details of flowers and diamond spray.  And finished with the sentiment of dare to dream.

The Mixed Media Photo:


Thanks for stopping by!

Suzz

Saturday, June 25, 2016

Coloring Outside the Lines

Do you ever feel like you have created something before?  This card is definitely a repeat or similar to something I did before. :)  I started with an idea I wanted to try with stamping the outline flowers but only coloring outside the lines.

 So what happened?  I couldn't take it.. It was too plain...
I ended up adding the colors in the lines and the lovely sentiment to pop in the corner.  I probably will try again but maybe masking the flowers so I can sponge on a really dark color around the flowers and see if I can make it flower outside the flowers more strongly.

Products:  Stampers Anonymous - Flower Gardens, Yvonne Blair - Impression Obsession, STAEDTLER watercolor pencils, Ranger Distress Inks

I hope you are having wonderful weekend!

Suzz

Wednesday, June 22, 2016

Pastels & Pearls

Welcome to Funkie Wednesday!  Time for the Funkie part of the Frilly and Funkie DT to show off our take on the current challenge: Pastels and Pearls Challenge.    Nancy is hosting the challenge and she has given us the challenge to create any vintage or shabby chic project that features a pastel color palette and includes pearls. Those are the only guidelines. Other than that, the sky is the limit!

At the end of the challenge the team will choose their top four picks. Our first place winner will be invited to join us in a Guest DT spot here at Frilly and Funkie. Three additional talented participants will receive badges to display on their blogs. Everyone who enters and adheres to the challenge guidelines will be entered into a drawing to win a $25 spending spree at The Funkie Junkie Boutique!

I tried to combine the pretty pastels with pearls and still have a few funkie details in the card.


My card started with an inky background mixing up different distress stain sprays and then adding a nice flicking of white paint over the background.

from there I started to play with stencils and white embossing paste.
I created this piece but haven't gotten a chance to finish the rest of it.
I then went on to emboss on another part of the paper but covered it with a stamped doily on tissue paper. I used white embossing powder on the image and then glued it over the stenciled background.
Then I cam back in and added some white highlights on the stenciling and around the edges to make it pop. I die cut a butterfly from a coordinating piece of cardstock.

I stamped the girls in the purple ink and put them under the dome in the brooch. I die cut tons of flowers in the same colors and accented them with tiny pearls.  I then stamped the beautiful sentiment from Impression Obsession - Wings and embossed it in white to make it pop.

Don't forget to check out the  Frilly and Funkie blog to see the rest of the Design Teams awesome creations. 

Have a fabulous day.

Suzz


Monday, June 20, 2016

Merlot Flowers

Hello and another week started.  I decided to pull out my Ken Oliver powders this morning as I wanted to try masking and layering with the powders.  I ended up with two cards using both pieces from my masking.

I have been wanting to play along in the CAS Mix Up Card Challenge as it mixes the Mixed Media with the idea of a cleaner design.  Dirty but clean?

Here is the mask I created by cutting a rectangle from white cardstock in the middle of a piece of cardstock.
 I laid this over the card front on this card:

I then sprinkled Merlot and Ochre Powder over both the frame and the center of the white cardstock. After I sprinkled my mix I used a brush to spread it around and paint the powders (dry) over the inside of the frame.  I then sprinkled a little more and pushed it around.  I used a tiny spray bottle to squirt water onto the mask and opening. I kept it on through the whole process until I was done squirting the water on.  I then lifted the mask (frame) and dried them with a heat gun.  After that I re-sized the frame to fit on the card front.

I stamped text onto the frame using Archival Ink (Green Leaf).  I then spread more of the Merlot onto my craft mat and spritzed the wildflower stamp(Stampers Anonymous) with water and dragged the stamp through the powder to ink it  up. I stamped the flowers onto the front of a white card base. I repeated with a smaller flower stamp.

I then attached the frame over the stamped images and added a small sentiment(memory box) in the same green ink.

For the second card I used the same mask (I flipped it over to not mess with my powder effect) and laid it off center. I also took the center piece and masked my powders to protect them from my sponging of the distress ink to create a shadow effect for my main panel. I repeated this twice once with fossilized Amber and the second time with Abandoned Coral.

I then stamped my wildflower and sentiment using black ink.  I added a sprig of holly die cut(Memory Box) over the top. 

Have a wonderful Day!

Suzz

Photo:

Saturday, June 18, 2016

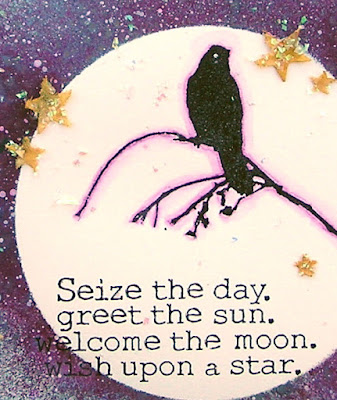
Seize the Day

At the PapeArtsy blog the challenges have been so inspiring as they dip into other mediums, techniques or concepts.  The current challenge is fabric and I was looking at how the fabric added dimension to the different art including the beautiful flowers cut out and sewed into three dimensional flowers or the fabulous moths constructed from fabric.


This had me thinking out using die cuts with fabric. I created a journal page using stars cut from fabric, sprayed with gold mist and coated in mica flakes. 

 I masked a portion of the page with a large circle and then sprayed with glimmer mists in different directions spinning the page with the mask around to get the same angle of the spray in each direction. I repeated this with blue, brown and purple mists.  After that was finished I added splattering of white paint to bring back some lighter highlights. I let that dry and pulled up my circle mask and stamped the sentiment and the bird in the moon. 

I then added a hint of shadowing around the bird.  I then cut my stars and misted them. After they dried I used glue and dipped them in the mica flakes. I then attached them to the background. I also added mica flakes sprinkled in over the background as well.

The stamps are Impression Obsession (Sentiment) and the bird is Paper Artsy.   The mists are from Tattered Angels Glimmer Mists.

Have a lovely Sunday!

Suzz


Thursday, June 16, 2016

Faith in Dreams

Happy Thursday!  Longest week ever... :)  I am back playing with a tag and some flowers. Trying to de-stress with a little flower power.

I combined A Vintage Journey's Texture Challenge with the Mixed Media Monthly 2nd Year Anniversary Challenge of which I am  using the "Texty" Challenge.

I started with a tag that was lightly spritzed in green ink. I had it in my scraps and pulled it out to play. Whilst creating another project to be shared next week I picked up the pink and brown ink along the edges.

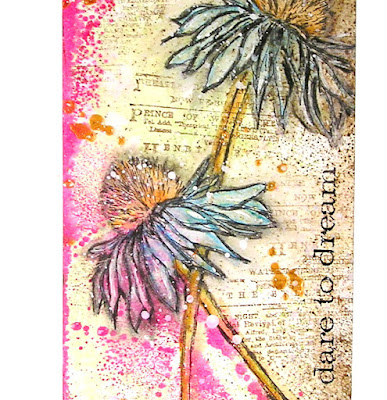
I wanted to  use the flowers so I stamped them and colored them with watercolor. They weren't popping the way I wanted them to so I came back in with a charcoal pencil and added the black shading to make them stand out.  I then added some splotches of white paint, gold embossing paste through a stencil and the test stamped over the background in brown.

It should have been a quick tag but I won't tell how long it took me! :)

After I finished I thought it might look better horizontally:

What do you think?

Have a great one!

Suzz

Challenge Photo:

Saturday, June 11, 2016

Bee Happy!

Hi!  I have been busy re-working my craft area. In my constant attempt to keep everything organized I am in a bit of a re-org.  I recently received a few new holders for my inks and paints and that has caused me to re-think everything in the craft space.  I cleaned off my desk finally and had a go at a few challenges.


 I am not sure if I like the face in the metal embellishment but the bee needed something and I thought this was an interesting take. :)

The Anything But Cute Challenge is the Birds and the Bees and when I was cleaning up my scraps I realized I had the layered bee and hadn't used it in awhile.  So out came some scraps and the bee die to try to use up some scraps as well as play with the bee.


I also decided to pair this up with A Vintage Journey which is texture or embossing paste this month as with the embossed background and bee I have loads of texture.

I won't cover all the details but a lot of antique linen, ground espresso, Victorian velvet and gold went into the background and bee.

The challenge photo for Anything But Cute:

Thanks for stopping by!

Suzz