Wednesday, September 29, 2010

Play Date Cafe Challenge #49

Sarah selected  the colors for the Play Date Cafe challenge this week.
 

Another fun mix of colors to play with this week. The design team also had a second challenge this week to use a technique called Clipped Corners provided by our sponsor this week Technique Junkies.

I started with this card and had about 4 different backgrounds before I decided on this background. The flowers felt like they went with my temples and Buddha.  


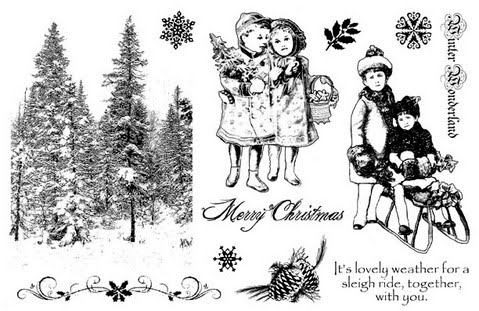
After I finished my first card I realized that the technique called for only one corner to be clipped. So I created another card with this beautiful angel from Stampington.  


I am not going to include all the stamp credits and paper credits, but if you have questions about any of them, drop me a line and I will look them up for you. :)

Onto our wonderful sponsor this week:  Technique Junkies. I am always seeing the techniques from TJ on blogs and love the different techniques that are used. 


Technique Junkies is offering a wonderful  prize for the winner of the challenge. A three-year online-only subscription. The winner will have access to the online 2009, 2010, and 2011 issues. (Valued at 29.95)

Pat Huntoon is the owner of Technique Junkies and our guest designer this week, go see what she created using the technique and colors. Her blog is Pat Stamps.

Play Date Cafe Design Team


Thanks for stopping by and look forward to seeing your entries in the challenge!

Suzz

Tag Tuesday - Calendar

I have not been able to play along in Louise's Tag Tuesday Challenge. So this morning I saw the challenge is calendars and decided to play along.  I also was inspired by Jacqueline's beautiful tag.


I have had this Maya Road stamp forever and haven't used it as it is a little calendar stamp you can use to stamp and highlight a date. I stamped it across the bottom and top and loved that it looked like a border.

The sentiment is Hero Arts. The leafy branches along the side are Hero Arts. Of course I had to add my little butterflies. The paper is Websters Pages. The woman is Rubber Stampede.

Have a wonderful day! 

Suzz

Monday, September 27, 2010

Embellish Challenge - Yellow, Black, Grey and White

I saw some beautiful cards using these colors out in blogland and they are from the Embellish Challenge to use the colors yellow, black, grey and white and to stamp a background or a pattern. 

Love the colors and the fun pictures!

I created two cards.  The first one is very me... The second one is... Well... you will see.. 


I pulled out my Damask stamp and created a pattern on the grey paper using a Judikins Damask and a new Cover All stamp from Impression Obsession which I love it looks like paint splatters.  So this card I think is very me. 

Here's my second card for the challenge:


So much empty space. Very hard for me to not add any more details. I tried to add gems and do other things to detail it up!:)  But ended up leaving the clean lines. Same splatter background with an overlaid stamp from Stampin up. The sentiment is from Cornish Heritage Farms.

There is a little frost on the berries but you cant see it in the pictures.

Hope you have a wonderful Monday!

Suzz

Sunday, September 26, 2010

Hero Arts September Challenge

Hero Arts September Challenge is Autumn or the technique of making a gift bag.  I had to create a few cards for a class I will be teaching and I used my much loved Hero Arts stamps to whip up a few of the stamps. My LSS has a wonderful assortment of the HA stamps .

Here are a few of the cards I am teaching at my LSS that fit right into the Hero Arts Challenge this month:


I love using circles as this was something that always is a bit of a struggle for me in design. I was pleased with the effect.   The background paper is Coordenations and it comes already embossed. Very pretty.


This card was inspired by a card my friend Lisa created from our stamping time together. Her card is here.


This was inspired by my box I created and I just transitioned it into a card and used some lovely Basic Grey Indian Summer papers with some stamping of the Hero Arts Starburst Lace Stamp.

Have a blessed Sunday!

Suzz

Saturday, September 25, 2010

I believe in Fairies

Simon Says Stamp and Show challenge is grunge.  They left it up to your interpretation. I take that to mean distressing up the project a little. 

I started with this:

 My daughter was using a deck of cards and when she tried to take them out she ripped the box and of course left it lying there after she was done.  I was going to throw it out and then decided to keep it for a future project.

Well when I received my Artistic Outpost stamps I also received this really beautiful set called Neverland with the most adorable Tinkerbell.  I decided she would look so cute in a little shadowbox. So I created this:


The flowers are from another AO set called Bloom and Grow. The little butterflies are actually stamped with Tinkerbell. You can't see it but her face is peeking out on the butterflies. :)

The inks are Memento Bahama Blue, Memento Rich Cocoa, Adirondack Citrus, and Versafine Vintage Sepia.

Hope you have a lovely Saturday. I am hoping to have some inky time! Yeah!

Suzz

Friday, September 24, 2010

Mojo Monday Sketch#157

I decided to play  along with the fab sketch by Julee at Mojo Monday 

Here is my take on the sketch using the ornament I created the other day. 


I like the effect of the ornament on the card and it could be popped off and used as an ornament after the recipient had enjoyed the card. :)

Of course all the stamps are Artistic Outpost Sleigh Ride and the die cut is Fleur De Lis from Spellbinders. Embossing powder is Ranger Queen's Gold. Pearls are from Memory Box.

I want to wish Julie a happy birthday! Today is a special birthday for her! Stop by her blog and leave her a birthday wish.
Thanks for stopping by...

Suzz

Wednesday, September 22, 2010

Play Date Cafe Challenge #48

Julie selected  the beautiful inspiration photo for the Play Date Cafe challenge this week:. 

I selected this beautiful stamp set from Crafty Individuals to use on my cards. I ended up creating two cards.

My first card:


Recipe for Image Panels:

  1. Stamp trees using black pigment ink and emboss with clear embossing powder.

  2. Sponge grey dye ink on bottom of cardstock.

  3. Sponge lime green dye ink on middle of cardstack to top of trees.

  4. Sponge blue dye ink on top half of cardstock and around the edges.

After I finished my first card, I decided to keep playing. I had a piece of patterned paper sitting on my desk and I wondered if I could achieve a similar effect. The paper pretty much looked like the background on my card. (I was really pleased that it worked) and I created this easel card.  


Recipe for backgrounds.
  1. Sponge Adirondack Brights Citrus all over white cardstock.
  2. Take the Memento London Fog Dye ink and drag along the edges and front of the green inked cardstock.
  3. Sponge edges with Ranger Distress Inks - Chipped Sapphire.
  4. Stamp images with Sapphire ink.
Pretty simple but love the effect of the grey ink directly applied to the cardstock in random areas.

We have a great sponsor this week at the PDCC Crafty Individuals.  They provided the Design Team with stamps and a prize for the winner of the challenge.

Each design team member selected a different stamp set. You will have to go check out what they did with the colors and their stamp set!
Play Date Cafe design team


I always enjoy seeing how people interpret and use the colors for the challenge. So many inspirational ideas! Have a wonderful Thursday!

Suzz

Artistic Outpost September Release

Today is release day for Artistic Outpost.  I was so excited and pleased to receive this lovely stamp plate in my mailbox.


This is the September release called Sleigh Ride from Artistic Outpost. I love that it  has the lovely images of children in their holiday finery.  I also love that it includes some favorites of mine (snowflakes, trees, pinecones) as well as beautiful sentiments.


These stamps are available both as an unmounted sheet of red rubber measuring 8.5" x 5.5" or  mounted on EZMount clingfoam, pre-trimmed, and stored on a printed cling card.

I was inspired to create a lovely ornament using the children:

The picture was taken with the ornament against a lovely burgandy colored paper to showcase the white transparent layer and gold snowflakes.

Recipe:
Cut the Spellbinders Fleur De Lis from gold cardstock. With the Fleur De Lis die cut I find it really helpful to place wax paper between the die and the paper you are cutting. It helps when it comes time to pull the paper out of the die.  The other big advantage is you end up with a beautiful snowflake in wax paper which looks very much like vellum! 

Layer the snowflakes on top of each other on an angle to show both snowflakes. 

Stamp the children on white cardstock  using versamark watermark ink. Heat emboss using Ranger Queen's Gold embossing powder. Cut  a 2 1/2 inch circle around the top of your embossed image.  Sponge the edges using Versafine Toffee and Memento Rich Cocoa.

Add a few Memory Box gold pearls as accents and  a little ribbon for the hoop and you have a beautiful Christmas ornament or tag.

The design team has created some really beautiful projects and cards which you can go see in the Artistic Outpost Gallery. The design team is also sharing fabulous projects on their blogs:  

Have a lovely day!

Suzz

Monday, September 20, 2010

Scenes of Nature at Christmas

I created this fun 7Gypsies printer tray to share over on the Outside the Box blog. I used all my favorite birds and trees stamps from Memory Box as well as the beautiful paper from the Mistletoe collection.


I also had the opportunity to play with some of the Design Adhesives from Clearsnap and their glitters. Very fun and very pretty.  The adhesives are 2 sided stickers. So you rub them on and they leave a sticky surface to cover with foil, glitter or any other substance you woul like to rub on the image.

I listed all the products on the Outside the Box blog or you can email me and I would be happy to share with you what I used in the mini rectangles.

Have a lovely Monday! Thanks for stopping by.

Suzz

Sunday, September 19, 2010

PDCC #47 Part II

I decided to play with the PDCC colors this morning again. :)  Challenge #47  was to use turquoise, real red, leaf green and black and white.

I pulled out another Paperbag Studios set as inspiration for my Christmas card.


Love this little Christmas tree with the music underneath. After I pulled it out and saw the music under the tree, I knew I had to pull out my CHF music background and use it in the same colors.

The paper is Webster's Pages, perfect fit for my red in the card. The birds are from a bird cube from B Line Designs. (Everyone needs a bird cube!)

Fairly simple layering of different sizes and shapes of papers. Accent the tree with some of my favorite Memory Box pearls and done!

Products not mentioned so far: Versafine Deep Lagoon, Versafine Black Onyx, Adirondack Meadow, May Arts Silk Ribbon.

Hope you have a beautiful Sunday! We are off to church and SRE and then back to clean the house. Ugh.

Suzz

Saturday, September 18, 2010

2S4Y Kazan Sketch #61

I had a little free time today and wanted to see if I could fit in Kazan's Sketch #61 at 2S4Y.

Here is the beautiful sketch from Kazan.


and here is my card:

Well I have to admit this was the easiest card I have created in awhile. I actually felt I cheated as the only things I stamped were the sentiment and the butterflies. That gorgeous paper is from Webster's page and I envisioned sneaking something in between the flowers. All I had to do was cut a slit in the flowers to fit my little verse.

I was working on something else today that was very masculine it was nice to switch it up and create something frilly  and pretty.

I hope you are having a lovely Saturday!

Suzz

Friday, September 17, 2010

Lighthouse

Happy Friday!

I had purchased a set of wooden coasters in a wooden box. I created several fun wall hangings using the wooden coasters. This particular one I used the Artistic Outpost Lighthouse from the Beyond the Sea set.


This took several layers and playing around to get this effect. :) Start with a base of Adirondack Acrylic Paint. Stamp the lighthouse Versafine black onyx. Color the image using watercolor pencils to color and re-draw the lines. Wet the watercolor with an aqua brush. When the colors are to your liking. Versamark the entire surface and heat emboss. Repeat a couple of times to give it a nice gloss. Stamp the Sentiment using StaZon Ink on the glossy surface. (If it doesn't work you can remove it using the StaZon cleaner)

Accent with twine, tulle and charms.

Hope you have a lovely Friday!

Suzz

Wednesday, September 15, 2010

Play Date Cafe Challenge #47

This week Sarah selected  the great photo and inspiration colors for the Play Date Cafe challenge.


Isn't that house so sweet with it's turquoise door and trim? .

Combine the fun color combination with the wonderful stamps (Doodles & Daters) that our sponsor provided this week and you get this:


Our sponsor this week is Paperbag Studios.  I was thrilled to learn they were sponsoring our challenge. Love their stamps and was so excited to be able to use them in the challenge.

This card has a little story behind it. My friend and fellow design team member Lisa was able to come over and spend the day chatting, laughing and inking. We had a lot of fun and laughter.  During the day we both were working on our cards for this week's challenge. The images were stamped and our papers were selected.  At that point we decided to swap cards to finish the design.   The card you see above was really a collaboration of effort between me and Lisa. Thanks Lisa!  

Paperbag Studios is offering a wonderful prize to this week's winner.  A $25.00 gift certificate!
We also are lucky to have Roben-Marie, the owner and a designer of Paperbag Studios as our guest designer  this week! Make sure to stop over and see her creation at the PDCC.

The rest of the design team created some lovely projects using the same set of stamps and colors:

Play Date Cafe design team


Have a fabulous Thursday!

Suzz

October Crafts n things


I am very excited  that I have a few things published in this month's Craft n Things. 

I was asked to create a project using Glimmer Mist and a box.  I was inspired to create a beautiful Fall box. This is what I dreamed up and it actually looked like what I had envisioned. (Doesn't always work that way for me. :)

The details on how to create this Fall box are in the October Crafts n Things.  Crafts n Things also have an on-line 30 minute card section where there are a selection of beautiful cards with instructions. 

Thanks for stopping by today!

Suzz

Tuesday, September 14, 2010

Embellish Challenge

The Embellish Challenge is a color and piecing challenge.  Here is the beautiful picture:
This week's sponsor is My Favorites Things, that inspired me to pull out my Pure Innocence image from My Favorite Things.


The pants, shirt and chalkboard are all pieced using various papers. I decided to create a 5 1/2" x 51/2" card with a diagonal fold on the front.

The sentiment on the chalkboard is from Memory Box and purchased especially for my middle daughter as she is really smart and I thought it would be cute to get the sentiment for when she does well on her grades. 

Thanks for stopping by!

Suzz

Sunday, September 12, 2010

Card Patterns Sketch 81 & Operation Write Home Birthday Bash

I wanted to combine the lovely sketch from the Card Patterns Challenge #81:


 and play in the challenges for the OWH Hero Arts party:


The party is over at the Hero Arts Flickr Group.   I created this card for a few of the challenges:
Cards of Encouragement and and 3 of a kind. :


I used all Hero Arts stamps and mixed Memento New Pear, Bamboo Leaves, Rich Cocoa dye inks along with Versafine Vintage Sepia.

Have a blessed day!

Suzz

Friday, September 10, 2010

Card Patterns Sketch #80

Here's my second post of the day... Didn't want to miss out on the Card Patterns challenge. I used the Sketch #80 as the design for my card.


The stamps are all from the Paris Exposition set from Artistic Outpost. I was really excited about using the vintage hot air balloons and the set is all about the Paris Exposition and has beautiful script and images.


The paper is from Memory Box in the Christmas Release and it is called Holly Jolly. It is the perfect background for the beautiful balloons.  The Plum Paper is from Webster's Pages. The fun trim is really a deep plum but photographed black and it is from Making Memories as part of their Halloween trims.  The border punch is EK Success. I used Memento Plum and Versafine Vintage Sepia along with Ranger's Queen's Gold Embossing Powder.

Hope you have a wonderful Friday!

Suzz

Operation Write Home and Hero Arts Bash


I have two posts today. :) One is for the Hero Arts Bash they are hosting with Operation Write Home. The party is over at the Hero Arts Flickr Group.   There will be a variety of challenges and games with fun prizes from Hero Arts! The goal is to help out Operation Write Home.  They send cards to our soldiers who can use them to send home. The challenges will run from today through Sunday.

Here are some of the details:

  • Create a card and post it in the Hero Arts Flickr group.
  • Include the tag “OWHbash” on each card you create and you’ll be entered for random prizes from Hero Arts!
  • Link the card to the challenge thread that you are playing in.  
  • The deadline will be Sunday, September 12 at 11:59pm PST. Play anytime between Friday morning and Sunday night!
  • Check back on Monday, September 13 for the prize announcements.
  • Send your cards to Operation Write Home. Shipping information here: http://operationwritehome.org/mailroom

Keep the Operation Write Home guidelines in mind:
  • No glitter. It can cause soldiers to be detectable in night vision.
  • Standard size A2 cards are preferred (4.25 x 5.5”)
  • If the card base is a dark color, please line the inside with light colored paper to make it easier for the troops to write in.
  • Include the words “Operation Write Home” on the back of each card.
  • More helpful information from OWH can be found at http://www.owhhomefrontblog.org/p/about-owh.html

Me and my fellow Apronettes are hosting a challenge called Resist and Distress.  Pretty easy... All you have to do is create a card using a resist and distress it a little. :)  

Here is my card for the Resist and Distress Challenge:

I hope to see you over there playing along in any of the challenges. It is going to be fun!

Suzz

Wednesday, September 8, 2010

Play Date Cafe Challenge #46

This week is a color splash week at the Play Date Cafe.  Julie selected  the inspiration photo:. 

Stunning photo! The color splash is where you create your project with black, white and/or grey and add a splash of color from the accent colors provided. This week you can choose one of the splashes to add to your black, white or grey. 
We have a really fun sponsor this week at the PDCC:


Creative Cuts & More is a leader in the die cutting industry. We offer a huge variety of bags, boxes, cards, labels, frames and shapes, including many that are exclusive to CC & Bazzill Smoothies, Bazzill Canvas and Metallic cardstocks plus felt, velvet paper, chipboard and acetate.
Check out our blog and the gallery at Creative Cuts & More for more ideas to inspire your creativity.


The prize is a wonderful assortment of products:


Creative Cuts & More provided the design team with some lovely wedding inspired prodcuts to create our projects from.

I chose to create a set for the bridesmaid and grooms as their thank you gift.


All stamps are  from Hero Arts. Love the new large flourish! The ink is Versafine Smokey Grey.  The pink dye ink is Memento Rosebud (my favorite pink dye ink).

The tulle has become so addictive to me. I am finding so many fun uses for it. (I confess I also picked up some white tulle to dye any color I want.)
Go check out the  other wonderful entries from the rest of the design team:

Play Date Cafe design team


Love the color splash challenges as everyone's entries are always so fantastic.
Suzz

Moxie Fab World - Tuesday Trigger - Lipsylicious

When I saw the Moxie Fab World - Tuesday Trigger from Cath this week Lipsylicious:

Which was this picture


Lip Glamour from Oprah.com.  I love the rich colors and the rows of lipsticks.   Now in parallel with that I have also just received a RAK from Savannah. Go check out her fun blog HERE.  Love what she creates as well as being a super sweet friend.  She sent me a wonderful Ippity set called A Little Buggy along with some other fun items. Thanks Sav!

Well the Buggy set along with those lipsticks got me to thinking... :)  Here is what it inspired:

I used the flower (I think?)  from the set and decided to do lollipops in the warm tones of the lipsticks. I stamped with a rusty orange, deep red and  plum edged with brown. I then cut out all my flower friends, glossed them up and added glitter! (Thanks Cath and Sav I will be wearing that glitter today all day! :)

Guess what song I have been singing all morning?  "We represent the Lollipop kids, the Lollipop kids, the Lollipop kids" from The Wizard of Oz.

I will be back tonight to share the next PDCC colors. (Which by the way, I was really close to using this weeks colors on this card and didn't even realize it until I was finished)

Suzz

Tuesday, September 7, 2010

Mojo Monday Challenge - Week 155

The easiest card to make....

Beautiful sketch provided by Julee Tilman at Mojo Monday Challenge:


Beautiful papers from 7Gypsies:


and beautiful stamps by Hero Arts.

Edited: The trim around my circle is made using the Fleur De Lis from Spellbinders. I cut out enough of the individual pieces to frame the circle. :)


Thanks for stopping by...

Suzz

Monday, September 6, 2010

Happy Labor Day!

Hope you are a having a wonderful Monday. It is Labor Day and we are sitting around doing a little house chores and lazing around. I have been busy inking it up. Here is something I was playing with:


Everything on the card is Tattered Angels. The Owl is from their stamps and the flourish in the moon is a resist from their flourish.

I had so much fun coloring the beautiful wings on the owl!

Thanks for stopping by..

Suzz

Friday, September 3, 2010

Card Patterns Sketch #79

My anniversary with my DH is on Tuesday. We will be married 19 years this year.  I had this idea to do a card for our anniversary based on a school theme. I thought it would be fun to create it like it was the front of a book cover or paper from school where you doodled about the guy you were crushing on.

When we started dating I decided to finish off collage and go out and get a job with a big company. My boyfriend/future hubby was part of the reason why I pushed myself to do that and he helped fund a little of that education. :)

So this card is for my DH.  I used the sketch from the Card Patterns Challenge #79.

Here is the sketch:


and here is my anniversary card:

The silver is all from gum wrappers. Too funny right?  I wanted to doodle more on the card like you would on your book covers and I tried to write our initials on the main heart. Decided against it after a few failed attempts. But I think it is still a fun card and he will enjoy it.

Hope you have fun plans for the weekend. I am going to try to get in some more crafty time.

Suzz

Starfish Project

Well I was very excited to have my first official guest designer post over on the Artistic Outpost blog today!  I decided to pull out my Beyond the Sea set and create a starfish card. 

I started with creating a starfish shape.  After a few sketches I decided to trace a circle from the bottom of my glass onto white cardstock. I free-handed a leg of the starfish. I used the starfish stamp and a real starfish (dried out) from the kids bathroom as my inspiration. After I had created one leg, I cut it out and used it to trace the outline on the circle five times. That became my template.

Here is the starfish:


Recipe:
  1. Cut out starfish shape.
  2. Stamp Image of the couple using brown pigment ink. Color using watercolor and distress edges with brown dye ink.
  3. Stamp multiple shells and sea creatures using brown pigment ink. Sponge with Scattered Straw Dye Ink. Sponge edges with brown dye ink.
  4. Stamp music using brown pigment ink repeatedly across starfish.
  5. Sponge gold dye ink across entire starfish.
  6. Sponge edges of starfish with brown dye ink. Sponge using sea sponge brown dye ink to add a texture.
  7. Add touches of light blue to starfish by coloring light blue and blending with waterbrush.
  8. Versamark all images and starfish and heat emboss using clear embossing powder. Repeat if needed to get smooth surface.
  9. Tie twine around surface of starfish.
  10. Layer couple in boat and other images onto starfish using pop dots and glue dots.
  11. Accent clams with light blue pearls.
Now after that was done..... I decided I wanted a backdrop for my starfish and I created this:

I love the effect of the tool as it looks like water rippling and added a few pearls for the bubbles. I didn't have a frame so I will need to get one to put this in so I can hang it up. It goes with the decor in the den perfectly.

I hope you enjoyed the little starfish!

Thanks for stopping by.. Have a wonderful weekend!

Suzz