Tuesday, August 13, 2013

Happy Birthday

I have had so much happy mail this past week. I received two ATC swaps, new stamps, and am waiting for an order of more art supplies.  One of mail packages was from Darkroom Door with some of the stamps from the new release. I love the sketch from Mojo Monday this week and decided to ink up some of those new stamps to create a birthday tag.


I had created the background on the tag previously using orange paint and embossing paste.  I inked up the Darkroom Door Eclectic Stamp -  Butterfly  with Ranger Distress inks - Spiced Marmalade and Barn Door and stamped it on tissue paper. I clear embossed it to give it a sheen and some texture.  I realized the colors worked beautifully with the tag and decided to mix them together.  The sentiment is from the new Essentials 12 Collection - Simple Sayings.

I know this will make a great birthday card so I am going to add a back to the tag and turn it into a tag card. I am always looking for birthday cards to give to my girls when they go to a friend's for a birthday party.

I actually had finished the tag matching the sketch more accurately with more layers of lace going higher up:
What do you think?  I took pictures and then decided to pull off the few layers and go with only two on the bottom.

The Mojo Monday Sketch:
I might have to play with this sketch again as I love it!

Have a wonderful Tuesday!

Suzz

Sunday, August 11, 2013

Marriage


I think back to when  I first started stamping and sharing on-line and I would see the most beautiful shapes on-line and wonder how they were creating them.  Then I decided to make a big investment and purchase my first die-cutting machine. Now I have been through two machines and have a big collection of  beautiful dies. This week at the Monday Challenge at Simon Says Stamp the challenge is all about making the cut.  You can use dies, punches, die-cut shapes, or stickers.

My project was inspired by the leftover cardstock from a die cut making a frame. 
 I with a frame and decided to create a wedding a mini-album.

Here are the pieces I started with: 
 I took a few scraps of cardboard and cut the center out using the die. I painted them white.

 I cut two pieces from metal cardstock that fit the same size and opening.  I embossed them using an embossing folder and then painted them white.


 I attached a hinge with brads to hold the two pieces together and added a coat of white paint.

I backed the frame with a sheet of white cardstock and stamped the flourish using a soft plum color.  The inside was covered with metal cardstock and doilies and lace.  

 The back side looks like this:
 I left this open to add photos:

Products:  Impression Obsession - A Good Marriage , Spellbinders Labels 4, ProvoCraft Cassies Brocade Embossing Folder, Memory Box - Darla Butterfly Die, Prima Flowers, PaperArtsy Metal Card, Tattered Angels - Purple, Tuscan Sun, Hero Arts - Leafy Vines, Memento Sweet Plum, Ranger Archival Ink - Black, Bo Bunny Doily, Hero Arts - Classic Tea Rose, Claudine Hellmuth White Paint


Come join in the Simon Says Stamp Monday Challenge for a chance to win a $50 Gift voucher for Simon Says Stamp.

Have a fabulous day!

Suzz

Wednesday, August 7, 2013

Birthday Wishes

I had a little free time this morning to play and decided to play along with the Moxie Fab World Challenge - Birthday Creations - Birthday Card and the City Crafter Challenge - Polka Dots.

A quick card with a smear of paint across a pretty yellow polka dot paper.  I stamped the Stampendous - Nestled Bird with Archival ink.  I then colored him using STAEDTLER watercolor Karat Aquarell pencils with a waterbrush.

I am trying to build up my birthday card stash. The girls are always running of to friends parties and looking for a card to grab. This won't meet their criteria but will be perfect for my sister or my MIL. 

Have a wonderful day!

Suzz

Sunday, August 4, 2013

Paris

I love going to the mailbox and seeing what awaits me. There is nothing more exciting that receiving a handwritten piece of mail.  The challenge this week at  Simon Says Stamp Monday Challenge is airmail.  It got me thinking about my various travel stamps.


My first thought was this wonderful Hero Arts Around the World stamp that I rarely use but really love.


I misted the background of the tag with a touch of brown spray.


I stamped the background repeatedly with the postage using black ink.  I then added color to sections using my watercolor pencils and waterbrush.

I decided to die cut a few shapes and wanted to die cut the Eiffel tower.  I thought it would be fun to die cut it from travel themed paper tape.

I wrapped cardstock with paper tape.


I die cut the shapes from the tape. I then cut the clock from white carsdtock and inked it up with the Ranger Distress Stain - Aged Mahogany .

I added a few strips of the paper tape to the background before attaching the die cuts. I smeared Aged Mahogany over the surface of the Eiffel tower and sponged the edges with black ink.


 I added a gem flourish, leaf, and multiple flowers to finish my focal point with the letters for Paris around the edge of the clock.

Products:  Around the World, Tim Holtz - Sizzix Die - Eiffel Tower Die, Tim Holtz Sizzix Weathered Clock Die, Darjeeling Petaloo Flowers, My Moments Flowers,  Cavallini & Co - Paris Paper Tape, Prima Wood Engraver Button, TIm Holtz Idea-Ology Accoutraments, Pink Paislee Copper Luxe Letters, Ranger Distress Ink - Aged Mahogany, StazOn - Black Die Ink, Ranger Archival Ink - Coffee, Mister Huey - Chocolate Brown Spray, Aged Mahogany Distress Stain


Come join in the Simon Says Stamp Monday Challenge for a chance to win a $50 Give voucher for Simon Says Stamp.

Thanks for stopping by!

Suzz

Saturday, August 3, 2013

Journey

Lot's of splotchy fun is happening today on my blog. I was inspired by Tim's Tag of August.  I pulled out a set I haven't used before with all the different traveling images to create my tag.

 This tag took three tries to get it right. Those masks got some serious workout.  I started with smearing  weather wood ink and Vintage Photo ink onto the craft mat and added spritzed water.  I dragged the tag through it and heat set it and then picked up the spots by laying the tag on the ink.

I stamped my masks and cut them out. I then stamped the card with black archival ink.  I masked it and stamped the filmstrip.  I stamped all the images using black ink and highlighted them with STAEDTLER Karat Aquarell watercolor pencils.

 I wanted to play with different color combos and tried out a new yellow distress paint with orange distress paint.

 I mixed the persimmons with the seedless preservers and made a great color combo that I think I will use it for a future Halloween project.

I liked that color combo so much that I created another full piece of cardstock using the same colors.


.Have a wonderful Sunday!

Suzz

Friday, August 2, 2013

It's Summer Time

Today is the grand finale to the week long hop with the Stampendous DT and the Dreamweaver DT.  If you have missed out this week go over the the Stampendous blog and hop along.

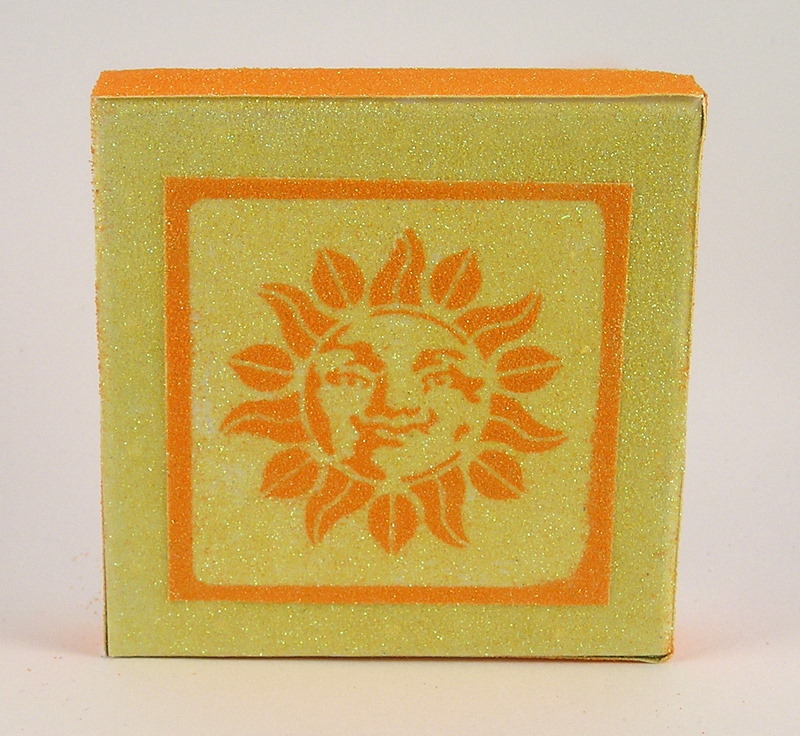
I decided to use the glitter and create a gift box using the sweet sun stencil.

I covered the surface of the box with the double sided sticky paper and applied the orange and yellow glitter.   I rubbed the stencil with a soap to prevent the surface from sticking to the sticky paper. I then sprinkled the ultra-fine orange glitter over the surface.  I then lifted the stencil and sprinkled with the yellow glitter. I then cut it down.  I layered the sun onto the glittered box.


To go with my gift box I created a coordinating card to create a gift set:

 I originally had planned to create charms that would be used on a bracelet.  I Sponged StazOn ink through the stencil onto shrinky dink. I cut circles using circle dies and punched a hole in the top. I then held them with my stylus and heated it up with the heat gun. After it cooled down I added a coat of yellow paint on the back of the charm to make the sun pop.  I tried them on a bracelet which didn't look how I wanted them to.  I was inspired by those little sundresses my daughters used to have with charms dangling along the top half of of the sundress. I paired the charms on my card with the lovely Stampendous Jumbo Cling  border stamped in orange. I added the birthday sentiment from the Stampendous Soaring Sentiments in the bottom corner.

I was having so much fun with the stencils and glitter I decided to create a mini card.


I used glitter to color my scene. I used a series of post-it notes to cover the stencil areas I didn't want to cover with glitter.  I mixed in the micro glitters from Stampendous.  Ice Blue Micro GlitterRoyal Ultra Fine Jewel Glitter and   Silver Micro Glitter.       Sunshine Yellow Micro Glitter, Orange Micro Glitter, Black Micro Glitter.

Onto the important details:

DW-STM banner 7-13

The fun prize packages:
DW-STM_July '13 prize badge

There will be  two prize packages given away  to two randomly selected comments on the posts (of both teams) Monday through Thursday this week, then another prize package for a randomly selected winner from comments on Friday!

Hop along for tons of inspiration from both teams: 


Thanks for stopping by! 

Suzz

Thursday, August 1, 2013

Any Way You Fold It

Buttons over on the Frilly and Funkie blog showed how to create a pocket folder with a piece of pattern paper. The current challenge sponsored by Frilly and Funkie is Any way you Fold It. I took the fold that Buttons used and created my version of the pockets.

 I started from some beautiful soft pattern paper. and folded per the instructions on the FF blog.  I then added a touch of doily to the folds.  I distressed the edges with brown dye  ink. I cut multiple tags for the inside. 
 I stamped the Artistic Outpost - Flower Market Pansy using Ranger Archival Coffee ink and colored the flowers using watercolor pencils.

Products: Ranger Archival Ink - Coffee, Doily, STAEDTLER Karat Aquarell watercolor pencils, Artistic Outpost - Flower Market, Ephemera Background, Songbirds

Thanks for stopping by!

Suzz