Sunday, June 14, 2015

Imagination

This week the challenge is "Don't Cut just Paste" at the Simon Says Stamp Monday Challenge this week.  Bring out your embossing paste and play!  I decided to use a background that I created with translucent paste.   

I pulled out my backgrounds and a bunch of bits and pieces.

I started with two tags backgrounds and a variety of bits and pieces using a layering stencil and Wendy Vecchi's translucent embossing paste.

While the paste was wet I laid the gold leaf on top and left it to dry.  After it dried I rubbed off the excess and misted the surface until it was saturated.

I then stamped he butterfly using gold ink and cut it out.  I used a resin face and touched it up with gold ink.  I added a golden stem and the gold ribbon on the bottom and the top. 

Products:   Ranger Distress Stain Spray -Peacock Feathers,
Gold Leaf Sheets, TIm Holtz - Idea-ology Remnant , Tsukineko Golden Glitz Delicata, Darkroom Door Eclectic Butterfly, Teresa Collins Wood Pieces (I used chipboard but these are comparable) , Lattice Work - Layering Stencil, Wendy Vecchi Translucent Embossing Paste, Prima - Figurehead Relics, Gold Trim. 


Simon Says Stamp is offering a $50 gift voucher to a randomly selected participant in the challenge, come play along!


Thanks for stopping by!


Suzz

Thursday, June 11, 2015

Coffee & Seahorses

Tim's Tag for June features a cool coffee cup and a fun plaid background.  I ended up with two very different projects inspired by Tim's tag.

 I loved the plaid background on Tim's tag and had two new ink pads that I wanted to play with. I used them to create my plaid background.

I sponged on the two colors in one direction and then flipped the stencil and sponged the next direction. To grunge it up I sponged on Vintage Photo around the edges and sprinkled the distress ink across the surface.

I decided to use the seahorses with the layering stencil doily background and abandoned coral.  For the card I had a request from my son to create a coffee themed card for his girlfriend's birthday.    I had one coffee cup die cut and used it for the card.   My coffee cup is inspired in design by Tim's tag.
I added a birthday candle for the straw and had to hand cut my plastic cover but I like the transition to a birthday celebration.

Thanks for stopping by!

Suzz

Tuesday, June 9, 2015

Discover

Do your stamps speak to you?  A good friend of mine and I laugh about this.  Mine do inspire me to put together a certain style or theme.  It is much harder for me to take a cute stamp and go a different path.  Today's card was definitely inspired by the main image.


 I started with this leftover piece of cardstock with alcohol inks splattered and smeared over the background.  I knew I wanted a strong image to place amongst the varied background.


I specifically asked my LSS to order the Brett Weldele images from Stampers Anonymous as they are handsome gents with strong features and lines.  I decided to place him in the midst of the alcohol splatters.

After I stamped him (using StazOn ink as the paper is glossy) I decided to mix in stencils with Wendy Vecchi black Embossing Paste.  I also used a few rub-ons on the background.

I came back and added my metal accents and a touch of tissue tape. I had fun playing with this image.  I am entering this in two different challenges: Mixed Media World - Vintage and Anything But Cute - Make it Masculine. 

Thanks for stopping by!

Suzz 

Sunday, June 7, 2015

April Showers

April Showers brings May flowers. We have been in the midst of a shower of flowers.  With two girls having two graduations and having multiple awards nights we have been bringing flowers to a variety of events.  The Simon Says Stamp Monday Challenge challenge this week is plants and I decided to use this as an opportunity to create some paper flowers to present to my daughter.  


Here is the finished picture with a few gift cards attached.  Saved on the flowers and bought her a few gift cards which she was thrilled with.
I have to admit that this was a bit addictive and I ended up with two bouquets of flowers in a variety of sizes.

You start with tissue paper and fold it into an accordion fold.  The most important thing is to have enough sheets of tissue paper so you get a nice full flower.  The rest can be varied (Length, Edges, Colors)

After you have folded it you will die the tissue paper and then wait, wait and wait some more to dry. I did use the heat gun to speed along the process but I let part of it dry overnight.

Once that is done you will need to add a tie in the middle. I used a light wire to tie the middle.

You will trim the edges.  On his one I chose to cut a rounded scallop on the edges and then cut out a little divot

You pull up each layer of the tissue paper up to the center from each side. This flower ended up not having enough folds and tissue paper so it didn't make it into the bouquet.

Here are a few other samples of flowers;


This was one of my favorites and ended up being quite large but a great focal flower for the center of the bouquet.

This flower I cut the ends into a point :
Less petals with a scalloped edge on the petals:
A fuller version:

To finish off the flowers I attached flowers stems by using the leftover wire on the center.  I sprayed some tissue paper to create my wrapping on the bottom of the bouquet.  I stamped on the gift card holder with some sentiments telling her how proud we were of her accomplishments.

Products: Ranger Archival Ink - Black  Ranger Distress Stain Spray -Fired BrickMustard Seed, Barn Door,  Spiced MarmaladeCracked PistachioFlower stems , Simon Says Stamp - More Sketchy  Banner Simon Says Stamp - Tilted Banner Sayings


Simon Says Stamp is offering a $50 gift voucher to a randomly selected participant in the challenge, come play along!

Thanks for stopping by!


Suzz

Saturday, June 6, 2015

Tropical Birthday

I haven't played along in the Hero Arts Blog challenge in forever and a day!  But I just received one of their new layering stamps sets which allows you to stamp the different layers in different colors and decided to play along in their fun "Tic Tac Toe" challenge that is going on all month!


 I played around with the colors to try different shades and after a few different attempts I ended up with something very similar to the shades used on the packaging. :)  I went browsing at Lin's blog as she is always so inspiring with the flowers and came up with this design:

I decided to cut out the flowers and layer them onto an acetate card.  I went to the crafty store for some tape refills and came out with some fun bamboo washi tape which had me die cutting the letters from it and then I used the Hero Arts Chevron background stamp on the bottom of the cardstock with the same green used on my leaves.

 I followed the tic tac toe line of  "Background Stamps", "Die Cuts", and "Birthday".

The Hero Arts Challenge is all month long and they have 4 prizes up for grabs.

Products:  Hero Arts Color Layering Hibiscus,  Hero Arts Cling Chevron,  Simon Says Stamp - Birthday Die, Bamboo Washi Tape,  Ranger Distress Inks - Shabby Shutter, Peeled Paint, Barn, Mustard Seed, Rusty Hinge, Ranger Archival Ink - Black

Happy Sunday!

Suzz

Thursday, June 4, 2015

Royal Welcome


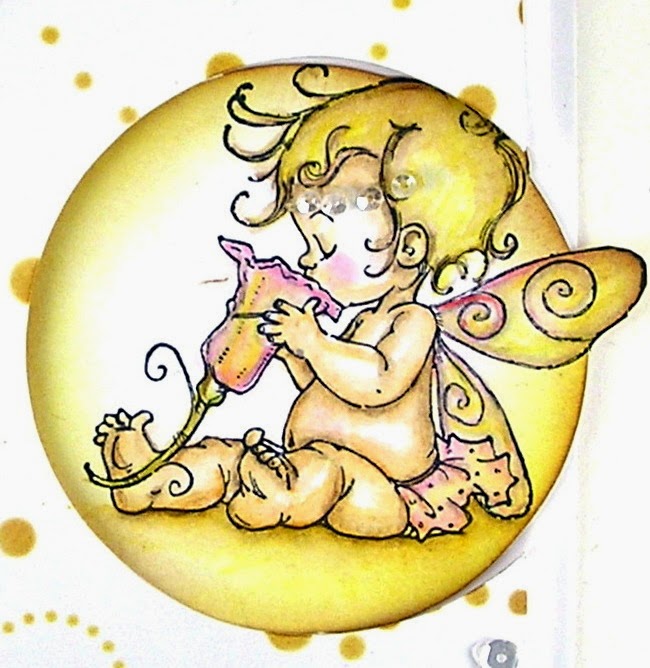
A quick share today of a sweet fairy from Penny Black celebrating the arrival of a baby girl.  This was inspired by the arrival of the princess Charlotte and the Mojo Monday Sketch #400

I love these little fairies and had fun coloring her with my STAEDTLER Karat Aquarell watercolor pencils.  I decided to frame her out on the inside of my card. 

I flipped the sketch and left a little room for my sentiment.  I cut a partial circle to show her off and then used the Simon Says Stamp Stencil to add the circles on the front sponged with fossilized amber and vintage photo.

The sketch:


Have a happy Thursday!

Suzz 

Tuesday, June 2, 2015

Fly

How about a little pink, lilac and more pink?  I was inspired to play along in a few challenges the Words & Paintery Color Challenge and the Mixed Media Monthly Challenge #13. (Think Pink) 

I have to tell you that the background started from a ribbon I was misting pink.  I was waiting for it to dry and decided to take a scrap of cardstock and kept pressing the cardstock on the ribbon until the surface of the cardstock was covered.  It reminded me of the sponge painting we did on our basement of course not in pink. :) 

When I was done I thought it made a pretty soft background and decided to use that as the base for the challenges.  I then stamped the Prima Finnabair image in black added some touches of lilac with my STAEDLTER watercolor pencils.  I then looked over and saw my hot pink sequins and thought they would be the perfect whimsical touch. 

They were all glopped together because I had used them on another project glue dots on and ended up pulling them off the other project and put them back in the container. when I pulled them out and placed some around the card I loved the overlapping effect and decided to use them the way they were. :)


That's all for me today!  Have a great one!

Suzz