Showing posts with label Heidi Swapp Color Shine. Show all posts

Friday, February 5, 2016

Grateful Heart


Hello!  There is so much inspiration out there and I used the Vintage Journey's Industrial Challenge with the Mixed Media Monthly Glitter challenge to get my creative juices flowing.


I have to admit that I had this background laying around for a long time and it was calling to me to use it.  These were the last bits of the mist so I got a ton of shimmer from the gold left in the bottles and I laid down salt to help get the pooling of the color in a crackle effect.  I looked at how the mists had pooled and saw a heart shape. 
 I decided to use that shape and used a watercolor pencil to hand draw a heart shape to emphasize the pooling of colors.  I blended it with a waterbrush and added a mix of blue and brown watercolor pencils.
 I then  used the Stampendous Luxe Mix which I have to say is one of my favorite products because they have mixed up the mica flakes, and glitter to give a beautiful mix of texture.   I sprinkled it randomly over sections which already have a high concentrate of the glimmer from the mist.

 To add to my industrial feel, I stamped a bit of the definition stamp from Stampendous over the surface and highlighted it with the monocle and a pin to clip it on.

I found a lovely sentiment in the Tim Holtz Idea-Ology stickers and some tissue tape for texture.

Products:Heidi Swapp Color Shine, Tim Holtz Idea-Ology Monocle, Pin, Tissue Tape, Small Talk, Stampendous Gold Luxe Mix, Stampendous - Dream Text Stamp


Hope you have a wonderful day!

Suzz

Sunday, October 18, 2015

Silver and Teal

Hi!  I am playing along with Linda's (The Funkie Junkie) Twelve Tags of Christmas - Week #3.  The challenge she hosts is sponsored by her boutique (The Funkie Junkie Boutique).  Her tag this week uses the cool knit sweater inspired dies from Sizzix.

I didn't have the die that Linda used.  Instead I thought about how I could replicate the look and feel of Linda's tag.  I went through all my stencils looking for ones that would work to emulate Christmas inspired patterns.
I wanted to have my background shimmer similar to Linda's so I pulled out a few Color Shines (Silver and Gold) and on my way to those I spied the pretty teal color.  I was looking at red sprays but none of mine give me the red I wanted so I decided to go the teal and silver route.

I masked off the tag with painters tape so it would lift off after I finished stenciling my stripes of different patterns. I then used scrap cardstock to mask off the other areas and I stenciled with white embossing paste my various patterns.  I did have to have drying time in between depending on the size of the stencil.  After I finished I sprayed the entire surface with the silver shine.

I came back and added in the teal spray in the areas that were stenciled.  This required masking again to keep the blue in the stenciled areas.

I then die cut a deer from a metallic paper and embossed a stamped music image onto the surface.  I finished him off with some antlers from Christmas sprigs purchased last year.

Products: Memory Box Stencil, Tim Holtz Layering Stencils, Memory Box 12 Days of Christmas, Sizzix Deer, Hero Arts Joy to You, Heidi Swapp - Teal, Silver Color Shine

Have a blessed Sunday!

Suzz


Sunday, August 30, 2015

Color Blocking


I love color combinations and how some colors you think won't work together perfectly complement each other. (Kind of like some marriages!)  Our challenge this week the Simon Says Stamp Monday Challenge is to use a trio of colors.  You pick the medium and the colors you want to choose!


I am a huge fan of Project Runway and so happy it is on again and I get to watch every week.  One of the techniques they always talk about is color blocking and I decided to use that idea with my trio of colors.  I am going to walk you through my design process a little because it always goes sideways when I get going.

Here is my inspiration picture from pinterest with the color trio I started with:

You can even see my notes and what ideas I had. Sometimes I do this type of brainstorming watching t.v. and looking through magazines. (Gasp) I do love my magazines and flipping through old issues is one of my favorite things to do.

I liked the idea of the colors and the blocking so off to try it out... 


First I cut masks in the sizes I wanted my colors to be and used those to mask off sections along with other bigger scraps of paper.

Then I placed them over the areas to be protected and sprayed the sections the colors I wanted.

Here are all the different masks and papers I used in trying this out. You have to have dry pieces so they lay flat and cover and keep the edges sharp. The first sample you can see I had some bleeding of mist.  I must have done about 10 different versions of these with a variety of colors as I didn't like the colors I started with.
I even ended up with this version with a mix of mists using a stencil overlay.
After misting the sections I then came back in with the white gel pen to clean up the edges.  Then I played around with stencils. This was a failed attempt with a chevron using a pearls paint in the stencil and I didn't like how soft the effect was so I scrapped it. As well as the misting that bled into my coral area. :)
This was the original colors I tried and ended up messy so I tried stenciling over the top. I wasn't too happy with this either so back to the drawing board.
Finally I got several patterns with different stencils on the blocked areas that I liked.  I used embossing paste over the teal areas with a beautiful stencil.  I used the coral dye ink over the yellow areas with a stencil.  I used a coral dye ink over the lighter salmon color background and a stencil.  I finished the edges with white gel pen.
To accessorize I spritzed some paper and cut out some banners and butterflies.

For the pieces I didn't use they get kept and cut up for other projects if I decide in the future. I hope you enjoyed the wandering I did on my cards.


Products:   Heidi Swapp Color Shine -  Salmon, Patina, Mustard,      Wendy Vecchi - White Embossing Paste, Heidi Swapp Butterfly Stencil,     The Crafters Workshop Stencil - Mini ArtRanger Distress Ink - Abandoned Coral, Buttons, Simon Says Assorted Sequins,   Memory Box Butterfly Vine Stencil, Pearl,  Memory Box - Heartwood Stencil, Vellum, Stampendous Happy Birthday, Copic Marker - Yellow,  Memory Box - Vivienne (I see this is out of stock but there are so many gorgeous butterflies look at the Memory Box Die Butterflies and you will find another you fall in love with!)  I was lucky enough to be part of Dave's MB design team and all of his dies cut beautifully!

Come join in the fun and splash in some colors for a chance to win a Simon Says Stamp  $50 gift voucher!


Have a wonderful week!
Suzz

Friday, July 24, 2015

Everything is coming up Daisies!

How about a bouquet of daisies!
I created a lovely shimmery background created Heidi Swapp Color Shine sprays.  I then used versamark to stamp my flowers and heat embossed them with white embossing powder. I layered the velum over the corners and stamped the sentiment using StazOn ink.

Products: Darkroom Door - Eclectic Daisy, Darkroom Door - Melody, Stampendous - White embossing powder, Versamark Watermark Ink, StazOn - Cherry Pink Ink,  Heidi Swapp Color Shine Sprays

Suzz


Wednesday, July 8, 2015

Food Colors Part II

Back to the rest of the food colors... Again I was pulling out some of my favorite stamps of all time that I haven't used in years. :O

My first food color combination is Eggplant and Ginger.  While watching the cooking shows I was surprised to see that the ginger was a pretty pink color.
 I sponged on the top half a mix of Memento Soft Plum and Lilac.  On the bottom I started with Angel Pink but added Rose Bud into the mix.  I tamped the pussy willows and added highlights with the white gel pen. I also splattered watered down acrylic paint over the surface. I added a layer of splattered goosebumps to add darker water splotches which have a nice sheen to it in the light.  

The next colors were Lemon and Carrot:
I used the layering stencil and sprayed the yellow mist first and then did the orange at an angle to only mist it to the inside of the stencil.  I used Heidi Swapp Color Shine.  I then used the Idea-Ology Rub-Ons Botanical to add the touch of music and words.  I stamped the Stampers Anonymous Cupid over the top and added a touch of pink watercolor pencil shading to his body.  I then punched a bunch of hearts to add the hearts to the background.

Next up is Grapefruit and Cherry

I stamped one of my all time favorite Stampendous stamps the Ranunculus.  The inks were a splattering of white acrylic watered down paint over the background. Then Heidi Swapp Color Shine (soft pink) and then the Dylusions Cherry spray splattered over the top.

The  finish with Blueberry and Plum colors: 
 The inks were the Ranger Distress Stains (Lavender and Broken China).  The image is Stampers Anonymous and the letters on either side are Memory Box.

There is one more food collection of salt and pepper which I have all kinds of ideas for so we will see what I end up with.

Have a fabulous day!

Suzz

Friday, December 5, 2014

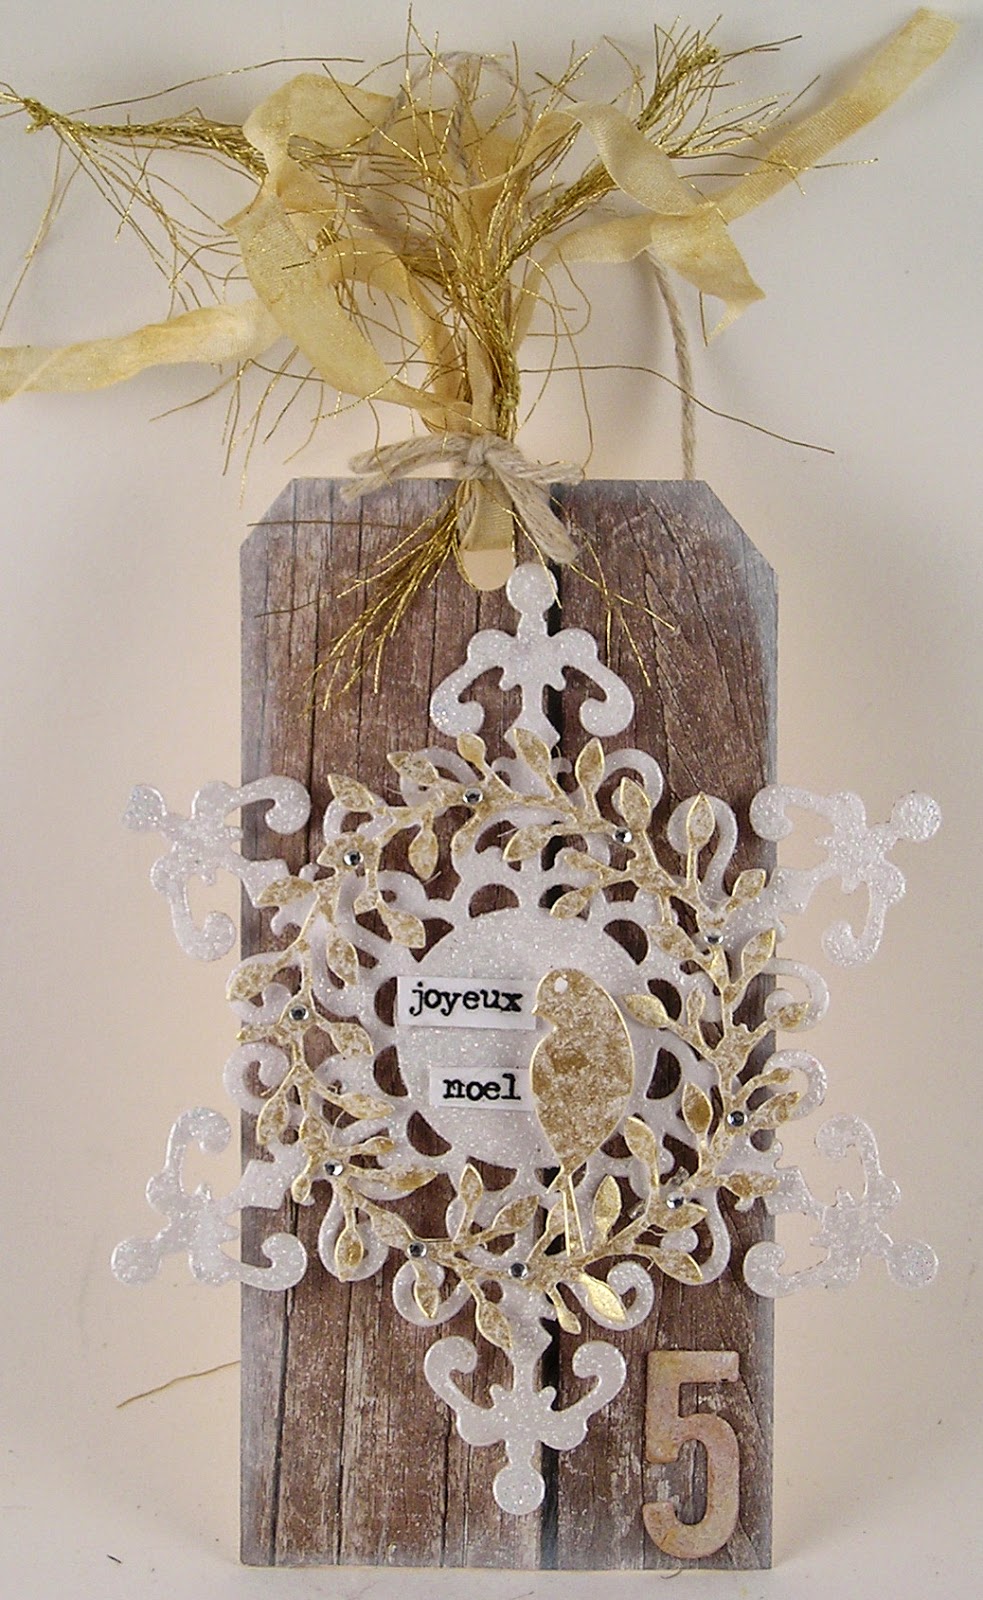
Joyeux Noel


A golden tag or day # 5 of the birds of Christmas. 


A scrap of wood grain pattern paper, a leftover snowflake and a freshly cut wreath and bird simply misted with some gold spray and assembled in layers.

The snowflake is covered in glittery embossing powder.  I smudged the edges of the tag with white ink to soften them.  The dies are sizzix and Memory Box for the wreath and bird.

Have a lovely Friday!

Suzz