Showing posts with label Our Daily Bread Designs. Show all posts

Saturday, February 11, 2012

CR84FN48 - Clovers and Bees

 Today is a new challenge at  CR84FN.   The colors are  lovely and remind me of spring.


I used the sweet Our Daily Bread Designs Simple Things set to create my card:


I stamped the Honeycomb background using a purple dye ink onto the background of two panels. The clover was stamped twice using gray Versafine. The image was colored using watercolor pencils and a waterbrush.  The sentiment is from the same Simple Things set and is stamped in black ink. 


Here are the beautiful colors:

For all the details on the challenge this week go to the CR84FN blog. 

Please visit the wonderful CR84FN Design Team:

Deborah Frings * Sue Lelli  * Andrea Matthews *  Stephanie Kraft * Suzanne Czosek (me)  *  Heather Jensen * Mona Pendleton  * Lisa Somerville * Monika (Guest Designer)

Thanks for stopping by!

Suzz

Tuesday, January 17, 2012

ODBDLYLS13 - Faith & Love

The ODBDLYLS13 Challenge this week is to use a lovely inspiration photos with hues of blue, grey and a pop of red.  I  have this lovely new set Never Give Up from Our Daily Bread Designs that has this beautiful cross which had me pulling out some old photos of my uncle's first communion. 


The picture is of my grandfather, grandmother, my mom (in the adorable coat and hat) and her older brother and younger brother.  She actually had two more brothers who weren't born yet. :)

I used that as my focal point and scattered the cross across the background with touches of blue glimmer mist.  The sentiments are from the ODBD God's Love set and Faith.

Products: Prima, My Moments, Recollections flourishes, Ranger Dye Ink - Stormy Weather, Ranger Archival Ink, Glimmer Mist - Jazz Blue, s and lace trims.

I decided to create a second layout based on the inspiration using some pictures from my mom's first communion.

 I used the ODBD sets used include: Never Give Up, Brocade Background, Sweet William Small, and Easter Blessings.

The flourishes are Zva and the paper is Enchanted by Bo Bunny. The background is a mix of stamping the brocade background and smearing white paint and sponging blue dye ink.

The inspiration photo:

For all the details of the challenge go here.

Happy Tuesday to you!

Suzz

Thursday, January 12, 2012

Butterfly Love

I love my butterflies. I was happy to pull out my new ODBD butterfly sets and make a card for the Fashionable Challenge #12 - Anything Goes using your New stash and the Moxie Fab World - Cool Tools Week - Die Cutting.


I started with a background created on a 8 1/2" x 11" piece of white cardstock.  I stamped the background using ODBD Honeycomb background  using Ranger Archival Ink Coffee. I inked up the stamp and then used a baby wipe to wipe off portions of the stamp before stamping to give an uneven effect on the background.  After I finished stamping the entire surface I sponged white acrylic paint across the surface.

The background was cut and distressed with a distressing tool and brown dye ink. Stamp the butterfly flourish using Versafine Toffee and Ranger Archival Coffee ink on the background.  Stamp again on a another piece of the honeycomb background.  Stamp the butterflies using the gold ink and overlay the details with the brown ink. Die cut using the butterfly dies.  Stamp the sentiment using the brown ink. Cut and distress edges.

The butterfly dies, stamps and sentiment are all part of the ODBD Gods Love. 

Have a wonderful Thursday!

Suzz

Saturday, December 31, 2011

CR84FN45 - Never Stop Going

 Happy New Year!  We are welcoming in the new year at CR84FN with some bright and bold colors!  I used the Card Patterns Sketch #146 for my layout.


I was lucky enough to get to play with the new Our Daily Bread Designs -  January Release.  There is this fantastic grunge Butterfly image with coordinating die and background stamp. 

I started with an ink based background using Rusty Hinge re-inker and Tattered Angels Glimmer mist.  I spritzed the glimmer mist onto the craft mat and dripped in the re-inker.  I then used my plastic ruler to smear the two together on the craft mat. I then pulled out white cardstock and dragged it across the inky mat to pick up the colors. 

At the end of the smears there are always drips and drops of colors and I pick those up with a new piece of cardstock.

The main image was stamped over one of the pieces I created in my inky process.

The butterfly image is stamped on the inked background using StazOn Azure.  I then re-stamped the butterfly only in Rusty Hinge.  I stamped the overlay details of the wings of the butterfly on acetate using the StaZon Azure ink. The die cut will cut the shape of the butterfly so I was able to die cut all my butterfly pieces.

The backgrounds were created by stamping the small butterflies using Azure and smearing over it with white acrylic paint. The second background piece is from the ink smearing.  The lovely sentiment comes in another new set being released this week at ODBD.

The CR84FN challenge is back to the regular schedule which means this challenge will run for two weeks.  Here are the beautiful colors for this week. The pictures are provided by  Deborah Frings

For all the details on the challenge this week go to the CR84FN blog. 

The wonderful CR84FN Design Team:

Deborah Frings * Sue Lelli  * Andrea Matthews *  Stephanie Kraft * Suzanne Czosek (me)  *  Heather Jensen * Mona Pendleton  * Lisa Somerville *

Happy New Year!

Suzz

Friday, December 30, 2011

A Year in Review

I love when people do a year in review as it brings back beautiful projects they have done. I decided to go through the months and grab some of my favorites from the year. Disclaimer... This is a really long post! Lot's of pictures and I hope something enjoyable to wander through... I love seeing all the different styles, techniques and fun things I learned this year. 

I created this back in January for Memory Box.  I love the layers of flowers, stamping and embellishments. I looked through my January folder and it was 70 percent pink and gray color combinations. :)

For this card I remember using up some scraps of beautiful black, grey and white papers with creating a shimmery heart as my focal point.  The verse (Verses Rubber Stamps)  is one of my favorites and I must have used it so many times this year.


This card was created for the Moxie Fab Challenge to use tissue tape in an innovative way.  It didn't win but still is a favorite of mine as I loved how the copics colored on the tissue tape!
The next was my blog header created in the spring/summer which I get to use some of my favorite flowers and butterflies from Hero Arts.

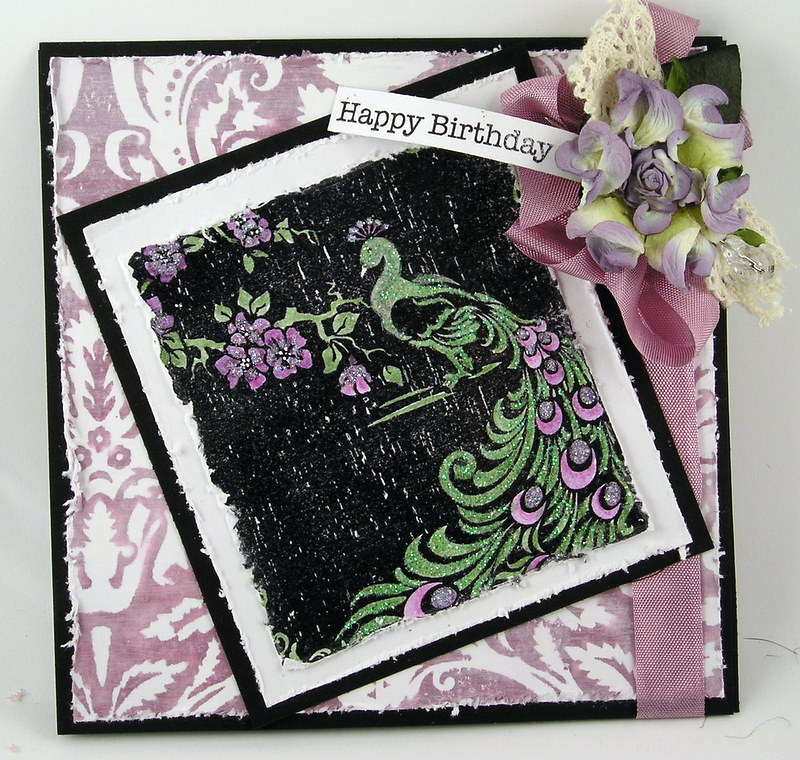
I love this background stamp from Hero Arts and love adding color to the peacock and glitter!

I am a big fan of the Lucie Attwell images from Artistic Stamper and had to include one of my cards with with one of her sweet images:


I was able to play with this lovely butterfly bush from the Faith set at Our Daily Bread and decided to make a die cut easel card and I loved how this design turned out:
This was a piece of lovely pattern paper which I mixed some Hero Arts and Verses Rubber Stamps together to create a summery flowery scene. This was another quick and easy card.  I wasn't sure about it when I was done but it grew on me. : )


This card started with an unusual sketch with two circles. The sketch inspired me to use the Artistic Outpost timepiece as one of my circles and a similar AO image should be used in the second circle.
The next piece uses a Sparkle Rubber Creations image on a cute bookmark.  My girls loved this!


This one was fun for me as I love designing small grids and blending the colors, images and sentiments together into a hopefully cohesive card. 

The next was a set of three bird houses which were very fun to create!  I love the color combination on this birdhouse and will probably re-visit the birdhouses again.


This one was a struggle and so not my usual style. I was pleased with how it ended up and we gave this to my daughter's teacher for her Christmas gift and she loved it as she rides a motorcycle and has actually rode her motorcycle to some of the places on the map! 

The next was a card using the Whimsical Melange plate from Artistic Outpost. The plate has these wonderful house shapes and they are perfect for birds as well as frames for other images. I enjoyed the unusual design along with the litter banner around the circle.

This was created at the same time and I love the ruler in that plate and decided it would make a fantastic background.
This next card was a easy design just a leaf layered on some beautiful Memory Box paper. Some of my favorite designs come from scraps of die cuts or pattern paper which I play around with for a design first. That is what happened with this card. Layering the papers and then adding the focal image.

This fall thank you card was all about the distr4ess inks and techniques. I played around with some inks and layering of the leaf images.  I added a frosty painting to some of the leaves to give them a washed out effect.


The next card using the dragging of the inkpad across the paper to create a faux wood effect. Love how this creates a rustic background quickly. The Stampendous flower was so beautiful and easy to pop into the corner with a few flourishes.


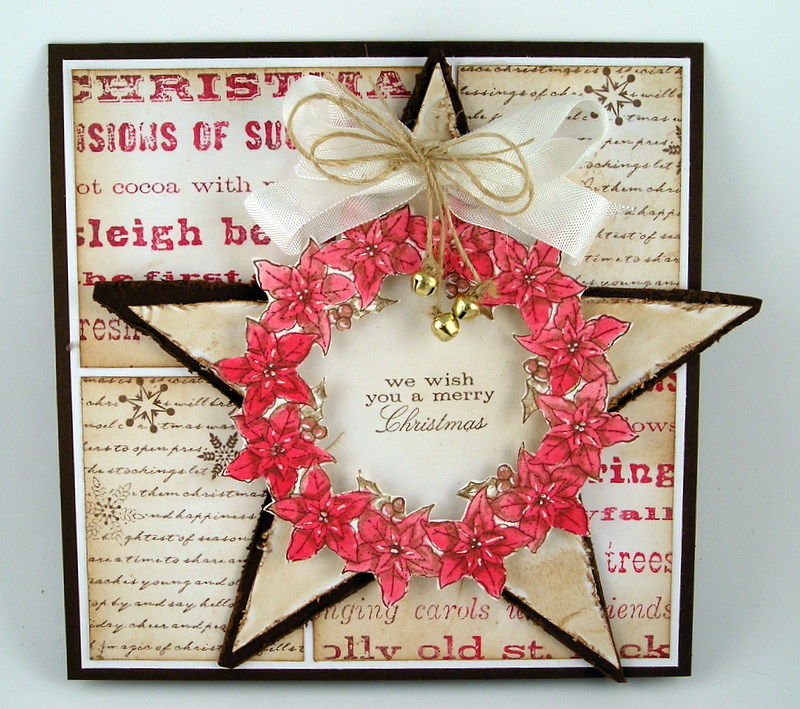
I have a fascination with the star shape and used that with a wreath on this card which I love the effect. The background is a repeated pattern of a few different Memory Box stamps. Love how the star showcases the wreath and the background showcases the star.


I had to share one alcohol ink background as I love playing with the alcohol inks and the effect of the inks on glossy cardstock is so beautiful. This just highlights a warm and rich background with a simple sentiment. So not only did I get to play with my inks I also ended up with a masculine birthday card!

This just showcases a lot of my favorite things: The paper flowers, glimmer mists, distress inks and layering textures, images and papers all together.


This is one of my recent cards using the white on white and a verse.  I love the softness of the monochromatic card and the tissue paper flowers.
This next card was created for ribbon challenge where I was given four different ribbons and asked to show them all on one project.  I love how the ribbons created the banner and effect across the front of the card.
My last three projects were my blog header for winter and a few of the tags for tim's twelve days of tags.  His techniques really inspired me to play around with some new toys and I had a blast.  Of course I used some of my old favorites of glimmer mists, embossing and glitter.


 Sorry my year in review was such a long post.  I had fun re-visiting my projects and actually was surprised by how many I loved from this year. :) 

The majority of the stamps here are from: Memory Box, Hero Arts, Stampendous, Artistic Outpost, Chapel Road Artstamps, Verses Rubber Stamps Our Daily Bread Designs, The Artistic Stamper, Lily Bee Designs, Sparkle Creations Rubber Stamps.

Have a wonderful day! 

Suzz

Wednesday, October 5, 2011

Tricks & Treats

Today's project start with the color palette from the ColourQ challenge #105 and the City Crafter Challenge to create something 3D.

I recently purchased at a garage sale a set of take out boxes which I thought would be great treat boxes. I started with that and created a Halloween Treat box.


This is the treat box with a candy treat wrapped in tulle in the box. 

I took a second photo to showcase the treat box without anything in it.


Recipe:

  1. Trace sides of box onto white cardstock. Cut out and repeat to get all four pieces. 
  2. Remove top flaps from the box. 
  3. Stamp background using an Impression Obsession Cover A Card with  Adirondack Cool Peri -  and Memento Pear Tart.
  4. Stamp Hero Arts tree and spider using black ink on purple background. Draw line using black gel pen. 
  5. Sponge edges on all pieces using brown dye ink. 
  6. Stamp Artistic Outpost bats onto green background using black ink. 
  7. Trim out with brown pom poms. 
  8. Stain seam binding using glimmer mists. Tie on handle. 
  9. Stamp tag with Hero Arts Spider Web and Trick or Treat sentiment. Sponge edges of tag. Add ribbon. 
I also used a sketch from Our Daily Bread Scrapbooking Challenge to create a layout with the colors. 


The background was glimmer misted with a variety of the colors. Then the edges were heat embossed using golden sand - Stampendous.  The stamps are all Our Daily Bread.

The image was colored with a combination of dye inks and glimmer mists.

Here is the color inspiration:
 Here is the layout from ODBD

Thanks for stopping by!

Suzz

Wednesday, June 29, 2011

Faith

This card is for the  Our Daily Bread Designs - Anything Goes Challenge. 


The Our Daily Bread stamp set is beautiful and it is called Faith. You know I can't pass up anything with butterflies and the verses are all wonderful.

I created a little easel card using the butterflies on the branches and the spellbinders die.

Short post today... So much going on with summer in full swing..

Hope your day is lovely!

Suzz