Showing posts with label Ranger Distress Stain Sprays. Show all posts

Wednesday, November 11, 2020

Celebrate

 Hi!  Time for a new challenge!  Cec is hosting this time and she has challenged us to Celebrate!  Here is how she described the challenge: 

"Your challenge is to create a shabby chic or vintage project to celebrate someone or something special. Since celebrations are happy occasions, your project should be made with lots of happy, bright colours. Keep your dull or neutral colours to a minimum please because as winter approaches we will have lots of that naturally so your bright colours must be predominant."


I have to admit I struggled a bit with the bright colors.  I finally decided to create a masterboard background with a mix of colors. 


Here is a bit of the background cut to a tag.  I started by applying the embossing paste through the Ironwork stencil.  I then spritzed and sprayed a mix of reds, purple, pink, orange and yellow all together.  I added some shimmery sprays and then finished it with a salt layer to pool the inks. 


After it dried I die cut a large amount of tissue paper tattered florals and gave them the same treatment.  Inky sprays, salt and shimmery spray all over the flowers and then let them dry.  I then took the flowers and double layered them with a glue dot in the center to make them scrunch up like flowers. 

I traced a heart and used it as my guidance to create my floral heart. 

I hope you enjoyed my celebration of love! Come join us and play along!  The winner will earn a chance to be a Guest Designer at a future date here at The Funkie Junkie Boutique blog, and everyone who enters and follows the rules will go into the draw for the chance to win a $25 spending spree at The Funkie Junkie Boutique. There are also Top 3 Badges for three additional outstanding entries, chosen by the Design Team.

Suzz

Products: 

Sunday, September 22, 2019

Suzz Sells Sea Salt

Hi!  I decided to share what I was playing with this weekend!  I didn't finish anything but had fun playing around with Sea Salt and Ranger Distress Sprays.  

Here's what happened....   

I started with trying to figure out what I could send in a few packages.  I was thinking about Halloween/Fall inspiration. 

I grabbed a new Ranger Layering Stencil that has been begging me to try it!  I decided to smear some crackle paste in the crackle stencil on mixed media paper. 
Ranger Distress Ink Evergreen Bough Sea Salt By Stampersuzz
 
While it was still wet I pulled out Ranger's Evergreen Bough and Walnut Stain Distress Ink Sprays and started to ink it up.  I kept spritzing and adding some water to blend the colors.

It had so much extra spray I tipped it and let it drip onto my craft mat.  I never leave my leftover ink and I always try to use it up.  I grabbed a few sheets of mixed media paper and started to soak up the ink onto the extra sheets. 

Ranger Distress Ink Evergreen Bough Sea Salt By Stampersuzz
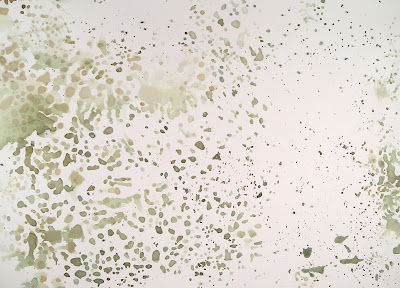
I had so much ink on the first page I decided to pull out the sea salt and absorb the ink and pull some of the ink into the salt. 

If you click on the photo you will see the close up details and how it pulls the ink out. 

Ranger Distress Ink Evergreen Bough Sea Salt By Stampersuzz
This was my second sheet of taking up the ink off the craft mat.  I also sprinkled with sea salt with a lesser effect because you need pools of ink for it to be able to absorb the ink.

Next you have to let it dry.  I usually can't wait so I get out the heat gun and try to dry it all up as quick as possible.

In the process of this inky fun I decided that my embossed background could also use a sprinkling of sea salt.  That is why you see the spots of white on the embossed section.  I love how this turned out, it looks like something ate away part of the color/texture!

After I had dried out the salt on all my pieces you can pull the salt off.  I usually use a ruler and scrape it off onto my craft mat. 
Ranger Distress Ink Evergreen Bough Sea Salt By Stampersuzz

For the embossing paste background, I used my fingers as I didnt' want to scrape off any embossing paste.

Next I wanted to use the inky salt to create more backgrounds.  I spritzed all the left over salt with water to re-activate the ink and laid cardstock on top of it. 

Ranger Distress Ink Evergreen Bough Sea Salt By Stampersuzz
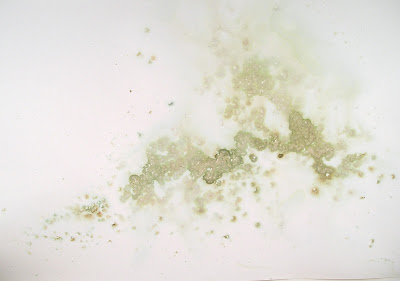
Here is the effect of the inky salt on the first sheet.  I then decided to put a second sheet down on the inky salt and added more spritz of water.

Ranger Distress Ink Evergreen Bough Sea Salt By Stampersuzz
Because I moved the paper it had more tendrils of color.  I can't wait to cut these backgrounds into sections to capture different looks.

For my final sheet I ended up added more salt and water to the darkest areas on the original salt background.  I sprinkled fresh sea salt into the brown areas. 

Ranger Distress Ink Evergreen Bough Sea Salt By Stampersuzz

I spritzed with water and then dried it out with the heat gun.  When I finished I scrapped off the dried salt onto another sheet of cardstock. 

Ranger Distress Ink Evergreen Bough Sea Salt By Stampersuzz
I spritzed the dried salt on the cardstock until the color spread and then dried the paper again and scrapped off the salt.

I had so much fun I decided to share it with you!

Suzz 


Sunday, May 24, 2015

Thank You, Thank You, Thank You

Today the Simon Says Stamp Monday Challenge design team is sharing thank you inspired projects.  This year we have quite a few parties, graduations and other things to be thankful for and I decided to use a few art staples and create a series of thank you cards. 


This was an inky morning and I thoroughly enjoyed mixing up the colors and ended up with dyed hands in a rainbow of colors.


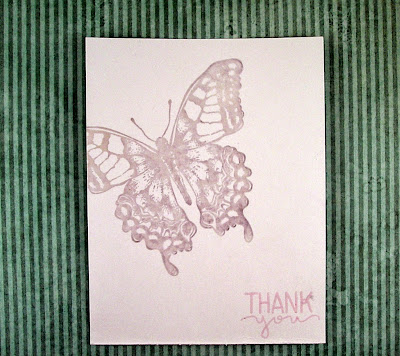
I started with a series of butterflies stamped with Versamark on white cardstock and heat embossed using clear embossing powder.

After that I was just dripping, spraying, misting and flicking sprays and paint to create different effects.


I decided to cut out the wings on this card to give a shadow effect.


This received a flicking of white acrylic paint at the end.
This was flicked first with water and then white acrylic paint. I also sponged dye ink around some of the butterflies in contrasting colors on some of the other cards to make the butterflies pop.
Products: Stampers Anonymous Monarch,  Simon Says Stamp Thank You sets (Many Thanks,  Lots of Thanks),  White acrylic paint, Versamark Watermark Ink, Clear Embossing Powder, Sequins, Darkroom Door - Eclectic Butterfly, Ranger Dye Ink - Picked Raspberry  Ranger Distress Stain Spray - Mustard Seed, Mowed Lawn, Fossilized Amber, Picked Raspberry, Dusty Concord, Salty Ocean
 
Simon Says Stamp is offering a $50 gift voucher to a randomly selected participant in the challenge, come play along!


Thanks for stopping by!

Suzz

Sunday, February 8, 2015

Birthdays Birthdays

February and March are big birthday months in our family.  I ended up buying ahem all my January cards because I got so far behind.  That meant me getting pro-active and creating cards early for this month.  Both are challenging for me as one is for a nephew turning thirteen and the other is for my niece who is turning 18. 

For my nephew I was looking for a grungy mixed media effect using basketball as the focus.  He plays on multiple teams. I used the Graphic 45 sports stamps for the images.  The background uses a mix of the DarkRoom Door stamps.

For my niece I followed the same grungy style but mixed in stars and music.
I was trying for a new color mix of lavender, gray and yellow.  I might re-work this one as it didn't fly with my daughters.  I still have time. :)

Well that is all I have to share today. I am busy working on a few different projects for future shares and I will be back tonight with the new Simon Says Stamp Challenge!

Suzz