Wednesday, August 23, 2017

Going to the Chapel

Happy Wednesday!  I worked all weekend on this little wedding display and I am happy to share it with you today!  The Frilly and Funkie challenge is hosted by me this time around and I am challenging you all to show your "Cutting Edge" in the "
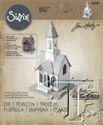
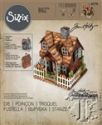
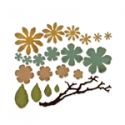
On the Cutting Edge".  I was inspired by some new dies that I had recently purchased from The Funkie Junkie Boutique

This challenge is all about using your dies, punches or other cutting tools to create a masterpiece featuring at least one die cut, machine cut or punched image. Make sure your art is in the vintage or shabby chic style and incorporates a cut out.

I decided to create a wedding display as I have had a nephew just announce his engagement and it had me thinking about weddings.
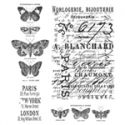
This project had me cutting lots of shapes and then inking them up and added subtle textures with embossing paste, dye inks, stencils, and stamps.

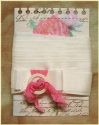
 I knew I wanted to use a cloche and this cake stand I bought a long time ago on clearance.  It has been hosting knick knacks on my craft desk for awhile and I thought how fun it would be to use it to hold my wedding chapel.

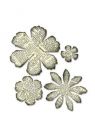
I wanted my flowers to be inside and out top and bottom:
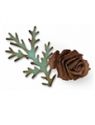
 I died some seam binding and ribbon to match the colors of the flowers and church. I then rolled up the tattered pine cone into mini roses.  I did a wash of some antique linen spray mixed with abandoned coral in an empty sprayer. I added more water to get a softer color and used that on the backside of the flowers.  The front is antique linen spray with stamping of script in black ink.

 On the bottom is more roses and tattered flowers big and little with the same sprays and inks. I did a soft stencil with the antique linen sponged over the stencil on the larger flowers to add a hint of pattern.  The centers of the flowers have a mix of buttons, pearls and nothing depending on how tight the bud of the flower.

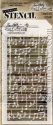
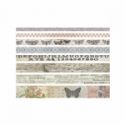
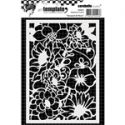
 The hardest part was getting a photo. I tried multiple times in multiple places and along the way found this doily that added such a lovely base to the flowers.  The church was stenciled with the music stencil and white embossing paste. While it was wet I sprayed it with the Antique linen to give it the aged look I was looking for.  I added the tissue tape at the end to contrast the platform, roof and steeple.
 I had fun draping the flowers along the side of the cloche and onto the platform. Some are attached to the glass with glue dots and some are just laid down onto the platform.  Every time I tried a new angle for pictures things got moved around and I loved how it looked each time.


A close up of the pearls in the centers of the flowrs as well as some of the stenciling on the larger flowers.

Well I hope you are inspired to get out the die cuts and play along!

At the end of the challenge the team will choose their top four picks. Our first place winner will be invited to join us for a Guest Designer spot here at Frilly and Funkie. Three additional talented participants will receive badges to display on their blogs. Everyone who enters and adheres to the challenge guidelines will be entered into a drawing to win a $25 spending spree at The Funkie Junkie Boutique!

Get cutting!

Suzz


Saturday, August 12, 2017

Saturday Step By Step

Welcome back! Today I am sharing over on the Frilly and Funkie Blog a step by step how to create my mini journal.


Here is  a sneak peek of all the un-assembled goodies!   You will have to pop over to the blog to see how it all comes together.

I was really pleased with the fun pages that ended up in my journal book!

Have a wonderful Saturday!

Suzz

Wednesday, August 9, 2017

Read any Good Books Lately?

Happy Wednesday!  Are you feeling funkie?  It is time for the Funkie Design Team to share thir projects at the Frilly and Funkie Challenge for the "Read any Good Books Lately" challenge hosted by the wonderfully creative Sara Emily.

Sara Emily challenged us with:  "Reading a good book on the beach or on the porch is a simple summer pleasure. For this challenge, please create a vintage or shabby chic project that depicts a favorite book or use book pages on your project, alter a book or even make a journal or journal page! Just be sure it's in the vintage or shabby chic style that we are looking for!"

I just left the library the other day with a huge stack of books which I have been working my way through!  I am always looking for damaged, or distraught books to up-cycle into my art.  I used a slightly older dictionary page as the base for my project today.  


If you are observant you will notice there are a few holes on either side of my tiny house.  There is a reason for that and I will be sharing that later this week over on the F&F blog with a full step by step and a few other fun pages.

At the end of the challenge the team will choose their top four picks. Our first place winner will be invited to join us for a Guest Designer spot here at Frilly and Funkie. Three additional talented participants will receive badges to display on their blogs. Everyone who enters and adheres to the challenge guidelines will be entered into a drawing to win a $25 spending spree at The Funkie Junkie Boutique!

Please hop over and check out the entire DT projects as they are all fabulous!  I hope you are inspired to play along with us!

Suzz 

Friday, August 4, 2017

16 Candles

Happy Friday! 

I am sharing a few birthday cards made for some upcoming 16th birthdays.  I went for a mixed media approach on one and a shaker card on the other.


I wanted to splatter it up with some pretty colors and I mixed a few distress oxide inks together and picked it up on my cardstock from the craft mat.

I then stamped the circle (wendy vecchi) and the numbers.  I added the sentiment and then went looking for something to add a little more details and found the old Hero Arts definition stamp for birthday and added that.

I stamped a few stars which then got outlined in black watercolor and white gel pen.  The funky girl was stamped and cut out and pop dotted to give her a little definition along with a few balloons for fun!

Next is a shaker card with a watercolor wash over the surface.


I water colored the paper first with a blend of colors an then cut out the stars in random places. I created a box underneath with foam tape to put my sequins inside of and attached it with a layer of acetate between.

I stampe dthe sentiment before layering and splattered white paint over the surface and added sequins outside as well.

Well I wanted to share the only crafting I have done since my last post!  The summer is flying by and so many family things happening which makes me happy as we get so much time spent together before school starts again.

Suzz