Thursday, January 30, 2014

Butterflies

Today on the PaperArtsy blog I am sharing a tutorial on how to create my project.  Here is a little sneak peak of what I created.


Head over to the blog to see the full project. There is also a challenge that you can join in on for a chance to win PaperArtsy stamps!

Thanks for stopping by!

Suzz

Happy Heart Day!

Time for another Valentine's day card. I decided to get my mojo on with the Mojo Monday Sketch #330.  This is the last week in the month so the Mojo Monday sketch offers up two different ways to use the sketch. this is a long and skinny sketch and you can make it in two different sizes. I chose the 6" x 3.5" size for my card.  To make it even easier for me I decided to use the colors in the Color Throwdown Challenge #277.

 I started with the cute dog Simon and his girlfriend from Simon Says Stamp - Simon in Love.


 I followed the sketch and rotated it.  I used Authentique paper for the bottom and added a touch of pink vellum with rounded corners.  The twine is May Arts.  I added a few hearts cut using Spellbinders Nested Hearts.   The image is colored with STAEDTLER Karat Aquarell watercolor pencil.

Sketch & Color Palette: 


Have a lovely day!

Suzz

Wednesday, January 29, 2014

Discover Time

Carmi over at ResinCrafts Blog issued a challenge before CHA inviting anyone to create a project using Resin and a lovely watch bezel. She provided the bezel and we got to play with resin and the bezel.  If you check out the blog you will see the results of a many different artists who started with the same bezel and created a variety of projects.

For my bezel I just started playing around.  I covered the inside of the bezel with a layer of gems with I then covered with a layer of resin.  I let that harden and then put my sentiment in along with the bee. I filled the resin again and added a touch of chain from one side over to the wings of the bee.  I finished off with a heart charm.
I had fun playing with this project. Hop over and check out all the other fantastic submissions. I have been enjoying seeing what inspired the projects.

Suzz

Tuesday, January 28, 2014

Cupid

Valentine's Day is coming and I have a few cards to make.  One has to go into the mail too so I need to get cracking!  I created one this morning that I thought was going to be for my husband but now I think it is a tad too feminine. :)


I am sure it will find a good home. ;)   A fairly simple process. I stamped the DarkRoom Door Chicken Wire over the background using the Smokey Gray Versafine ink.  The next layer is Stampers Anonymous stamp inked up with Memento Rosebud. I repeated it until the background was covered.  The stampers Anonymous cupid was stamped in gray and highlighted with STAEDTLER watercolor pencil (pink).  A few pink pearl hearts and a little misted feathers and twine in pink to accessorize.

We are in frigid weather here and everyone is home. It feels like the holidays again with all the kids home. Unfortunately I am still working today but with the bonus of the kids. :)

Have a warm and safe day!

Suzz

Sunday, January 26, 2014

Deadwood

Welcome to the wild wild west... The challenge this week at Simon Says Stamp Monday Challenge is about cowboys... My  family and I took a trip out west which included visiting Deadwood which had me scrapping our trip.
I started with trying to create a poker hand reflecting Wild Bill's hand when he was assassinated which is called the Dead Man's Hand.  I did a little online searching to find out what vintage cards would look like and what the hand contained.

I started with the cards first which are always fun to create. I cut them to size and rounded the corners.  I distressed the edges with brown dye ink.  I stamped a soft damask using a gold ink.  I then added the suits in black ink in the quantity which was in his hand.  In my research on line there were varying stories on the fifth card and some showed it as not visible.  So I decided to create a fancy pattern on the backside of my card. Of course no saloon cards would be right without some glass rings and splatters.  I even added a bullet hole to one of my cards.

To create the background on my layout I took three steps: 

I sprayed the background with gold mist.  I then added a layer of bronze mist.  I finished with stamping the Wild West letters in gold repeatedly.

After that was finished I added in a row of damask along the left side in black and gold.


I highlighted the center with a black gem.  I stamped the saloon and highlighted it with some shadowing in the background.

I added the cowboy and a few pistols stamped in black on a similar background.  I added the grunge letters misted to coordinate and accented with metallic brads.  I added a date underneath my kids.

Products:  Stampers Anonymous - CMS109 - Wild West   Hero Arts - Black Metallic Decor Embellishments,   Versafine - Toffee,   Chipboard Letters, DarkRoon Door , Visual Artistry - French Connection, Ranger Distress Ink - Vintage PhotoHeidi Swapp - Bronzer Color Shine, Heidi Swapp - Gold Lame Color Shine, Ranger Archival Ink - Jet Black, Corner Rounder
 

Once again if you play along with us you have an opportunity to win a  Simon Says Stamp $50 Gift Voucher.
Thanks for stopping by! 
 

Suzz

Wednesday, January 22, 2014

Explore & Discover

Welcome to the Artistic Outpost Design Team monthly blog hop!   The team has created some beautiful projects!

My project is inspired by a scrap pulled from my scrap pile using the Paper Boy image.

I always think this little gent looks like a boy who lives down by the docks with his sweater and stocking cap.  To create the feeling of the sea I added the lighthouse from the Beyond The Sea plate in the background.  The background was created on the gelli plate using a clock stencil and paints.  I added a few words from Huck Finn stamped in black ink.  I added script from the French Flight plate randomly stamped in the background. . 

Hop along for all the inspiration:

Gerrie * Lisa * Sue * Tracy * Linda * Allison * Terry * Kate

Thanks for stopping in!

Suzz

Tuesday, January 21, 2014

Hero Arts 2014 Catalog Hop


All this week the Hero Hostesses are showing off the new Hero Arts 2014 Catalog with tons of inspiration!  You should have arrived here from the extremely talented Donna Mikasa's blog Three Umbrellas.  If you didn't hop over to the Hero Arts Blog to start from the beginning so you won't miss out on any of the beautiful projects!

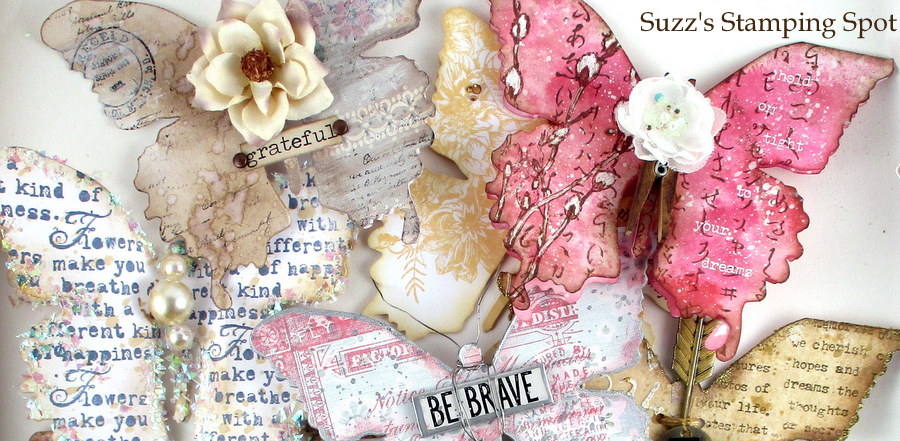
I made a ton of cards using a variety of stamps but my favorite project was this one:
I had a vision of creating a rustic card with a flannel type backdrop.  I started with the stripes and stamped the red stripes vertically.  I then inked the same stamp using black ink and turned the stamp to create the flannel pattern.  I added blue stripes with a watercolor pencil and a ruler.

I then stamped the bear, eagle and trees  in black and cut them out to create my arrangement. .  I added a banner with the sentiment.  I wanted a little interest in the background so I splattered a little blue and black watercolor..

My next card uses the same OWH What a Guy clear acrylic stamps: 

 I spent the majority of my time playing with the Hero Arts Chalk Ink Snow and the Forever set.


I wanted to see the soft effect of the white chalk ink on kraft.  I colored in the image using watercolor pencils and a waterbrush.

To show how versatile the stamp is here it is stamped in a few different inks: 

I stamped in versamark over a glimmer misted background and heat embossed with white embossing powder.    I decided to add a few butterflies stamped in orange ink.

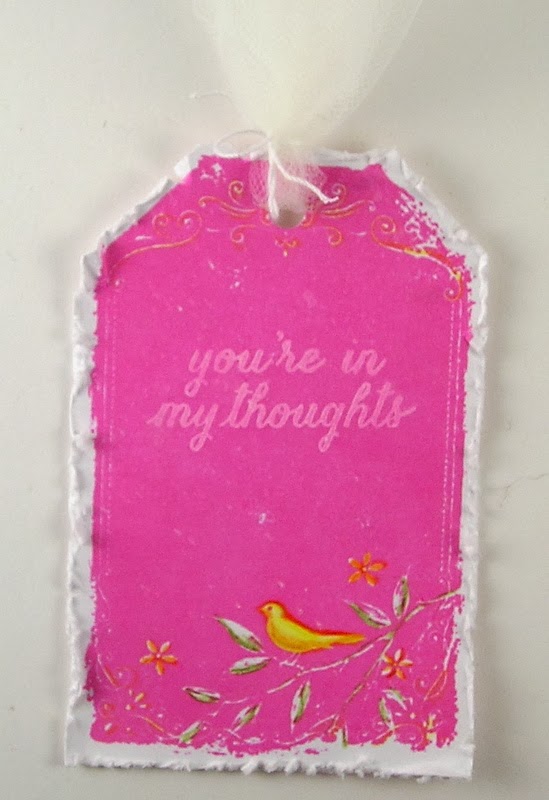
For my last one I stamped it using a pink ink: 
 I colored the image with watercolor pencils and added the sentiment using the white chalk ink.


Next in the parade of loveliness is the extremely creative and talented Barb Engler! Hop along for more inspiration!

Thanks for stopping by!

Suzz


Sunday, January 19, 2014

A is for Altered Arches

 Simon Says Stamp Monday Challenge  is brought to you this week by the letter "A"... The challenge is to be inspired by the letter "A".  I was inspired to create an altered arches using Authentique's Valentine's papers.  .

Here is the full display:

 Click on the image to enlarge it and see the full image.

A few close up pictures:
The other end of the arches:
and the middle:

The unfinished arches after the pattern paper was cut and taped down.  I smeared white acrylic paint over the surface to soften the edges:


The back side is covered in coordinating papers and linked together with hinges.
I traced the arches on the reverse side of the papers and cut them out.  I cut chicken wire to fit over the opening of the arch.  I stapled the chicken wire to the chipboard.  I taped the pattern paper onto the chipboard arches.  I then smeared white acrylic paint over the surfaces.

I attached the hinges on the reverse side of the arches. I hand cut the different images from the various papers.  The doilies were painted with pink and white acrylic paint. I sponged the edges of the cut images and the doilies with brown dye ink.

Products: Smitten, Graphic 45 Sweet Sentiment,   hinges ,   white paint,   Lace Trim, Idea-Ology - Lavish Trimming, Bo Bunny Doilies, Heart DoiliesScrew Brads, Ranger Distress Ink - Vintage Photo, Claudine Hellmuth Pink Acrylic Paint
 

Come join in the challenge this week  for an opportunity to win a  Simon Says Stamp $50 Gift Voucher.
Thanks for stopping by! 
 
Suzz

Thursday, January 16, 2014

The Golden Nightingale

Happy Thursday! I am happy to see the week wind down... I am back sharing a new Stampendous stamp!  When we received the new release I fell in love with this  little bird.  He reminds me of the story of the Golden Nightingale by Hans Christian Andersen.   I was inspired to create a golden canvas with a mix of steampunk elements to represent the mechanical bird. .

I painted a piece of corrugated cardboard with a mix of gold and white paints. I spritzed gauze and muslin in pink and gold hues for the background.  I painted the gears gold and smeared black ink to highlight the raised surfaces.  I stamped the image with black ink and colored with watercolor pencils, mists, and white gel pen.  I embossed the edges of the die cut with Stampendous Aged Gold Embossing Enamel.  I also added a smattering of Mica Flakes over the background.

Have a beautiful day!

Suzz

Wednesday, January 15, 2014

Sew much Fun!

Happy Wednesday!  I am feeling much better but still not creating too much yet.:)  I wanted to share one of the stamps in the new release from Stampendous.  I thought the little mice with the pin cushion were adorable and couldn't' wait to color them up.


I started with a blue tone and ended up bringing in the oranges.  I colored the image using STAEDTLER Karat Aquarell watercolor pencils.  I paired it with some coordinating paper and buttons. 

I had a scrap of the paper left so I decided to add it to the inside.  This is a mini card and perfect for a little note or thank you. 

The new stamps are available to the stores to order and you can go to your local retailer to request them. 

Thanks for stopping by!

Suzz


Sunday, January 12, 2014

Cherish & Forevermore

Sorry it has been a little quiet around my blog this week... I have been a bit under the weather.  I am pleased that I had the chance to create something for the Anything Goes Challenge at Simon Says Stamp Monday Challenge before I started feeling poorly.

This week I am sad to say is Candy Colwell's last week on the design team.   I am a huge fan of her work and always look forward to what she shares on her blog.  Candy you will definitely be missed!

My inspiration this week started with the Hero Arts Acetate Tags.   

 I wanted to create something that was translucent and airy for a wedding.  I decided to start with the tag and a few other pieces:
  1. Emboss Acetate tag with embossing folder. 
  2. Smear surface with white acrylic paint. 
  3. Die cut butterfly from white cardstock. 
  4. Cover butterfly with glue pen and sprinkle with crystal glitter.
  5. Die Cut Circle from white cardstock. Emboss with embossing folder.
  6. Layer circle on tag and attach butterfly to circle. 
  7. Attach trim to bottom of tag. 
  8. Attach flower to center of butterfly. 
  9. Attach stickers to tag. 
  10. Tie crinoline, pearls, and twine to top of tag.

I then moved onto a wood grain effect.

 To create this snowy scene:
  1. Emboss tag with wood grain embossing folder.
  2. Paint surface of wood grain with a mix of Ranger Distress Stain and paints. 
  3. Die cut deer from Map Pattern Paper. Sponge Edges of reindeer with brown dye ink. 
  4. Paint burlap with white paint. Let dry. 
  5. Paint twine with gold paint. 
  6. Punch snowflakes from white cardstock. Accent with gem and sparkle with glitter. 
  7. Tape burlap strips to tag. 
  8. Tie  twine with buttons around burlap. 
  9. Attach snowflakes to tag randomly with glue dots. 
  10. Wrap scarf around the deer and pop dot and attach to tag. 
  11. Tie burlap to top of tag with twine and gold pine cones. 
 My final tag was an experimentation with paint and distress stains.

 For this one I wanted to use the embossing and paint but mix in some stamping and stains.

  1. Emboss tag using snowflake embossing folder. 
  2. Paint flowers and branches with gold paint. 
  3. Paint backside of acetate tag with gold paint. 
  4. Smear front of tag with a mix of bronze paint and white paint. 
  5. Stamp script using brown ink over surface. 
  6. Attach lace trim and flowers to front. 
  7. Tie lace trims and twine on top of tag.
  Products: Hero Arts Acetate Tags, white paintAnna Griffen Ancanthus Embossing Folder  Memory Box Chloe Butterfly,  Ranger Distress Paint - Antiqued Bronze, Ranger Distress Paint - GoldStampers Anonymous - Attic Treasures, Prima Flowers, Prima Flowers, Lace Trim, Idea-Ology - Lavish Trimming, Snowflake Punch,     Wood Grain Embossing Folder
 
The Simon Says Stamp Team is away this week at CHA doing a little shopping for the store so you know there will be fantastic new things available coming soon! If you play along with us this week you will have an opportunity to win a  Simon Says Stamp $50 Gift Voucher.
Thanks for stopping by! 

Suzz


Tuesday, January 7, 2014

Home

Hello!  We are staying in and keeping warm.  The weather has been very cold and keeping us in the house.  My project was inspired by the new DarkRoom Door  Welcome Home set.  I started thinking about traveling and our family road trips.  My family took a  road trip to New York (which was fantastic) and reminded me of warmer times.  Although at the end of every vacation we are happy to come home.

This card is inspired by that trip to New York.  I inked up  a piece of white cardstock using blue glimmer mist leftover on a craft mat.  After the background had dried I sponged orange dye ink over a honeycomb stencil.  I then stamped the Gazette Background using blue ink over the background. I stamped images from the New York Volume 1 and New York Volume II  using black ink.   I intermixed the images with stamps from Vintage Office Set. 

I am pleased and excited to announce that I am part of the 2014 DarkRoom Door Design team!  The design team is extremely talented.  I cant' wait to see what DarkRoom Door and the DT have in store for us in 2014.

Thanks for stopping by and keep warm!. 

Suzz
 

Sunday, January 5, 2014

Feeling the Blues

Simon Says Stamp Monday Challenge is back this week with a new Blues Challenge!    This can mean post holiday blues, hues of blues, or blues music. You pick the inspiration! 

I knew I wanted to play with glimmer mists, chalkboard inks and Dylusion sprays to create some inky blue backgrounds.  After I created the backgrounds I was inspired to create a masculine and feminine version of a blue card. My first card is the more feminine version of the cards:
 I sprayed the inks onto the craft mat and mixed them together and dragged my white cardstock into the inks. After they had dried I cut them up and used them for the various parts of my cards.
For the first card I stamped the damask using blue ink over the background.  I then stamped the postcard image onto tissue paper using black ink. I colored the image with watercolor pencils and blended them with a waterbrush.  After the image dried I used decoupage to attach the tissue paper image to the background.  I sprayed a flower and ribbon to match the background.  The sentiment was stamped using blue ink on another piece of the background. I cut it into a tag shape and distressed the edges. 


For the masculine card I decided to use the traveling man as my focal point.

I stamped the traveller using blue ink on the background and cut a circle around him.  I added shading and highlighting with watercolor pencils and gel pens.  I then stamped the background with a map image in blue ink.  I added the car and the banners.  The sentiment was stamped and cut up. 

Products:
Stampers Anonymous Traveler , Visual Artistry - The Journey, Stampers Anonymous - Warehouse District, Blue Ink, DarkRoom Door - Welcome Home, Signo Uni-Ball White Gel Pen, Distressing Tool, Hero Arts - Silver Metallic Decor, Screw Tops, Stampendous - Postcard Bird, Impression Obsession - Garden, Ivory Flower, Burlap, Pearls, Decoupage, Tissue Paper, Hero Arts Antique Flower Background, Ranger Archival Ink - Black


The ever generous  Simon Says Stamp. is offering a $50 Gift Voucher for one randomly selected participant in the challenge.  Come join in the fun!
Suzz

Friday, January 3, 2014

Creative Journey

I like to think of my hobby as a creative journey.  I love seeing what new ideas, products, techniques and trends are happening.  Tim's tag for January reflects on time and creativity.  This inspired my take on his tag which is all about a creative journey. .


 I had such fun creating this tag.  I started with thoughts of a red and silver tag but ended back at the black, gray and silver take on the tag.
 Quick run through of the steps:

  1. Spritz craft mat with black glimmer mist.  
  2. Drag clock stencil into black ink. 
  3. Lay inky stencil on white cardstock. Spritz with water and repeat until entire cardstock is covered. 
  4. Let dry. 
  5. Sponge black dye ink over stencil onto background. Repeat until covered. 
  6. Cut tag out from background. 
  7. Die Cut clock from metal foil. 
  8. Emboss middle with embossing folder and apply black paint to surface. 
  9. Smear black paint on frame and clock hands. 
  10. Stamp map over background randomly using black ink. 
  11. Apply Journey rub on to top right side of tag. 
  12. Sponge edges of tag with black dye ink. 
  13. Pop dot frame of clock and attach to left side of the tag. 
  14. Attach center inside clock face. 
  15. Cut off excess of clock from left side. 
  16. Attach hands and use snap as accent. 
  17. Cut banner shape into stickers and edge with black ink. Pop dot and attach along left side. 
  18. Apply rub-ons to enamel tag. 
  19. Attach charms and enamel tag to chain. 
  20. Paint key with Ranger Distress Stain - Silver and lace trim. 
  21. Let dry and assemble charms and lace trim on top of tag. 
Hope you are enjoying your creative journey today!

Suzz


Thursday, January 2, 2014

Silvery Goodness

I am back to share my final tag in  Linda's tag challenge.  This has been a lot of fun and Linda has been a great inspiration. This is inspired by her bonus tag #2.  The challenge is sponsored by her boutique The Funkie Junkie Boutique

I was inspired by the silver and embossed textures.  

 I started with embossing the bottom half with a Prima stencil and Wendy Vecchi Silver Embossing Paste.  I then added inky splotches using Ranger Distress Stain - Silver mixed with water.    I then painted a strip of lace with Ranger Distress Paint - Silver.  I stenciled the top fold with the same stencil and silver paste.

After I put together my layers I wanted something on the front so I decided to stamp the DarkRoom Door Eclectic butterfly using Versamark on Acetate.  I embossed the butterfly with Silver Tinsel.

 On the inside I stamped the sentiment (Stampers Anonymous - Way With Words)  and background (Hero Arts)  using the Ranger Distress Paint - Silver. 

We are sitting in over a foot of snow and more coming!  What a snowy winter we have had this year so far. I plan on trying to stay warm and craft!

Thanks for stopping by...

Suzz

Wednesday, January 1, 2014

A Year in Review

Happy New Year! I decided to scroll through all my blog posts over 2013 and pull some of my favorites from 2013 into one post.  I am going to have to declare 2013 the year of the tag for me. Many of my favorites were tags. :) Enjoy the review. If you want info on the products, techniques or post click on the photo to take you to the original post. 

http://www.suzzstampingspot.blogspot.com/2013/03/carrots-anyone.html
http://www.suzzstampingspot.blogspot.com/2013/05/dream-fly-soar.html

http://www.suzzstampingspot.blogspot.com/2013/01/all-about-me.html


http://www.suzzstampingspot.blogspot.com/2013/11/untie-ribbons.html

http://www.suzzstampingspot.blogspot.com/2013/04/art.html

http://www.suzzstampingspot.blogspot.com/2013/02/steampunk-love.html

http://www.suzzstampingspot.blogspot.com/2013/07/masculine-atcs.html

http://www.suzzstampingspot.blogspot.com/2013/08/journey.html

http://www.suzzstampingspot.blogspot.com/2013/10/charming.html

http://www.suzzstampingspot.blogspot.com/2013/10/stampendous-and-scrapbook-adhesives-hop.html

http://www.suzzstampingspot.blogspot.com/2013/06/smear-splatter-splash.html


http://www.suzzstampingspot.blogspot.com/2013/04/time-to-fly.html

http://www.suzzstampingspot.blogspot.com/2013/03/in-birdhouse.html

http://www.suzzstampingspot.blogspot.com/2013/05/golden-opportunity.html

http://www.suzzstampingspot.blogspot.com/2013/05/tag-day.html

http://www.suzzstampingspot.blogspot.com/2013/05/extra-extra-read-all-about-it_14.html

http://www.suzzstampingspot.blogspot.com/2013/08/paris.html


http://www.suzzstampingspot.blogspot.com/2013/06/krafty-flowers.html

http://www.suzzstampingspot.blogspot.com/2013/09/these-are-few-of-my-favorite-things.html


http://www.suzzstampingspot.blogspot.com/2013/06/dream-little-dream.html

http://www.suzzstampingspot.blogspot.com/2013/09/stamptember-hop.html

http://www.suzzstampingspot.blogspot.com/2013/12/ballerina-christmas.html

A Happy, Healthy and Blessed 2014 to you!

Suzz