Hi! Today is the Funkie side of the DT to showcase their beautiful pastel flowers for the latest Frilly and Funkie Challenge
Bloomin' Marvellous. The talented Zoe is our host and she challenged us with:
"As spring pokes it's head through the frozen ground, let's celebrate the
season and create a vintage or shabby chic project with flowers as the
focus and in vintage muted pastel tones, (no brights)."
What a delightful challenge as the weather is flickering between winter and spring for us right now. We definitely are inspired by the crocus and tulips poking their little faces towards the sun! I have two projects inspired by the challenge.
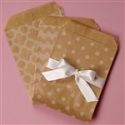
This little bag was actually my second project and happened very quickly after my mini-vases. My husband had gone to the hardware store to get a few keys made. When they gave him the keys they put them in this little kraft bag with the quantity and price. I saw it on the counter and asked for the bag. I loved how it looked. He left it for me on my craft desk.
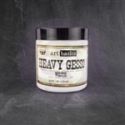
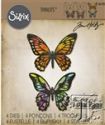
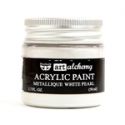
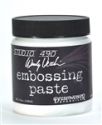
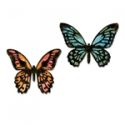
As I was working through the mini vases I created a big mess of things out on my desk. It made creating this bag very easy. I took the paint and painted the center of the bag. After it dried I took a plain white butterfly previously cut and glued it in the center. I then took one of the collage word sheets and collaged it over the background. I stenciled with embossing paste around the edges. I wanted them to pop so I spritzed the entire surface with a soft mist of lavender. After that I splattered more on to give more color. I took one of my roses from the previous project and placed it with the stem onto the bag.
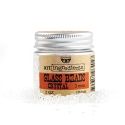
The rose color needed to blend more so it received a coat of the same purple as the background. I then found some little glass stones to add as my final accent. This little bag was one of the quickest things I have created in awhile and I loved how it turned out!
For my original project I started with mini-vases:
These were inspired by some crafty time with a good friend. I spent most of the time talking (ha ha) and cutting tons of flowers and butterflies in anticipation of the this challenge.
I started with piles of plain white cut out flowers, branches, and butterflies. I looked at my pastels and was thinking tattered rose, worn lipstick, peeled paint.
But then my eye caught the shaded lilac and I started thinking of soft hues of lavender. It didn't hurt that when I spent the time with my good friend she was inking up in layers of purple!
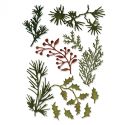
The flowers are the lovely pine-cone die from Tim Holtz - Sizzix. I inked up half of the flowers with the distress oxide smeared directly on the die cut before I rolled them up.
I spritzed the excess ink and used another flower base to pick up the excess ink. I repeated until I had 5 ready to roll flowers.
I wrapped the die cut around the base of a tiny paint brush and then flattened, squished and bent the edges until I got the shape I wanted. The Tim Holtz video of this is always my go to as he makes it so easy to follow.
While the flowers were drying I repeated the inky process with the butterflies. The detailed butterflies were completely inked and the backgrounds were used to pick up the excess ink.
Last summer at an antique mall I had found 5 mini milk glass containers. The were very cheap as I don't think they were that old. They were the perfect vase for my mini flowers! I pulled out some bits and pieces of think wire from leftover plastic flowers and other things. I painted the wire with white acrylic paint. And then I hot glued the wire stems to the flowers, branches and butterflies.
I also had pulled out the Dina Wakely Collage Words and thought how fun it would be to collage those inspiration words onto the vases. I used some decoupage and applied them to the vase.
I finished it off with painting with the white acrylic paint the edges and back side of the vase. All that was left was to die some seam binding and assemble the vases.
I hope you come and share your fabulous flowers with us! The winner will earn the chance of a Guest DT spot here at Frilly and
Funkie, and everyone who enters and follows the rules will go into the
draw for the chance to win a $25 spending spree at The Funkie Junkie
Boutique. And there are Top 3 Badges for three further outstanding
entries, chosen by the Design Team, because choosing just one winner is
so hard!
Thanks for stopping by!
Suzz


