Wednesday, March 6, 2019

Artist Trading Coins

Howdy!  I am back to share some Artist Trading Coins created for the current Frilly and Funkie Challenge "Artist Trading Coins" hosted by me. :)

The challenge is to create an Artist Trading Coin. I was inspired by a new way of capturing a little bit of art to share with others. Your challenge is to create a trading coin which should be a circle shape 2 1/2 inches in diameter.


I have to admit this challenge was a bit addicting for me as I kept creating different types o ATC's.


Dina Wakely Always Flowers Ranger Distress Inks For the Funkie Junkie Boutique

Once I cut a variety of circles I pulled out some new stamps and just started to create. 
Dina Wakely Always Flowers For the Funkie Junkie Boutique
 I really like designing in small spaces.  I think I like it because you have the opportunity to cut off part of a stamp or image and create a different view or focal point.

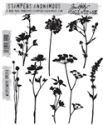
I started with the new flower stamps from Dina Wakely and stamped them staggered.  I wanted them to be softer so I could stamp over the sentiment.

This actually measures 2 3/4" in diameter to accommodate the sentiment.  I also added a slightly larger circle so I went over my size on this trading coin.

For my second ATC I decided to use the same flower stamp set but stamped it multiple times on old dictionary pages.
Dina Wakely Always Flowers Ranger Distress Inks For the Funkie Junkie Boutique
 I wanted to see if I could get textured layers.  I used the full flower image and stamped, embossed and cut out the layers to create my printed flower.  I added a little bee to the petals from another Dina Wakely stamp set.

I then decided to pull out the paper dolls to use up a leftover yellow background from the previous ATC.
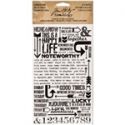
Ranger Distress Oxide Ink Tim Holtz Ephemera Little Snippets Paper Dolls Rub-on Remnants For the Funkie Junkie Boutique
 With just a few pieces of ephemera, stickers and rub-ons I was able to quickly assemble another ATC.

I also wanted to play with the Funky Foliage as it just recently made it's way home to me. :) 

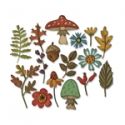
Sizzix Funky Foliage Die Ranger Distress Oxide Inks For the Funkie Junkie Boutique

I die cut all the pieces and sponged them with the lovely soft Distress Oxide Inks and layered them onto a dictionary page background.

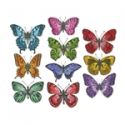
My final ATC was a mix of leftover scraps.  I wanted to try something with pretty spring colors and a die-cut butterfly started me down this path. 
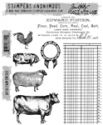
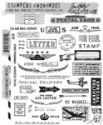
Ranger Distress Oxide Ink Picked Raspberry Wild Violet Idea-Ology Tim Holtz Quote Chips Stampers Anonymous On the Farm Correspondence For the Funkie Junkie Boutique
I hope this has you inspired to come share your circular art!  The winner will earn the chance of a guest spot here at Frilly and Funkie, and everyone who enters and follows the rules will go into the draw for the chance to win a $25 spending spree at The Funkie Junkie Boutique. In addition, the Design Team will select three further outstanding entries and those creators will receive a Top Pick badge to display on their blogs!


Thanks for stopping by!


Suzz

Tuesday, March 5, 2019

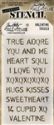
Darkroom Door Filmstrip Stamp

Hi!  I wanted to share a few cards I made using the new Filmstrip stamp from Darkroom Door.
I had fun stamping the strips and then coloring them with watercolor pencils and waterbrush.  I used them to create a very graphic design with the stamped sentiment from the Capture Life Stamp Set from Darkroom Door.

I then decided to create an overlapping filmstrip set:

I love how graphic and striking the filmstrip in black ink is and I added just a hint of yellow the the flowers on this card. 

Thanks for stopping by!

Suzz

Wednesday, February 20, 2019

Let me Count The Ways

Howdy!  Time for the Funkie side of the Frilly and Funkie Challenge!   The talented Sara Emily is hosting the challenge and her challenge this time is "Let Me Count the Ways".

She is explains the challenge:

"Since it's just a day away from Valentine's Day, the opening line of Elizabeth Barrett Browning's famous love poem "Let Me Count the Ways" (Sonnet 43) comes to mind. "How do I love thee? Let me count the ways." For this challenge, I would like to see your vintage or shabby chic project that includes three of something. This could be three colors, three words, three stamps (you get the idea); just be sure to tell us what those three elements are."

Using an odd number of elements is something I learned early on in designing my cards and other projects.   One of the classes I took the instructor said it helps the eye follow the design when you use three (or odd) number of elements.  

I decided to use three of one die cut image and layer them to give depth.  I also followed the idea of three with my brads.


Sizzix TimeKeeper Sizzix Bird Silhouette Stampers Anonymous Etcetera Tim Holtz Layering Stencil Nordic Ideaology Quote Chip For the Funkie Junkie Boutique

 I started with a brown kraft bag given to me from a local merchant when I purchased something.

Sizzix TimeKeeper Sizzix Bird Silhouette Stampers Anonymous Etcetera Tim Holtz Layering Stencil Nordic Ideaology Quote Chip For the Funkie Junkie Boutique
 I painted the background with a coat of white gesso.  I then stenciled with crackle embossing paste a pattern on the top and bottom.

I let that dry and smeared with distress crayon and dye ink pad.  Added a spritz of water to soften the effects.  Let that dry.

I then die cut the bird multiple times in white cardstock and cardboard.  I wanted some depth so the cardboard birds were used to stack and layer 3 times.  I painted all the cardboard birds with white acrylic paint.  I cut out a bird from white cardstock which I used to stamp the script and the flowers.

I attached the stamped bird to my top layer.  I then cut out the clock frame and attached it behind the bird with the filmstrip and my 3 brads.

Sizzix TimeKeeper Sizzix Bird Silhouette Stampers Anonymous Etcetera Tim Holtz Layering Stencil Nordic Ideaology Quote Chip For the Funkie Junkie Boutique

 I added the quote chip to give a little punch to the top of the bag.  Now I have a cute gift bag for someone who love to travel and take the journey!
Sizzix TimeKeeper Sizzix Bird Silhouette Stampers Anonymous Etcetera Tim Holtz Layering Stencil Nordic Ideaology Quote Chip For the Funkie Junkie Boutique

Come show us your groups of three!  The winner will earn the chance of a Guest Designer spot at Frilly and Funkie, and everyone who enters and follows the rules will go into the draw for the chance to win a $25 spending spree at The Funkie Junkie Boutique. And there are Top 3 Badges for three further outstanding entries, chosen by the Design Team, because choosing just one winner is so hard!

Thanks for stopping by!

Suzz

Wednesday, February 6, 2019

Winter Blues

We have certainly having the winter blues!  The weather dumped about 8 inches of snow and then dropped to negative degrees temperature and now we are getting warmer! 

The extremely talented Kathy is hosting the challenge at the Frilly and Funkie this time around.  She challenges us with the "Winter Blues".   Here is how she describes the challenge:

"January is the longest winter month and lots of us get the "winter blues." Let's take the winter blues in a positive direction by creating a mostly monochromatic vintage or shabby chic project done up in shades of blue. You may use a bit of white, beige or grey for contrast, but I would like to see the blues to be front and center in this project."

I love a good monochromatic color scheme and blues are beautiful especially in the winter time!  I decided to create a vintage valentine montage with shades of blue.

 I was playing with my Distress Stain Sprays and salt.  I love how it pulls the ink into an intense color where the salt absorbs the color. 

I thought it would be interesting to create a shape with the salt and then add the color.  And this is where I ended up:

Stampers Anonymous Merchant Idea-ology Ball Chain Tim Holtz Paper Dolls Metal Gate Ephemera Mulberry Paper Flowers For the Funkie Junkie Boutique

 How did I get there? 

  1. Draw a heart.  Cut it out.  (Use a heavier piece of paper)
  2. Place the heart onto a sheet of mixed media paper. 
  3. Sprinkle table salt around the edges of the heart and onto the mixed media paper. (I made sure there was a pile of salt all around the edges.)
  4. Arrange the salt to the outside edges of the heart onto the mixed media paper.  Smooth the salt to allow it to flare out towards the edges of the paper. 
  5. After the salt is arranged to your liking.  Spray with your desired distress stain spray color.
  6. At this point I realized the salt was absorbing the ink completely. (Which make sense. :) So I pushed it around and added some more salt.  
  7. Let dry and then scrap off the salt. 
I think I would have only done a few things differently. I would have either:
  • Sprayed the heart mask around the edges first with a pool of ink.  Added the salt while it was wet and let it dry. 
or
  • Sprayed another sheet of paper and sprinkled the salt into it.  After it dries used that around the edges of the heart.  Re-activated the ink with spraying water or more distress ink. 

Things to try in the future. :)

Other pieces to this project included:

  • Painting the metal gate
  • Adding a touch of feather with the heart on her hat
  • Sponging blue distress ink over the paper doll
  • Painting the chain with white paint and sponging on some blue die ink and accenting my numbers with bits of chain
Come share your shades of blue with the team!  The winner will earn the chance of a guest spot at Frilly and Funkie, and everyone who enters and follows the rules will go into the draw for the chance to win a $25 spending spree at The Funkie Junkie Boutique. In addition, the Design Team will select three further outstanding entries and those creators will receive a Top Pick badge to display on their blogs!

 Thanks for hanging out with me!

Suzz

Products: