Hi... I'm back.... In time for the new Funkie Junkie Boutique Challenge "It Looks Real" hosted by the talented Cec!
Here is how she describes the challenge:
"There are so many ways to make something look real when it isn't. For this challenge, make a vintage or shabby chic project with one or more faux elements. Those elements could be faux rust, leather, stitching - to name a few. Make sure you tell us what the faux element is and how you made it because it will look real."
You may remember my post from a few weeks ago where I was playing the Decayed stencil, some texture paste and salt. That immediately came to mind when I saw the challenge. We have this bench in our yard that we don't use except for decor.
I started by trying to replicate the colors on the mossy bench:
Unfortunately I realized when I sat down to work on my post that my Hickory Smoke Distress Stain Spray was empty. I decided to mix up a bunch of different colors to get this:
I took a mix of greens, black, brown, white, to get a variagated color. I ended up with two backgrounds. This is the partial decayed stenciled background. I used the other on my card.
Here are the steps to get to this point:
1. Spread texture crackle embossing paste over a mixed media cardstock with the decayed stencil.
2. While it is still wet spray distress inks and oxide sprays over the surface mixing the colors as desired.
3. While the ink is still wet pour the salt over the surface. I moved up to sea salt from regular salt. :)
4. Now the hard part you have to wait until everything dries. You can speed up the process by using a heat gun but it will still take awhile. Best to let it dry overnight.
5. When it is completely dry you shake off the salt and rub it off. Normally I use my plastic ruler to scrap off the salt. With the textured paste it might pull off your paste. (I put my paste on unevenly and didn't scrape off the excess while the stencil was on which left a very cool surface but limited my scraping.) I used my fingures to rub off the salt bits.
6. After that your surface is ready. I had a few chunks of my embossing paste break off of my background. I just added a few drops of inks into those areas and they blended beautifully.
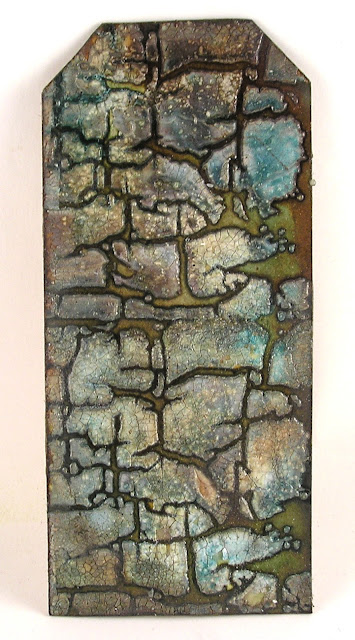
When you are done you can choose to leave it muted or you can cover the entire surface with clear embossing powders to give it a geode effect.
My tag was embossed with clear embossing powder which makes the colors really shine.
For this base I splattered with white paint at the end to highlight areas.
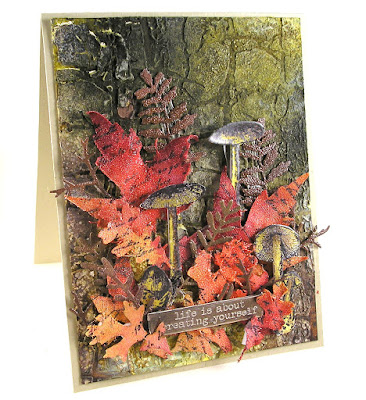
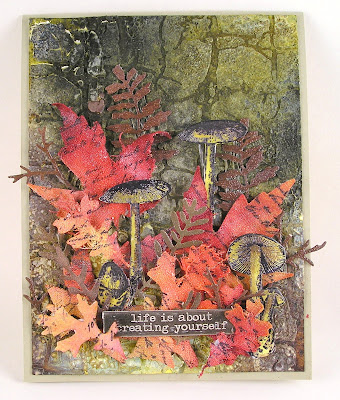
After that I sprayed with a mist of yellow, orange and red distress inks. After they dried I stamped some script onto the leaves. I then versamarked the surface of the leaves and embossed with Frosted Antiquities.
The leaves were cut form cardstock and sponged with brown dye inks. Then they were also embossed with the Frosted Antiquities. I finished the forest scene with a mix of tiny toadstools.
The winner will earn a chance to be a Guest Designer at a future date here at The Funkie Junkie Boutique blog, and everyone who enters and follows the rules will go into the draw for the chance to win a $25 spending spree at The Funkie Junkie Boutique. There are also Top 3 Badges for three additional outstanding entries, chosen by the Design Team.
Thanks for stopping by!
Suzz
Products: (The Funkie Junkie Boutique)
Sizzix Thinlits Fall Foliage
Stampers Anonymous - Tiny Toadstools
Tim Holtz Layering Stencil - Decayed
Ranger Distress Stain Sprays - Fired Brick, Spiced Marmalade, Ground Espresso, Crushed Olive, Black Soot, Hickory Smoke, Peacock Feathers, Iced Spruce, Pumice Stone
Ranger Distress Oxide Sprays - Fossilized Amber, Ground Espresso
Ranger Distress Oxide Ink - Ground Espresso
Ranger Distress Inks - Crushed Olive
Prima Art Basics - White Gesso
Wendy Vecchi Texture Crackle Paste
Frosted Crystal Antiquities Embossing Powder
Versamark Watermark Ink Pad
Sizzix Funky Foliage
Sizzix Funky Floral 3 Die
Salt
Idea-Ology Tim Holtz Word Bands


Just popping in to say thank you for the inspiration and the step by steps on your marvellous project. Loving the techniques and what a stunning effect on the background x.
ReplyDeleteYou sure DID FOOL me; I knew your background had to be created, but those leaves... I thought the leaves were real leaves preserved!
ReplyDeleteI'm so lovin' what's going on here!!!
That paste & crackle is sooooo fun!!
You've definitely inspired me!
THUD! Yep, that's me hitting the floor again, because as always I am floored by your techniques, Suzz! And that amazing tag background leaves me with my mouth wide open, scratching my head wondering if it is some sort of polished geode. Oh, my! What a fabulous card and tutorial! I'm so going to try this, but I know I could not achieve the results you have here!
ReplyDeleteYour leaves made from linen are genius and oh, so inspiring! Now I wish I had those little toadstool stamps, too! You are such an enabler, my friend! Thank you for your inspiration today! Hugs!
PS I had to add that we had a bench just like that, too. Kind of a science experiment for me. But now we are just left with the iron ends, because the rest of it rotted away. Ha! Ha!
ReplyDeleteAND what is it with the Hickory Smoke spray? I used up the last few drops of mine with this last project, while the rest of my sprays are full!
WOWZERS! I absolutely love your project! Thanks for the details, I love the idea of using fabric for the leaves!
ReplyDeleteWOW Suzz! You have perfectly replicated the look of decay with that magnificent background. It reminds me of dry stone walls we see here in the UK, covered in damp and moss, and the most wonderful backdrop for autumnal leaves and toadstools. Truly this is wonderful! x
ReplyDeleteSuper gorgeous and oh that texture! I LOVE your mossy background and all the steps to create it. PINNED!
ReplyDeleteLove the techniques you used to achieve such fabulous results!
ReplyDeleteYou definitely captured the essence of your bench!
An absolute knockout - your cloth leaves look completely real, as does that gnarly textured lichen background - and I love the fungi popping up between the leaves. On top of that, it's completely beautiful. Just fabulous!
ReplyDeleteAlison x