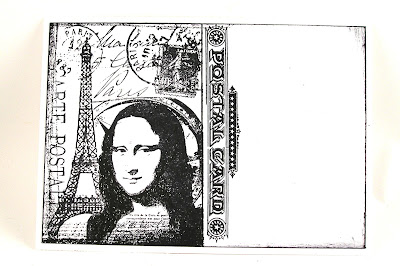
Hi! I am sharing a post for the Funkie Junkie Boutique Inspiration Ave on travel! This past month has been a bit hectic with a little bit of roadtrip fun. It had me thinking about traveling the world and postcards!
I worked on a card and multiple postcards. I shared the front and backs of the postcards.I mixed in some stamping along with a touch of die cuts. I love postcards because they are all stamping!
For the cardbase:
Mask the top and bottom of the card with washi tape. Sponge blue dye ink over the open cardstock. Cut out the globe from white cardstock. Sponge the globe with various shades of green dye ink. Splatter the surface of the inked areas to create water spots.
Stamp the air mail and stamp images using the same dye inks from the globe and background. Cut the stamped images out and distress the edges. Stamp the sentiment with black ink and cut out. Ink the edges of the sentiment with the blue dye ink. Ink the edges of the snapshot with the green dye ink. Attach the stamped images with a clip. Assemble the card.
Now you have a fun little adventure and travel card ready to go for someone ready to embark on a trip!
For my next projects I created a variety of postcards. I used various stamps on 3 1/2 x 5" postcard bases
For the next postcard:
Stamp the image on the left side with black archival ink. If you are planning on sending a postcard I always try to use water resistant ink. If you use a dye ink you can cover it with clear embossing powder or a sealant. Stamp the postcard stamp across the side of the image leaving the right side open for the address.
The next postcard using the soft tan ink with a hint of watercolor pencil to accent.
Stamp the image with light brown ink and add accents with watercolor pencil. Stamp sentiment along right side.
For the back of the postcard the globe was die cut and applied to the postcard. The edge was covered with washi tape and the sentiment stamped along the edge. The address stamp was masked on the stamp with post it notes and then inked up. Then then the post it notes were removed and the word address was stamped on the right side.
The front of the post card is a snapshot and a few stamps were stamped over the image to add some travel vibes.
For my final postcard the Inspector is peeking over the edge.Stamp the inspector using black archival ink. Mask the inspector with a second stamped image of him cut out and placed over the original stamped image. Ink up the circle stamp and stamp over the masked image. Then layer in the other stamps using the blue, black and brown inks. Finish with sponged archival ink around the edges. Flip the postcard over.
Stamp the images using archival black ink an the plan with the blue dye ink. Sponge the endges with the brown dye ink. Draw a line down the center with black permanent marker. Distress the background with some inky smudges using brown archival ink.
I hope this has you thinking of travel plans!
Suzz
Products:
- Stampers Anonymous Tim Holtz - The Inspector
- Stampers Anonymous Tim Holtz - Correspondence
- Stampers Anonymous Tim Holtz - Eccentric
- Stampers Anonymous Tim Holtz - Tiny Text
- Stampers Anonymous Tim Holtz - Exquisite
- Ranger Distress Oxide Ink - Uncharted Mariner
- Ranger Distress Ink - Ground Espresso
- Ranger Archival Ink - Jet Black, Pebble Beach
- Ranger Distress Ink - Forest Moss
- Ranger Distress Ink - Crushed Olive
- Idea-Ology Tim Holtz Snapshots
- Idea-Ology Tim Holtz Remnant Rubs Eccentric


No comments:
Post a Comment
Thank you for stopping by and spending a little time here with me on my blog!
Note: Only a member of this blog may post a comment.