Hi! I have been a terrible blogger this month. Things have been very busy at home and I have been creating but not finishing many things. I finished this card last week but then realized it was very similar to a series of cards made previously with this stamp. :)
I also have a ton of half finished projects. I start them and walk away because I don't know where to go with them next.
Like this attempt to play with a glaze resist over stamped text and color bursts.
or this a stencil outline with another stencil layered in with embossing paste.
This was me still playing with the glaze resist.
I have a bunch of ideas half started and not finished. These will go in the backgrounds pile to hopefully re-surface into a finished project at some time.
Thanks for stopping by!
Suzz
Showing posts with label Flower. Show all posts
Friday, September 30, 2016
Saturday, April 30, 2016
Wise Owl
Over on the PaperArtsy blog the challenge is about White Space. The post is very inspiring showing various ways to use negative space or white space in your art. This is one area I really struggle with as I love to fill in the space with more colors, stamping, etc.
I decided to play around with the concept this morning and this is what I came up with. I know there isn't a lot of white space but I do love the effect of the splattered mists.
I have used the following Paper Artsy stamps: HotPick 1011, Hot Pick Xtra 01 Background, and Tattered Angels Glimmer Mists - Patina, Bubble Gum. I also added a hint of little gold embellishments.
Thanks for stopping by!
Suzz
I decided to play around with the concept this morning and this is what I came up with. I know there isn't a lot of white space but I do love the effect of the splattered mists.
I have used the following Paper Artsy stamps: HotPick 1011, Hot Pick Xtra 01 Background, and Tattered Angels Glimmer Mists - Patina, Bubble Gum. I also added a hint of little gold embellishments.
Thanks for stopping by!
Suzz
Wednesday, April 27, 2016
Frilly and Funkie - It's Not Easy Being Green
Hi! I am hosting a challenge in honor of Earth Day, which is
April 22nd on the Frilly and Funkie Challenge Blog. The Funkie side of the team is sharing their projects today and you do not want to miss out on what they are sharing! For this challenge you can create any type of project as
long as you UPCYCLE or re-cycle something. Re-purpose an existing item,
recycle an element that usually would be thrown away or use your paper
scraps in a creative way.
The winner will earn the chance of a Guest DT spot here at Frilly and Funkie, and everyone who enters and follows the rules will go into the draw for the chance to win a $25 spending spree at The Funkie Junkie Boutique.
I had an empty Halo box that I thought would be perfect to house a few plants for my MIL for Mother's day.
I am really pleased with the way this turned out. Here is what I started from:
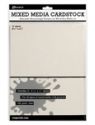
I had to do some trimming to take of the halo. :) And then I cut pieces of mixed media cardstock to the shape on the box.
Then I got busy trying to re-create a wood grain on the cardstock.
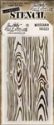
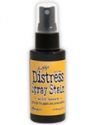
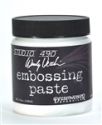
Pretty cool... I mixed distress stain spray with white embossing paste to tint the paste. I laid the stencil on and put a coat of wood grain on all four pieces. I had to let them dry in between to cover the complete sides so this process took a few days. (I don't like to wait for things to dry!) After the paste dried I kept applying coats of spray of brown, gray, and orange. I kept misting until I got the color I liked.
Here is a picture of the finished outside.
With the halo box it had the corners folded back and leaving a weird shape on the corners. I didn't need the extra structural support so I pulled it off the sides and cut out the extra cardboard.
For the insides I wanted the woodgrain but not the texture. I decided to spray the cardstock with a lighter mix of colors and then sponge a black dye ink over the stencil to create the grain.
After that I just die cut flowers which were misted with yellows and purples. I sponged the edges with brown dye ink and stamped a very fine script in brown over the surface. I punched a few little birds and layered the flowers across the front and back of the box.
To cover my edges I decided to moss it up! I pulled out the hot glue gun and covered the edges with moss.
Here is the finished box.
Here is an angle to show you the finished inside of the box.
The wet spots on the stone are from the puppy running up the steps before I stopped to take my pictures.
Here is a close up of the flowers in their pot.
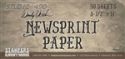
To finish off her gift I stamped on the newsprint paper a mix of the typewriter, butterflies, wildflowers in a mix of the colors on the box. I used two sheets to tie around the planter with twine and set them in the box.
Thanks for stopping by!
Suzz
Products:
The winner will earn the chance of a Guest DT spot here at Frilly and Funkie, and everyone who enters and follows the rules will go into the draw for the chance to win a $25 spending spree at The Funkie Junkie Boutique.
I had an empty Halo box that I thought would be perfect to house a few plants for my MIL for Mother's day.
I am really pleased with the way this turned out. Here is what I started from:
I had to do some trimming to take of the halo. :) And then I cut pieces of mixed media cardstock to the shape on the box.
Then I got busy trying to re-create a wood grain on the cardstock.
Pretty cool... I mixed distress stain spray with white embossing paste to tint the paste. I laid the stencil on and put a coat of wood grain on all four pieces. I had to let them dry in between to cover the complete sides so this process took a few days. (I don't like to wait for things to dry!) After the paste dried I kept applying coats of spray of brown, gray, and orange. I kept misting until I got the color I liked.
Here is a picture of the finished outside.
With the halo box it had the corners folded back and leaving a weird shape on the corners. I didn't need the extra structural support so I pulled it off the sides and cut out the extra cardboard.
For the insides I wanted the woodgrain but not the texture. I decided to spray the cardstock with a lighter mix of colors and then sponge a black dye ink over the stencil to create the grain.
After that I just die cut flowers which were misted with yellows and purples. I sponged the edges with brown dye ink and stamped a very fine script in brown over the surface. I punched a few little birds and layered the flowers across the front and back of the box.
To cover my edges I decided to moss it up! I pulled out the hot glue gun and covered the edges with moss.
Here is an angle to show you the finished inside of the box.
Here is a close up of the flowers in their pot.
Thanks for stopping by!
Suzz
Subscribe to:
Posts (Atom)