Kiara is also hosting a challenge on her blog http://http//stampingcafe.blogspot.com/2009/03/one-layer-monday.html for a single layer card.
The Hero Arts flickr group had a thread about single layer cards and we mostly agreed that we start with single layer card when you first stamp and move up to the multiple layers and fix things by adding layers when we make a mistake. :) So this week will be interesting to see what people come up with.
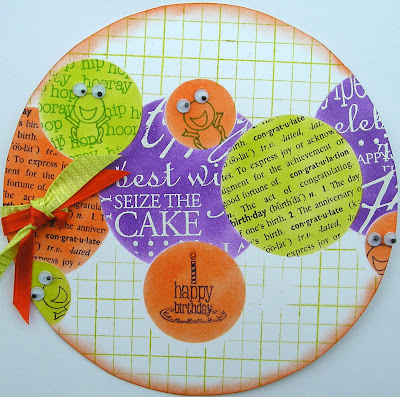
So here is my single layer card. Two things about this card...
One: it is for my eleven going on twelve year old daughter's birthday which is next week.
Two: Her room is painted in purple, green, and orange with circles... We used the same techniques as applied on this card in her room.
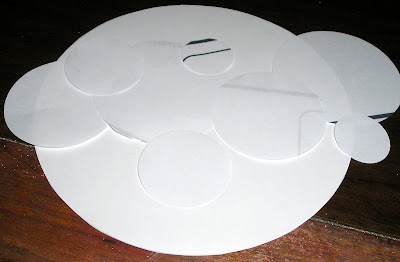
 This take a little planning and laying out before starting. This was my template:
Recipe:
- Punch out all circles from a piece of copy paper. You need to use thin paper to help with the masking and reverse masking. I cut multiple circles in each size to allow me to play with placement.
- Keep the circles and the sheet you used to punch them from.
- Lay out your circles with overlaps where you think you want them. After you position them where you would like them and how you would like to overlap them...
- If you can keep your template with circles laying there as a guide and use another circle to work on.
- Start with your full circles and where you want them placed. Lay the piece of paper with the punched out circles and lay it on your card where you would like the circle positioned. Sponge or brayer the color for that full circle. Do this for each top circle/full circle on your card.
- Partial circles or underlapping circles. Lay the circles scraps on already sponged circles to protect them. (If you have repositionable tape you can lightly tack them in position.) Postion them exactly on top of the sponged in circle. Now take your sheet with the punched out circles and lay where you want the next circle to be sponged. Sponge the next color in the circle.
- Continue this until all your colors are sponged on.
- Repeat the same process but now stamp your images in using the same methods. Cover the circles you don't want to be stamped on and use the sheet with the punched out circles to mask surrounding areas.
Thanks for stopping by...
Suzz


Awesome tutorial Sue!!!! I am so so so 'bad' at masking... I really loved this tip!
ReplyDeleteSuper cute card!
I think we need a photo of your dd's room... I am so curious to see it! :)
And, is she the oldest? Is there a teen in the house?
GREAT instructions! Love this card very much, Suzanne!
ReplyDeleteI'm thinking the planning was a fantastic idea with all that masking. Great job!
ReplyDeleteI think we're all wonderfing about your daughter's bedroom now. :)
ReplyDeleteLove your design. Lots of work and the result is fantastic.
Hi Suz! Great explanation of the masking technique! Happy Birthday to your daughter--she's gonna love this card! I do!!!
ReplyDeleteAwesome card, Sue! Love the color combo, how fun! Happy Birthday to your daughter, she will love the card! Thank you for the tutorial!
ReplyDeleteWhat fun, bright colors. And such a great example of masking.
ReplyDeleteWhat fun bright and cheery colors. Your dd is going to love it!! I wish I could see a picture of her room. Happy Birthday to your daughter.
ReplyDeleteSo sweet. Nice shading around the edge!
ReplyDeleteHow bright, cheerful and so fun too!
ReplyDelete