Tuesday, September 29, 2015

STAMPtember Blog Hop Winner

Hi!  All the winners for the Simon Says Stamp Monday Challenge STAMPtember® blog hop have now been posted.


The winner for the grab bag from my blog is  Lisa  Congrats Lisa!! The Simon Says Stamp team will contact you to make sure you get your prize, and there is also more information on the Simon Says Stamp Store blog.

Thanks everyone for stopping by during the hop and leaving some love.

Suzz


ATC's

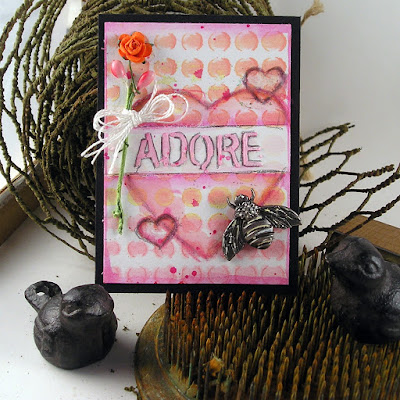
I had quite a few more ATC's that went with my series I shared yesterday.  I decided to split them into a few posts.  Here is the remainder of my ATC's made with my ombre backgrounds.


I had so much fun playing with different ideas and techniques.

Thanks for stopping by!

Suzz

Monday, September 28, 2015

Ombre

Hi all and welcome to another week of the Simon Says Stamp Monday Challenge. This week the challenge is ombre!

I created a series of backgrounds using a stencil, some paints in varying shades of colors to create my own ombre backgrounds.  I then cut them up to create a variety of atc's.

My first one mixed pink, coral, and yellow paints together.  I then stamped the butterfly and colored to coordinate. I added a few rub-on remnants in the background and a little shading around the butterfly.


Next I added a few circles and a touch of white paint to soften the background.  I added a stamped image of the lady and gave her a few inspiring words along with her flower in her hair.

I then went back to the same pink background and added a few more circles with white paint and added in the butterflies in coordinating colors.

Products: Stencil, Paints, Ranger Fossilized Amber Paint, Ranger Pink Gumball Paint, Ranger Abandoned Coral Paint, Ranger Dabber Blue Paint, Ranger Paint Dabber - Twisted Citron, Simon Says Sequins, Hemptique White Twine, Stampers Anonymous - Butterflies and Moths, Stampers Anonymous - Watercolor Butterfly 2015, Stampers Anonymous - Perspective , Idea-ology Remnant Rub-on Botanical, Dina Wakely - All the Girls , STAEDTLER Watercolor Pencils, Ranger Dabber Picket Fence Paint, Technique Tuesday Circle Dies , Prima Paper flowers, Black cardstock

As always Simon Says Stamp will be giving away $50 voucher to shop at the fabulous Simon Says Stamp Store
50dollar_voucher_600px

So now it's YOUR turn, come play along and show us your ombre inspired art. You have until Monday 8am Ohio time. 1pm UK time, 2 pm CET to join in

Suzz

If you use instagram add  #sssmchallenge to your challenge entry uploads so we can see them on there too!

Instagram

Tuesday, September 22, 2015

Bottled Up Vacation

Good Morning!  I am back to share a little bit of bottled up vacation to go with my sentiment of Collect Life's Beautiful Moments.
I could not get all the pictures to show up all the cool details because of the mason jar glass and how it catches the light when photographing this.

 This is intended to be hung like this:
 But it shows a little more of the detail when you look at it from this angle:

 I started with a mason jar and added a bit of sand on the bottom mixed with miniature shells. 
 I had some very pretty icy branches from Christmas sprigs left over that I cut and placed in there.

 I stamped the shell and colored it with a mix of Ranger Distress inks.  I die cut out a few sea-horses and inked them up and stamped a little script on them.  I then added a pearl eye to them and placed them in the jar.
 I then looked around and found I had the leftover covering from a set of measuring cups that I had saved because I loved the hemp / twine and it fit perfectly.  The best part is it has the handles on the top to use to hang the jar full of vacation anywhere.

Products: Simon Says Stamp Tim Holtz Exclusives Stamps, Sizzix Die - Mini Seahorse, Ranger Distress Inks - Coral, Vintage Photo, Peacock Feather, Memory Box Dream

I am entering this into the Mixed Media Place Exercise #12 - Proverbs or Sayings


Hope you have a wonderful day!

Suzz


Monday, September 21, 2015

STAMPtember Blog Hop


You should have arrived here from the wonderfully creative Sandra.  If not then you will need to go to the Simon Says Stamp Store Blog to start from the beginning. 

Use A Stamp And Blog Hop

You must create a project using a rubber or clear stamp, no digi images allowed, add your creation to the linky AND hop around the designers blogs leaving comments along the way.

We are showcasing the new STAMPtember® products that have just been released. CLICK HERE to see them all. It is a HUGE release with loads of fabulous stamps, dies, stencils and much more!

I was happy to receive the Simon Says Stamp Tim Holtz Exclusive stamps.

I created a card inspired by the sentiment with the hand.  I stamped over the background with a map stamp.  Layered in a leftover scrap of a map.  I added in the compass with a touch of watercolor and finished it with the sentiment. 


I also was lucky enough to receive these sweet Simon Says Stamp Stitched Pumpkin Dies and decided to create a Thanksgiving inspired card as well.

I had the Simon Says Stamp Thanksgiving Table set which was a cute backdrop to the pumpkins. I added a bit of stenciling in a strip along the bottom to ground my grouping.  

Products: Simon Says Stamp Exclusive: Tim Holtz Stamps, Stitched Pumpkin Dies, Thanksgiving Table, Ranger Distress Ink - Spiced Marmalade, Vintage Photo, Fossilized Amber, Peeled Paint, Stampers Anonymous - World Map, Classics Watercolor Pencils, Waterbrush, Black Twine, Ranger Archival Ink - Black, Black Cardstock, Tim Holtz Layering Stencil - Lattice, Ranger Distress Stain Spray - Fossilized Amber,  Ranger Archival Ink - Coffee

I am the last person on the hop go back to the Simon Says Stamp Monday Challenge and join in on all the fun!


As always Simon Says Stamp will be giving away $50 voucher to shop at the fabulous Simon Says Stamp Store
50dollar_voucher_600px


Each DT member also has a Simon's Goody Bag to give away too! All you need to do is leave me a comment on this post AND enter the Simon Says Stamp Monday Challenge 

Suzz


Instagram

Do you use Instagram ?  If so please add  #sssmchallenge so we can see your entries there too!

There are fabulous Give Aways and inspiration from fabulous designers on a daily basis over on the Simon Says Stamp Blog , if you haven't subscribed by email you may want to so you don't miss out

Simon Says Stamp

You have until Monday  8am Ohio time. 1pm UK time, 2 pm CET to join in


Wednesday, September 16, 2015

Wintery Branches


I just received a new PaperArtsy set and couldn't wait to ink it up.  The Words and Paintery September colors reminded me of a blustery autumn which fit with the Mixed Media World Autumn Colors Challenge. 

I created a variety of backgrounds with the colors from the challenge and cut down a section of one of them to create a tag.


I loved the mix of colors and the new stamps with the bird and branches fit perfectly with a cold autumn day.

Products: PaperArtsy - Sara Newman Eclectica,    Ranger Distress Ink / Spray - Rusty Hinge, Vintage Photo,   Memento - Black, Paris Night, Tim Holtz Layering Stencil - Snowflakes, Ranger Archival Ink - Black, Stampendous Gold Glitter, Simon Says Stamp - Sequins

Inspiration Photo:


Thanks for stopping by!

Suzz

Monday, September 14, 2015

Crystal Magic

Welcome to another week of the Simon Says Stamp Monday Challenge. This week the challenge is to share a technique you love!
I have always loved trying out new techniques and this week I tried a variety of techniques with Brusho powders. 

Here is the end results of my playing all week. 
 Keep in mind I have this beautiful desk my husband built me that actually is large enough for me and a friend to ink it up.  As usual I have it full of stuff and working in a tiny area until my project is done then I clean the surface and put everything away and start again! (I also like that you can see my remote which controls the t.v. which is on the entire time I am in the craft room. Preferably PBS mystery shows!)
I first started with a resist using the new snowflakes from Stampers Anonymous.  I inked up the stamps with versamark and stamped them onto mixed media cardstock.  I heat embossed with clear embossing powder.  After that I added a bit of powder and and water until I got the consistency I wanted and then held it up to allow the watery color to run down the cardstock.  I cut this down into a tag and a card sized piece of paper after it had dried.

I didn't finish off either of these backgrounds yet... Expect to see it in some future project. :)  Next I decided to try to apply the crystals to the stamp.

I used a dry paint brush and picked up the powder and painted it onto a dry stamp I could have also inked up the stamp with Versamark which would have held the crystals.  The crystals carry a lot of color and they doesn't need much water to generate color.  Tip: The crystals will get everywhere and activate when you least expect it!  So make sure to clean your surfaces thoroughly when done or  work over scrap paper that you can through out when you are done. :)  I have added some color to other projects unexpectedly because of this. :O

I painted the stamp and then spritzed lightly the stamp with water and stamped it I was able to stamp twice with the same vibrancy and the third I cleaned off the stamp and then did it again when dry for my third set of flowers.   I did this many times on different papers with varying results.

I also tried inking up a stamp with the crystals mixed with water on acetate.   I added a tiny bit of spritz of water to the crystals and then inked up the stamp from that mixture.  You get varying results depending on how much water is in the mix and gets picked up on the stamp.


My next thought was to sprinkle the crystals through a stencil and see the effect.
I started with the new snowflake stencil and sprinkled a small amount of crystals into the openings and spritzed lightly to keep the watery image intact.   I cut this down to a tag.  Because I had lightly spritzed the crystals the stencil didn't bleed as much but my crystals also were not fully activated and there is some texture to the snowflakes.  To prevent this from bleeding if water activated the remaining crystals I laid the stencil back over the snowflakes sponged on versamark over the snowflakes and heat embossed them with clear embossing powder.  This sealed them and kept the crystals intact. 

Right after finished the tag and while the stencil was still full of the remaining crystals and colors  I pulled the stencil up and spritzed more water to the stencil.  I then laid it back down to get the reverse image on a new piece of cardstock.   (I chose these colors because these are the colors I have in my brusho set.  I need to add the rest of the colors to my collection!)

I then tried to take a few photos of the process for you to follow along:

1. Place the stencil on mixed media cardstock  and sprinkle with desired mix of crystals across the surface:
 2. Start to mist the surface with a water bottle. I used a little one which controls the amount of water being used.  You will see the pretty colors start to blend and spread.  If you over saturate the crystals will bleed under the stencil and you will lose the image.  
 3.  Lift the stencil and you should see a lovely image on your card stock.
4. Take the stencil with the remaining watercolor and place face down onto another sheet of card stock:


Here are some of the results:  

The dark red one was the original one I took step #1 photo of before I misted and lifted the stencil.  I rubbed off the extra crystals with a dry piece of paper towel once it was dry to again prevent crystals from activating. Any of these images have a lovely wealth of color so if they get wet they will spread!  The outline of the stencil is on the right which I flipped onto a white piece of card stock.  The bottom left piece is from the step #3.  I don't know where step #2 disappeared to. I will have to go look for it! :)

I also was playing with coloring leaves in a pan of water with the crystals sprinkled in.  I took those leaves as they were drying and placed them in between pieces of white card stock and caught their imprint.

 Finally I played with stamping an outline stamp with the cracks and sprinkling the powders over the stamped image and spritzing them.  I also used the crack stencil and tried getting the same effect but the stenciled image didn't show up as much as I would have liked so I ended up with the stamp:

I also did try embossing paste with the crystals sprinkled on top after I had stenciled. It added a lovely bit of color and I think if I had mixed them into the paste it would have given a lovely colored paste.  Something to try for the next time I play with the crystals.

Products: Brusho Crystal Watercolors, Wendy Vecchi - The Beauty, Stampers Anonymous - Cracks, Tim Holtz - Layering Stencil - Crackle, Memory Box - Heartwood Stencil, Simon Says Stamps Sequins, Ranger Archival Ink - Coffee, Stampers Anonymous - Tim Holtz Snowflakes, Tim Holtz Layering Stencil - Snowflakes, Darkroom Door - Wildflowers, Stampers Anonymous - Classic Stamps, Sizzix Fall Foliage Thinlits
As always Simon Says Stamp will be giving away $50 voucher to shop at the fabulous Simon Says Stamp Store
50dollar_voucher_600px

So now it's YOUR turn, come play along and show us your favorite technique. You have until Monday 8am Ohio time. 1pm UK time, 2 pm CET to join in

Suzz

If you use instagram add  #sssmchallenge to your challenge entry uploads so we can see them on there too!

Instagram