Showing posts with label Mason Jar. Show all posts

Wednesday, March 8, 2017

Spring

Frilly and Funkie Time!  Nancy is hosting the challenge this time around and it is all about welcoming spring.  Here is how Nancy describes the challenge:

"Our theme this time around is 'Welcome, Spring!' It's fresh, soft breezes and fragrant blossoms have finally arrived. Create any vintage or shabby chic project that welcomes the advent of this glorious season. Think budding trees, birds and nests, butterflies, and beautiful blooms!"

At the end of the challenge the team will choose their top four picks. The first place winner will be invited to join as a Guest DT spot at Frilly and Funkie. Three additional talented participants will receive badges to display on their blogs. Everyone who enters and adheres to the challenge guidelines will be entered into a drawing to win a $25 spending spree at The Funkie Junkie Boutique!

I decided to create a card celebrating the beautiful blooms of spring that are wonderful to capture and put in a simple mason jar on the table. 

I started playing with a mix of the Wendy Vecchi products that were just released.  I was inspired by Wendy's style of cardmaking and tried to emulate the patterns she mixes so beautifully into her designs.


I started with using her squares stencil and layering in a soft shading of antique linen in the background.  I then used the Archival ink to stamp the vintage test through the stencil in various areas to add a little depth. 


I decided to cut that panel out and then stencil the edges of the cardbase  using the leaf green archival ink.  After I finished that and layered the panel on top of the card base I decided I wanted to add that same green to the top and bottom of my panel.  I sponged over my original antique linen with a green row of ink.

I then stamped the mason jar on acetate using Stazon ink.  I colored the backside of the jar with an alcohol marker to give it a hint of blue.

I cut out the mason jar.  I then stamped the flowers and stems a few times and colored them with distress markers and the same ink used on the background.  I cut them out and added a crackle glaze to the flowers.  The flowers got a smattering of glass beads for the center.

I stamped the lovely sentiment in coordinating ink on my background which decided where my flowers and jar were going to be placed.

Thanks for stopping by and please come join us in the challenge on the Frilly and Funkie blog!

Suzz

Wednesday, December 7, 2016

Winter Wonderland

Happy Wednesday!  The Funkie Team at the Frilly and Funkie Challenge Blog is sharing their projects for the Home for the Holidays Challenge.  Kathy is hosting the challenge and here is how she describes the challenge. "Let's get ready to Deck the Halls by creating some home decor for the holiday season.  You can make centerpieces, wreaths, banners, ornaments, wall hangings, or little vignettes  ...basically anything BUT a card for this challenge. If you don't celebrate Christmas or Hanukkah or Kwanzaa, then just make some home decor with a wintry theme."

At the end of the challenge the team will choose their top four picks. Our first place winner will be invited to join us in a Guest DT spot here at Frilly and Funkie. Three additional talented participants will receive badges to display on their blogs. Everyone who enters and adheres to the challenge guidelines will be entered into a drawing to win a $25 spending spree at The Funkie Junkie Boutique!

I have had a few glass jars with metal tops sitting on my craft table for awhile and that inspired me to create a mini winter scape intended only for an electric tea light as I have flammable items inside my jar.

 I didn't take many photos of the steps along the way but I will share a few tips.

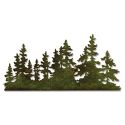
1. I die cut the trees from a lightweight cardboard which gave me flexibility in setting them around the edges inside my jar.  I painted them white and then added snow along the bottom with tape.

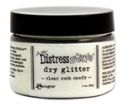
2.  The snow is a mix from Stampendous which I love because it has white embossing powder, mica flakes, and glitter all mixed together. It gives a beautiful wintery mix for you all ready to spoon out and layer the bottom of the jar. (Again highly flammable and not intended for wax candle!!)  I have linked up products from the store that will make a pretty snowy mix as well!

3.  I painted the top of the metal jar with a light white wash and then actually heat embossed the mix on the top. I repeated this multiple times.

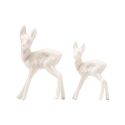
4. I then glued my deer onto the top and while the glue was wet I threw more snow mixture onto the glue.

4. I painted my trees with white paint and then rolled them in crystal glitter while wet.

5. I painted my stars which were blue gem stars to match the trees.

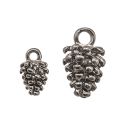
6. I coated my pewter pine cones and Christmas token with white paint.

7. I attached the trees with glue and added a layer of glue on the base and sprinkled the magical snow all around the trees.

I didn't take a picture of the tree lit up as getting the shot is tough to show off how it lights up.  If you want more translucence you could cut the trees from vellum.

Don't forget to pop over and see all the other beautiful projects by the design team!

Suzz

Tuesday, September 22, 2015

Bottled Up Vacation

Good Morning!  I am back to share a little bit of bottled up vacation to go with my sentiment of Collect Life's Beautiful Moments.
I could not get all the pictures to show up all the cool details because of the mason jar glass and how it catches the light when photographing this.

 This is intended to be hung like this:
 But it shows a little more of the detail when you look at it from this angle:

 I started with a mason jar and added a bit of sand on the bottom mixed with miniature shells. 
 I had some very pretty icy branches from Christmas sprigs left over that I cut and placed in there.

 I stamped the shell and colored it with a mix of Ranger Distress inks.  I die cut out a few sea-horses and inked them up and stamped a little script on them.  I then added a pearl eye to them and placed them in the jar.
 I then looked around and found I had the leftover covering from a set of measuring cups that I had saved because I loved the hemp / twine and it fit perfectly.  The best part is it has the handles on the top to use to hang the jar full of vacation anywhere.

Products: Simon Says Stamp Tim Holtz Exclusives Stamps, Sizzix Die - Mini Seahorse, Ranger Distress Inks - Coral, Vintage Photo, Peacock Feather, Memory Box Dream

I am entering this into the Mixed Media Place Exercise #12 - Proverbs or Sayings


Hope you have a wonderful day!

Suzz


Tuesday, May 26, 2015

Graduation

On pinterest I saw the cutest graduation mason jars and decided to copy the idea.  We have lot's of graduations this year in the family.  My daughters have friends as well who are graduating.
We did two versions of the jars some have money and the others have candy in the colors of the schools that the recipient is going to.

Here is all of the jars queued up waiting for the parties.
 I found a couple of packages of tassels at the store which made the toppers easier. I cut mini cards and put a black brad in the center.
 I stamped a sentiment to put in the center but haven't attached them so she can sign them before I put them in the card. 
I stamped a sentiment on the tissue paper diploma attached on the top.

Have a great day!

Suzz