


I really wanted to do some marbling and so I created a huge pile of marbled backgrounds. I tried shaving cream, alcohol inks, water, etc. I liked the shaving cream the best and ended up doing multiple backgrounds just for this card:

To create the marble background I did the following:
1. Spray a mount of shaving cream (Cream not gel) onto your craft mat or a sheet of acetate. Basically anything that won't hold the color after you are done and is easy to clean up or throw away.
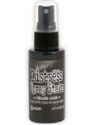
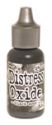
2. Drip re-inker or spray inks into the shaving cream.
3. Now you can try alot of different ways to marble. You can swirl the ink into the shaving cream with a plastic knife. You can just smoosh it into the shaving cream with an acetate sheet on top and pushing and moving the shaving cream and ink around. You decide. This is the fun part and my shaving cream smelled good and conditions your paper!
4. After you get your ink and cream mixed you lay your paper ontop and smoosh it around until it is covered in inky shaving cream.
5. Pull back the paper and lay flat. Using a flat edge scrape off the excess shaving cream. I use my plastic rulers and shave off the cream.
6. Let dry.
I ended up with so many pretty backgrounds it made it difficult to decide what to do next. I spent a few days trying some ideas. (I cut out some arches as I knew I wanted to incorporate arches into my project) I think it was my husband laying bricks outside in a pattern that triggered the idea of creating a herringbone tile effect.

I googled an image of herringbone to get me started.
1. Cut your tiles to the size you want. I cut mine 1/2" by 1 1/2".
2. Cut the background to the size you want before laying down the pattern.
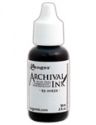
3. Sponge the edges of your tiles with a grout color. I chose black.
4. Start in the middle with one of your tiles and start taping and laying them.

5. Tape down the first on in the middle of you paper.
6. Lay down the next one and line up to the edge.
7. Repeat... Repeat.. Repeat..
A couple of tips:
- I first laid this without sponging the edges. They didn't pop enough because of the marbling. They needed a grout effect. You could do this by leaving space between the faux tiles but would need your space to be even.
- I had a few faux tiles that were slightly wider or longer. Your pattern wont' work if that happens. :) I had to pull mine up and re-cut a few more.
- When you get to the edge of the page attach them as a full piece. When you get done you can cut the pieces off to use as filler for the areas where you don't need a full piece.

The winner will earn the chance of a Guest Designer spot at Frilly and Funkie, and everyone who enters and follows the rules will go into the draw for the chance to win a $25 spending spree at The Funkie Junkie Boutique. In addition, the Design Team will select three further outstanding entries and those creators will receive a Top Pick badge to display on their blogs!
Thanks for stopping by!
Suzz
 |  |  |  |  |
 |  |  |  |  |
 |  |


Wow, Suzz! This card is not only BEAUTIFUL, but the laying of the tiles is some engineering genius! What a great design! Your creativity know NO boundaries! I've never seen such a great result with the shaving cream! Excellent tutorial, too! Hugs!
ReplyDeleteOh wow! This is a really cool technique. It looks so real. This is one stunning card and would be perfect for a wedding.
ReplyDeleteKate
Oh Suzz you sure fooled me! I couldn't figure out how this amazing card had been created until I saw your blog post. Your patience for creating that herringbone background is astounding! Thank you for sharing xx
ReplyDeleteI am totally blown away by that herringbone design! I would love to see this in person. It almost has a photographic quality that has me completely mesmerized. What an amazing project my friend!
ReplyDeleteThat marbled tile is gorgeous, I can't believe it is all pieced together! The end product is stunning and I love that sentiment!
ReplyDeleteThe marbling is fantastic but then made into a herringbone pattern, it becomes unbelievably stunning. Your patience and this piece blow me away!
ReplyDeleteYour technique is so awesome. I didn't finish my little marbled plinth in time for your challenge, but I want you to know that I was inspired by the challenge and made something because of it. Thank you for hosting the challenge and then making this incredible wedding card.
ReplyDelete