Saturday, August 31, 2013

Mixed Media Challenge

I decided to play along with my friend Mona's new Mixed Media Challenge #6 using the colors hot pink, light pink and gray. 
 I ended up with two different projects. The first one started from a piece of pattern paper sitting on my desktop. I had a piece of paper with gray woodgrain on the background.  I decided to stencil the damask pattern over the surface using PaperArtsy grunge paste.  While it was wet I sprinkled Stampendous Ultra-fine Micro Glitter over the surface.  after that dried I spied a leftover Eiffel tower die cut from a page in a book. I applied decoupage to attach it to the front.  I added smears of white paint around the edges.  My piece was a little too small for my cardbase so I applied Maya Road trim along the bottom.

Then I got stuck.  Walked away and came back thinking what if I add a bunch of flowers and trinkets?  So I laid them down and applied a coat of gesso. I sprayed over that with sprays (Black and Pink) The black turns gray with a light application.  I then decided I needed an image and found the lovely lady from Artistic Outposts Loverly London to use.  I stamped her on tissue paper and decoupaged her into the middle. I finished it with the french words along the top.

Along the way I played with a set of stamps from Hero Arts that I purchased because of Jacqueline and her inspiration using these new stamps.   If you haven't checked out Jacqueline's blog you should it is quite a treat to see what she has created.  This card is very much inspired by Jacqueline's style.


 This started from me stamping the flower with pink and gray onto a scrap piece of cardstock. Along the way it got misted when I was misting my other project.  I decided to keep going with it and added an Eiffel tower and some other images onto the card. This is a small card made from leftovers. I was pleased with the effect after it was done so decided to add it into my post.  Sets used: Hero Arts, Artistic Outpost - Paris Exposition, Loverly London, Stampers Anonymous Attic Treasures

The inspiration photo from Mona's mixed media challenge:


 Thanks for stopping by!

Suzz


Wednesday, August 28, 2013

Chalkboard Fun

Welcome to the Artistic Outpost August Release!  The design team is sharing projects using the new Chalk It Up plate and Chalkboard Wisdom plate being released today from Artistic Outpost.

I decided to put together a vintage canvas.

 This is a mix of several mists and layering of doilies, lace and buttons. I mixed in images of the girls from the Artistic Outpost - Paperboy plate with the new sentiments and frames from the Chalkboard Wisdom and Chalk it Up plates.  I added a few banners from Cowgirl Strength and draped them across the canvas.

My second card was inspired by this fabulous card by Linda.
Linda  used this image from the Loverly London plate  previously for her suffragette card and I  thought is would be fun to pair the image inside one of the new frames with the perfect words from the Chalkboard Wisdom plate.   I used the script over the background with a few water rings along with the pencils from the Secretary Pool Plate

Hop along to see all the other fabulous inspiration by the DT.


Thanks for stopping by! 

Suzz

Tuesday, August 27, 2013

The Other Side

I am back to share the other side of my new art journal.  I have been carrying my new book around jotting down ideas, sketches and doodles. 


 The background started with the same damask stencil and DecoArt Embossing Paste.  I added a layer of damask texture and waited for it to dry.  I then used gold glimmer mist to add a hint of color and followed that with brown glimmer mist in areas. 

I smeared the white paint over the surface to catch the damask edges and lighten the colors. The rest was stamping the images using Ranger Archival Ink.

The images are:  Darkroom Door - Fancy Flourish, Darkroom Door - Beauty, Darkroom Door - Butterfly Garden,     Darkroom Door - Arch, Darkroom Door - Home

I finished the edges with the same tissue tape.  I was thinking of stamping something in the Arch, but wanted to think about it. I may have to add something later when inspiration arises. Plus there is a lot of open space on the background. :) 


Have a lovely Tuesday!

Suzz


Sunday, August 25, 2013

Dotty


This week at Simon Says Stamp Monday Challenge we are going dotty!  From polka dots to spotted papers, stamps to dots made with a pen, or even embossed dot cardstock, we invite you to get dotty with us this week at the  Monday Challenge at Simon Says Stamp

I was inspired by the thoughts of dots and pulled out this fun pattern paper using the dots.

When I thought of the dots in the paper it reminded me of the circus and I decided to pull out the Stampendous circus stamps and create a card using Circus images. I used plenty of contrasts of black and red and white and cream. 

My second project is a tag using the same papers and Stampendous Circus Stamps:
I had the left over paper from the previous project where i had punched out the circles with the stars and thought it would be fun to use it on the corners.  I also had a few scraps of black cardstock with the stars punched out.  I cut them into banners and added a few of the punched out stars in a circle to put in the center of the stars. I dressed my little joker in a coordinating outfit. I stamped him twice once on white cardstock and the second time on the pattern paper to cut his outfit and hat out.

I made the ring from bronze wire and attached leftover stars around the circle. A fun circus card!

Products: Carta Bella - Well Travelled, Stampendous Circus PosterStampendous - Carousel Circus StampsStampendous - Lil Joker, Ranger Archival Ink - Jet Black, Vermillion, Crop-a-dile Punch, Stars Die


Come join in the Simon Says Stamp Monday Challenge for a chance to win a $50 Gift voucher for Simon Says Stamp. 

Thanks for stopping by!

Suzz

Friday, August 23, 2013

Creativity

I love the new quotes from Darkroom Door.  I used the new Quote - Creativity to inspire a cover to a new art journal. 

I like this quote. I think that in creating some times I am too worried about all the details and lose the fun in just playing with something new.  This reminds me to try things out and enjoy the process of discovering the art and not so much the design of the end product. 

I started with a journal bought for a few  dollars.    I actually bought a few of these and created my first journal quite awhile ago.  The previous  journal has lots of sketches, notes, ideas scribbled in it and I am about ready for a new one.

I started with white cardstock which I covered in white acrylic paint.  I laid a new damask stencil over the surface and used DecoArt Dimension Effects to add a layer of texture.  I then had to wait for that to dry. :)  When if finished drying I started mixing in Americana multi-surface Satin Paint in a lovely shade of lavender fields. 

I then stamped the Darkroom Door Butterfly stamp using black archival ink onto tissue paper multiple times. I repeated the process using the Bold Blossoms  I cut the tissue paper and used the Americana Decoupage sealer glue to apply the butterflies and flowers to the front of the journal.  I added the touches of the Americana Satin Poppy paint around the edges of the images. Then added touches to butterflies. I added a touch of white paint after that dried to soften the edges.  I rubbed Soft Plum dye ink over the raised surfaces and touches of white paint to highlight the damask.


I will share the other side of the journal in a future post!  Hope everyone has a wonderful weekend.  We are experiencing our first major change with our kiddos.  Our oldest is heading off to college this weekend.  I am going to be a little teary eyed this weekend.  

Thanks for stopping by.

Suzz

Thursday, August 22, 2013

Happiness is....

PaperArtsy is celebrating their 10th Birthday! I was happy to create a project to celebrate their birthday!
Head over to the blog for all the details!  I used the following products to create my project: PaperArtsy Fresco Finish - Mermaid, Limelight, Hot Pick 1009.

Head over for all the details on the PaperArtsy blog!

Suzz


Wednesday, August 21, 2013

Carnival Fun

I am sharing on the Simon Says Stamp Monday Challenge  a tutorial of my carnival inspired projects. My projects feature the bright and bold colors  of the carnival. 

Head over to the blog see the step by step tutorial on how to create this master board and to see all the projects created from this background.

Products: Hero Arts - Dots, Hero Arts - , PaperArtsy - Limelight, Paper Artsy - Mermaid, PaperArtsy Snowflake, Ranger Distress Inks - Ripe Persimmon

Don't forget to play along with the challenge this week for a chance to win a fabulous gift voucher for Simon Says Stamp! 

  Thanks for stopping by!


Suzz

Halloween Witches

Welcome to the Artistic Outpost Monthly Design Team Hop!  The theme this month is Halloween! 


Awhile back I had purchased a few different  metal decorative trim pieces about 12 " long and 1 1/2" wide. 


I decided to create a mini shrine using the metal trim.  My house shape was created by bending the metal and then connecting it on the top with a piece of wire. I added a backing from pattern paper and some stamping.  I then taped the paper to the back with tissue tape. I added a fringe of black lace, died black with distress paint. 

I stamped the fence on acetate using StazOn and added a whole patch of pumpkins inside and out. The sweet little witch is standing inside with a Halloween moon peeking out behind her as well as a colony of bats. The little witch is stamped in black archival ink and colored with watercolor pencils.

Products: Artistic Outpost - Vintage Halloween, Gothic 31Haunted Halloween, STAEDTLER - watercolor pencils - Karat Aquarell, Ranger Archival Ink - Black, Tissue Tape, Acetate, StazOn - Jet Black Ink, Lace, Earring (Black spider)

Hop along for all the fabulous inspiration:


Thanks for stopping by!

Suzz

Tuesday, August 20, 2013

Happy Birthday

How about a quick birthday card using the new Darkroom Door Simple Sayings sentiment?


The sentiment style had me thinking of a CAS design focusing on the sentiment. I paired the sweet sentiment with a  little bouquet of flowers. This  card is ready to send off   to our niece for her birthday.

The Bold Blooms flowers are stamped using Ranger Archival Ink - Chrome. The sentiment is stamped using Ranger Archival Ink - Magenta Hue.  I sprayed a touch of pink using water and a watercolor pencil. 

Have a wonderful day!

Suzz

Sunday, August 18, 2013

Carnival Fun

The Monday Challenge at Simon Says Stamp challenge is inspired by Carnivals!  You can be inspired by the colors of the carnival, carnival imagery, or your favorite parts of going to the carnival.  You decide what inspires you and create a project  to play along.

I am sharing a tutorial on the Simon Says Stamp Monday Challenge blog on Wednesday showing how I was inspired by Carnival.

Here is a sneak peek of part of my project:


Come join in the Simon Says Stamp Monday Challenge for a chance to win a $50 Gift voucher for Simon Says Stamp. 


Thanks for stopping by and remember to come back on Wednesday for the tutorial!

Suzz 

Friday, August 16, 2013

Butterfly Mini Cards

I am always digging around looking for a quick birthday card.  My girls are constantly running off to birthday parties for friends and usually come in at the last minute.  When I saw the new Simple Sayings from Darkroom door my mind started thinking about a series of cards featuring the new Eclectic Butterfly and a variety of of the simple sayings.


I decided to try a few different ideas when stamping my butterflies.  My first one focused on pastel chalks.  I started with stamping the butterfly using Versamark on white cardstock.  I used STAEDTLER Pastel Chalks to smear color over the surface.   I love how it makes a soft glow to the butterfly.  I decided to use my shadow and enhance it with a line of yellow STAEDTLER Karat Aquarell watercolor pencil around the edge. I softened the line with a touch of water from the water brush. I stamped the sweet sentiment using Ranger Distress Ink Picked Raspberry over the center. 

My next butterfly was embossed:
I stamped the butterfly using Ranger Archival Ink - Veridian and sprinkled Stampendous - Aged Teal embossing enamel over the surface. I purposely only sprinkled in areas to give the uneven effect of stamped areas versus the embossed areas. I added the sentiment and followed the same creative process.

I decided to create a card with just using the pretty colors from the dye inks.


Quickest card ever! Perfect size for a pocket on the inside for the gift cards the girls are always giving their friends. I used Ranger Distress Inks - Seedless Preserves and Ripe Persimmons.

I decided to play with paint on the beautiful butterfly:
I inked up the butterfly using a  Ranger Distress Paint dauber.  I stamped it  and heat embossed  with Stampendous Crystal Embossing Powder. The background is stamped using the Darkroom Door Word Stamp - Creativity and the Ripe Persimmons.  I coated the background with the crystal embossing powder as well.

I had fun using a variety of inks and techniques to create a series of cards and now I  have on hand a handful of mini cards for my daughters to use.

Thanks for stopping by!

Suzz

Tuesday, August 13, 2013

Happy Birthday

I have had so much happy mail this past week. I received two ATC swaps, new stamps, and am waiting for an order of more art supplies.  One of mail packages was from Darkroom Door with some of the stamps from the new release. I love the sketch from Mojo Monday this week and decided to ink up some of those new stamps to create a birthday tag.


I had created the background on the tag previously using orange paint and embossing paste.  I inked up the Darkroom Door Eclectic Stamp -  Butterfly  with Ranger Distress inks - Spiced Marmalade and Barn Door and stamped it on tissue paper. I clear embossed it to give it a sheen and some texture.  I realized the colors worked beautifully with the tag and decided to mix them together.  The sentiment is from the new Essentials 12 Collection - Simple Sayings.

I know this will make a great birthday card so I am going to add a back to the tag and turn it into a tag card. I am always looking for birthday cards to give to my girls when they go to a friend's for a birthday party.

I actually had finished the tag matching the sketch more accurately with more layers of lace going higher up:
What do you think?  I took pictures and then decided to pull off the few layers and go with only two on the bottom.

The Mojo Monday Sketch:
I might have to play with this sketch again as I love it!

Have a wonderful Tuesday!

Suzz

Sunday, August 11, 2013

Marriage


I think back to when  I first started stamping and sharing on-line and I would see the most beautiful shapes on-line and wonder how they were creating them.  Then I decided to make a big investment and purchase my first die-cutting machine. Now I have been through two machines and have a big collection of  beautiful dies. This week at the Monday Challenge at Simon Says Stamp the challenge is all about making the cut.  You can use dies, punches, die-cut shapes, or stickers.

My project was inspired by the leftover cardstock from a die cut making a frame. 
 I with a frame and decided to create a wedding a mini-album.

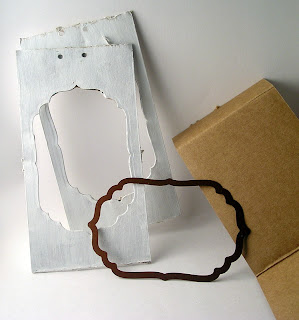
Here are the pieces I started with: 
 I took a few scraps of cardboard and cut the center out using the die. I painted them white.

 I cut two pieces from metal cardstock that fit the same size and opening.  I embossed them using an embossing folder and then painted them white.


 I attached a hinge with brads to hold the two pieces together and added a coat of white paint.

I backed the frame with a sheet of white cardstock and stamped the flourish using a soft plum color.  The inside was covered with metal cardstock and doilies and lace.  

 The back side looks like this:
 I left this open to add photos:

Products:  Impression Obsession - A Good Marriage , Spellbinders Labels 4, ProvoCraft Cassies Brocade Embossing Folder, Memory Box - Darla Butterfly Die, Prima Flowers, PaperArtsy Metal Card, Tattered Angels - Purple, Tuscan Sun, Hero Arts - Leafy Vines, Memento Sweet Plum, Ranger Archival Ink - Black, Bo Bunny Doily, Hero Arts - Classic Tea Rose, Claudine Hellmuth White Paint


Come join in the Simon Says Stamp Monday Challenge for a chance to win a $50 Gift voucher for Simon Says Stamp.

Have a fabulous day!

Suzz

Wednesday, August 7, 2013

Birthday Wishes

I had a little free time this morning to play and decided to play along with the Moxie Fab World Challenge - Birthday Creations - Birthday Card and the City Crafter Challenge - Polka Dots.

A quick card with a smear of paint across a pretty yellow polka dot paper.  I stamped the Stampendous - Nestled Bird with Archival ink.  I then colored him using STAEDTLER watercolor Karat Aquarell pencils with a waterbrush.

I am trying to build up my birthday card stash. The girls are always running of to friends parties and looking for a card to grab. This won't meet their criteria but will be perfect for my sister or my MIL. 

Have a wonderful day!

Suzz

Sunday, August 4, 2013

Paris

I love going to the mailbox and seeing what awaits me. There is nothing more exciting that receiving a handwritten piece of mail.  The challenge this week at  Simon Says Stamp Monday Challenge is airmail.  It got me thinking about my various travel stamps.


My first thought was this wonderful Hero Arts Around the World stamp that I rarely use but really love.


I misted the background of the tag with a touch of brown spray.


I stamped the background repeatedly with the postage using black ink.  I then added color to sections using my watercolor pencils and waterbrush.

I decided to die cut a few shapes and wanted to die cut the Eiffel tower.  I thought it would be fun to die cut it from travel themed paper tape.

I wrapped cardstock with paper tape.


I die cut the shapes from the tape. I then cut the clock from white carsdtock and inked it up with the Ranger Distress Stain - Aged Mahogany .

I added a few strips of the paper tape to the background before attaching the die cuts. I smeared Aged Mahogany over the surface of the Eiffel tower and sponged the edges with black ink.


 I added a gem flourish, leaf, and multiple flowers to finish my focal point with the letters for Paris around the edge of the clock.

Products:  Around the World, Tim Holtz - Sizzix Die - Eiffel Tower Die, Tim Holtz Sizzix Weathered Clock Die, Darjeeling Petaloo Flowers, My Moments Flowers,  Cavallini & Co - Paris Paper Tape, Prima Wood Engraver Button, TIm Holtz Idea-Ology Accoutraments, Pink Paislee Copper Luxe Letters, Ranger Distress Ink - Aged Mahogany, StazOn - Black Die Ink, Ranger Archival Ink - Coffee, Mister Huey - Chocolate Brown Spray, Aged Mahogany Distress Stain


Come join in the Simon Says Stamp Monday Challenge for a chance to win a $50 Give voucher for Simon Says Stamp.

Thanks for stopping by!

Suzz

Saturday, August 3, 2013

Journey

Lot's of splotchy fun is happening today on my blog. I was inspired by Tim's Tag of August.  I pulled out a set I haven't used before with all the different traveling images to create my tag.

 This tag took three tries to get it right. Those masks got some serious workout.  I started with smearing  weather wood ink and Vintage Photo ink onto the craft mat and added spritzed water.  I dragged the tag through it and heat set it and then picked up the spots by laying the tag on the ink.

I stamped my masks and cut them out. I then stamped the card with black archival ink.  I masked it and stamped the filmstrip.  I stamped all the images using black ink and highlighted them with STAEDTLER Karat Aquarell watercolor pencils.

 I wanted to play with different color combos and tried out a new yellow distress paint with orange distress paint.

 I mixed the persimmons with the seedless preservers and made a great color combo that I think I will use it for a future Halloween project.

I liked that color combo so much that I created another full piece of cardstock using the same colors.


.Have a wonderful Sunday!

Suzz

Friday, August 2, 2013

It's Summer Time

Today is the grand finale to the week long hop with the Stampendous DT and the Dreamweaver DT.  If you have missed out this week go over the the Stampendous blog and hop along.

I decided to use the glitter and create a gift box using the sweet sun stencil.

I covered the surface of the box with the double sided sticky paper and applied the orange and yellow glitter.   I rubbed the stencil with a soap to prevent the surface from sticking to the sticky paper. I then sprinkled the ultra-fine orange glitter over the surface.  I then lifted the stencil and sprinkled with the yellow glitter. I then cut it down.  I layered the sun onto the glittered box.


To go with my gift box I created a coordinating card to create a gift set:

 I originally had planned to create charms that would be used on a bracelet.  I Sponged StazOn ink through the stencil onto shrinky dink. I cut circles using circle dies and punched a hole in the top. I then held them with my stylus and heated it up with the heat gun. After it cooled down I added a coat of yellow paint on the back of the charm to make the sun pop.  I tried them on a bracelet which didn't look how I wanted them to.  I was inspired by those little sundresses my daughters used to have with charms dangling along the top half of of the sundress. I paired the charms on my card with the lovely Stampendous Jumbo Cling  border stamped in orange. I added the birthday sentiment from the Stampendous Soaring Sentiments in the bottom corner.

I was having so much fun with the stencils and glitter I decided to create a mini card.


I used glitter to color my scene. I used a series of post-it notes to cover the stencil areas I didn't want to cover with glitter.  I mixed in the micro glitters from Stampendous.  Ice Blue Micro GlitterRoyal Ultra Fine Jewel Glitter and   Silver Micro Glitter.       Sunshine Yellow Micro Glitter, Orange Micro Glitter, Black Micro Glitter.

Onto the important details:

DW-STM banner 7-13

The fun prize packages:
DW-STM_July '13 prize badge

There will be  two prize packages given away  to two randomly selected comments on the posts (of both teams) Monday through Thursday this week, then another prize package for a randomly selected winner from comments on Friday!

Hop along for tons of inspiration from both teams: 


Thanks for stopping by! 

Suzz