Showing posts with label tag. Show all posts

Wednesday, November 17, 2021

Tag It!

 Happy Wednesday!  Time for a new challenge at The Funkie Junkie Boutique called Tag it!  Teri is hosting it and here is her description: 

"Now is the time to be sure you have enough holiday gift tags. Show us you best festive holiday tag."

Who doesn't love a jolly Santa?  This one from Stampers Anonymous captured my eye.  I decided to use him on a tag with lots of pretty die cuts.  But I have a feeling he would be a fabulous tag all by himself! 
The tag started with a repeated text with a lovely red ink.  I originally started with a large tag and decided I wanted to shorten the tag to make Santa shine.  I then stamped santa and colored him with a touch of watercolor pencils.  

I decided I wanted to give him open eyes and added the circles and pupils for his eyes.  I added a twinkle with a white highlight and glossy accents on his pupils. 

I then die cut a variety of holiday greenery.  I sponged them with a mix of green and red dye inks.  I finished with a few bells and ribbon tied into a bow. 

I hope you are excited to play along.  Jump over to the blog to see all the beautiful tags my teamies designed.  The overall winner will be offered the chance to be a Guest Designer at a future date at The Funkie Junkie Boutique Blog, and everyone who enters and follows the rules will go into the drawing for the chance to win a $25.00 spending spree at The Funkie Junkie Boutique. There are also Top 3 Badges for three additional outstanding entries, chosen by the Design Team.

Thanks for stopping by!

Suzz

Products: (Links to The Funkie Junkie Boutique)  


Wednesday, March 3, 2021

Anything Goes

 Time for an Anything Goes challenge at The Funkie Junkie Boutique!  Here is how Jenny describes the challenge: 

"We are going with an 'Anything Goes' theme for the following two weeks and are looking forward to seeing your vintage/shabby chic projects."

I am rather enamored with my new Eileen Hull Sizzix Mandala die and have been playing with the die cuts and the masked version of the die.

I started with using a cut out Mandala as a mask and sponging a soft distress oxide ink over the surface to leave a faint pattern. 

I then cut the sponged background into a tag shape. I layered the tag onto a cardstock tag base and sponged around the edges with the same ink.

I die cut flowers from white cardstock.  I Stamped script on the flowers and embossed with clear embossing powder. 

The background received a  splattering of shimmery spray ink all over to give it beautiful water spots. 

Please play along and share your art!   The overall winner will  receive a $25 gift certificate to go on a spending spree at The Funkie Junkie Boutique. And the winner, along with our top three picks from the remaining entries will receive badges to display on their blogs in recognition of their outstanding contributions.

Thanks for stopping by!

 Suzz

Products: 

Wednesday, February 3, 2021

Groundhog Day

 Hi!  I am back with a new challenge for The Funkie Junkie Boutique hosted by yours truly! 

I challenged the team to "Groundhog Day"!  Now before you get worried that you have to have animals, weather, snow etc read on to see what the challenge is all about: 

"This challenge is inspired by the movie Groundhog Day.  In the movie Bill Murray is forced to repeat the same day over and over again for 10 years.  This past year has been a little challenging and people have felt like they might be in a little bit of a Groundhog Day time loop.  I am challenging you to create a shabby chic or vintage project that uses a technique, stamp, ink, or any other consistent tool that you find yourself using over an over in your art.  Think of this as your opportunity to share what you find yourself repeating in your art frequently.  Be sure to share with us in your post what it is that you keep repeating in your art"

For this challenge it was all about thinking about my favorite things I love to do... I decided the main thing I love to do is stamping images.  I started this blog many years ago and started with Stamping Suzz or Stampersuzz as you have all seen in my comments and posts... I am all about inking up new stamps and stamping the images... For me finding a new stamp that I love and using it different ways is what I enjoy the most. I decided to use the rose from the Stampers Anonymous set as my inspiration for this project. 

I stamped the flowers multiple times using the light brown ink.  I then colored with another favorite of mine (watercolor pencils and waterbrush)  I then fussy cut the flowers and assembled them together to create this tag.


I could say on this project I used so many of my favorite repeats:  tags, fussy cutting, watercolor, stamping and distressing the edges. 

I am all about the stamps. I love embellishments and other tools and techniques but for me my passion has always been about stamping the images and using them in different designs! 

Please come share your repeatable favorites with us in the challenge.  The overall winner will  receive a $25 gift certificate to go on a spending spree at The Funkie Junkie Boutique. And the winner, along with our top three picks from the remaining entries will receive badges to display on their blogs in recognition of their outstanding contributions.

Thanks for stopping by!

Suzz

Products: 

Wednesday, January 6, 2021

Put a Good Word In

 Happy New Year!  Cec has challenged us to Put a Good Word In for the new year with for the first challenge of the new year at The Funkie Junkie Boutique! Here is how she describes the challenge: 

"Create a shabby chic or vintage projects that includes a word or words that are positive or happy or uplifting in nature. Single words or sentiments/quotes can be used. Given what we have all been through for the last months nothing sad or negative please."

I have been wanting to play with my new Specimen stamps and couldn't wait to stamp the butterfly.  I used Victorian Velvet and Pebble Beach for my color palette.  

There is something about the soft hues blended with a mix of shimmer spray (Antique Pearl) and frosted crystal embossing powder to amp up the soft colors. 

I started with sponging the Victorian velvet over the Deco layering stencil.  I than stamped the tapestry using the pebble archival ink. 

After I finished that background I cut out a tag shape to create my background. 

Next I stamped the butterfly using the same ink and colored with a hint of Victorian Velvet. 

I then inked up the doily with the velvet and antique linen and sprayed with a shimmery pearl inky spray. 

I layered on a few accents that were painted white with gesso and sponged with coordinating colors.  

My sentiment that represents the good is to remember to have a greatful heart.  This is something I try to remember each day. 

Please join us in the challenge!   Our challenge has changed slightly.   

"Since this is a new year we have decided to change up the prize package slightly. Beginning with this challenge the Design Team will choose their four top picks as they always do but the overall winner will receive the $25 gift certificate to go on a spending spree at The Funkie Junkie Boutique. We will not have a Guest Designer going forward; instead all four top picks will receive badges to display on their blogs in recognition of their outstanding contributions."

Thanks for stopping by! 

Suzz

Products: 

Wednesday, September 11, 2019

Tag Magic

Time for The Funkie Junkie Boutique Challenge!  This week's challenge is hosted by the talented Ginny and she has chosen "Terrific Tags" as her challenge.  She describes the challenge as:

"Add it to a gift, label a homemade tasty treat, or display it with your favorite home decor, tags are not only fun to create they also have a million uses.  For this challenge create a tag that's big or small, mixed media or layered, or added to a project as a fabulous focal point."

I love tags!  They are fun to play with as they give you a chance to try new ideas, techniques or stamps in a smaller design format.
Stampers Anonymous The Professor, Stampers Anonymous On The Farm Idea-Ology - Halloween Adornment Idea-Ology Remnant Rubs For the Funkie Junkie Boutique

I started with about 5 different tag backgrounds and ended up creating what I call my magician tag! 

After I had all these beautiful backgrounds on these tags, I ended up going with a plain white tag and blocking the design. :) 


Stampers Anonymous The Professor, Stampers Anonymous On The Farm Idea-Ology - Halloween Adornment Idea-Ology Remnant Rubs For the Funkie Junkie Boutique
For this tag I took a section of the Halloween rub-on remnants and placed it in the middle of the tag. I adhered them with the Popsicle stick.    I then decided to use the stencil with black embossing paste to add texture to the bottom and top of the tag. 

My next step was to stamp the professor in between.  I used scrap cardstock to mask the other areas.  I then masked the professor and stamped the ledger over the professors section of the tag.  I finished with some lines drawn with versamark and embossed with black embossing powder. 

I wanted something fun so I stamped and cut out the top hat. I tilted it on it side.  I then stamped a background stamp in red ink and cut out mini cards.  They also were embossed with clear embossing powder to give them the glossy finish you see on cards today.  (I so wanted a mini bunny to pop out of the hat!) 

The stars were painted silver and attached.  The Halloween adornment was painted with white paint first and I rubbed off the excess paint.  I let that dry and then I smeared black stazon ink over the surface to make the front black.

Please go check out the rest of the fabulous Design Team's creations!  They are really beautiful!  Come join  us and share your tags! 

The winner will earn a chance to be a Guest Designer at a future date here at The Funkie Junkie Boutique blog, and everyone who enters and follows the rules will go into the draw for the chance to win a $25 spending spree at The Funkie Junkie Boutique. There are also Top 3 Badges for three additional outstanding entries, chosen by the Design Team.

Thanks for stopping by!

Suzz

Products:
Stampers Anonymous On the Farm
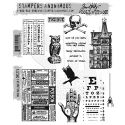
Stampers Anonymous The Professor
Stampers Anonymous - Fragments
Ranger Clear Embossing Powder
Black Molten Embossing Powder
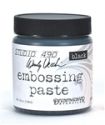
Wendy Vecchi Black Embossing Paste
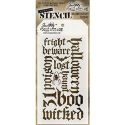
Stampers Anonymous Tim Holtz Gothic Layering Stencil 
Versamark Marker
Idea-Ology Halloween Remnant Rub-On
Idea-Ology Halloween Adornment 
Rayon Seam Binding
Ranger Archival - Vermilion Ink 
Ranger Archival Jet Black Ink 
Watercolor Pencils
Tim Holtz Water brush
Idea-Ology Tim Holtz Jute
Small Metal Keys
Black StazOn Ink
Dina Wakely White Acrylic Paint
Tim Holtz Idea-ology Stars
Prima Art Alchemy Metallique Silver Spoon Paint

Wednesday, June 12, 2019

Embellishments, Trinkets and Trims

Howdy!  I can't believe we are already in June!  I am back today for the Frilly and Funkie Challenge hosted by the wonderfully talented Jenny.  She is challenging us with Embellishments, Trinkets, and Trims. 


She describes the challenge as:

"Linda sells a huge array of beautiful embellishments, trinkets and trims in her store, from metal filigree pieces and charms to buttons, laces and ribbons. They can be the important focal point on a project or the final finishing touches that complete it. However you wish to use them lets see those embellishments, trinkets and trims in action on your vintage or shabby chic entries."


I may know a little bit about embellishments, trinkets and trims. :)  I have a few different jars on my crafty shelves full of bits and bobs.    

If you go shopping at the Funkie Junkie Boutique you can see Linda has a fondness for pretty and fun embellishments.   I have quite a few of her beautiful embellishments in my collection and they are what inspired my tag! 

I knew I wanted to showcase the flowery embellishment and had these lovely oblong filigree pieces that coordinated.  I decided to layer them together.


 I first painted the silver filigree with white paint to give it a coat.  I wasn't sure where I was going with the colors but I painted the pieces.

While they were drying I decided to create an architectural background.  I took a piece of mixed media cardstock and cut it to the size of a tag. 

I smeared the surface with embossing paste.  I like to have a heavy coat for the technique I wanted to showcase.  I took a piece of tissue paper larger than the tag and laid it on top of the wet embossing paste.  I then inked up the stamp and pressed it into the embossing pasted and pushed down. 

This gives you a beautiful embossed effect by pushing the imprint into the wet embossing paste.  The beauty of it is your stamp stays clean and the image is imprinted.  I used black ink to add the detail but you could do this with now ink and just use the sprays to pool in the crevices for a softer effect.

After it dried I came back and spritzed the background with blue and antique linen distress sprays.  Once that was dry I was trying to decided what to do with my embellishments when I thought why not add a hint of gold highlights to my background.


That inspired the rest of this because I ended up spraying my painted filigree with amber distress oxide spray. I heat set the color and then I used the gold wax to smear a gold finish.  I painted the ball and chain with gold paint.  And painted a few other metal pieces to coordinate. 

I added splatters of white paint to the background to lighten the effect.  I found the gold sentiments and added them. 

The pink came from the flower I found in my embellishment jar which had a pink crystal in the center.  I decided to use that to add a series of pink crystals over the background of the tag.

The tissue paper inspiration came from the Vintage Journey's June challenge to use Tissue Paper.

Come join us in the fun at Frilly and Funkie! The winner will earn the chance of a Guest Designer spot here at Frilly and Funkie, and everyone who enters and follows the rules will go into the draw for the chance to win a $25 spending spree at The Funkie Junkie Boutique. And there are Top 3 Badges for three further outstanding entries, chosen by the Design Team.

Thanks for stopping by!

Suzz

Products:

Antique Silver Filigree
Antique Silver Filigree Flowers
Metal Filigree Flowers
Wendy Vecchi White Embossing Paste 
Ranger Distress Sprays - Antique LinenFossilized Amber, Peacock Feathers 
Ranger Archival Ink - Cobalt, Jet Black
Tissue Paper
Prima Farmhouse Ephemera 2
Prima Vintage Art Pebbles
Tim Holtz Idea-ology Ball Chain
Prima Marketing Metallique Wax - Vintage Gold
Prima Marketing Sparks Acrylic Paint Unicorn Hair
Dina Wakely White Paint 
Dina Wakely White Gesso


Sunday, December 17, 2017

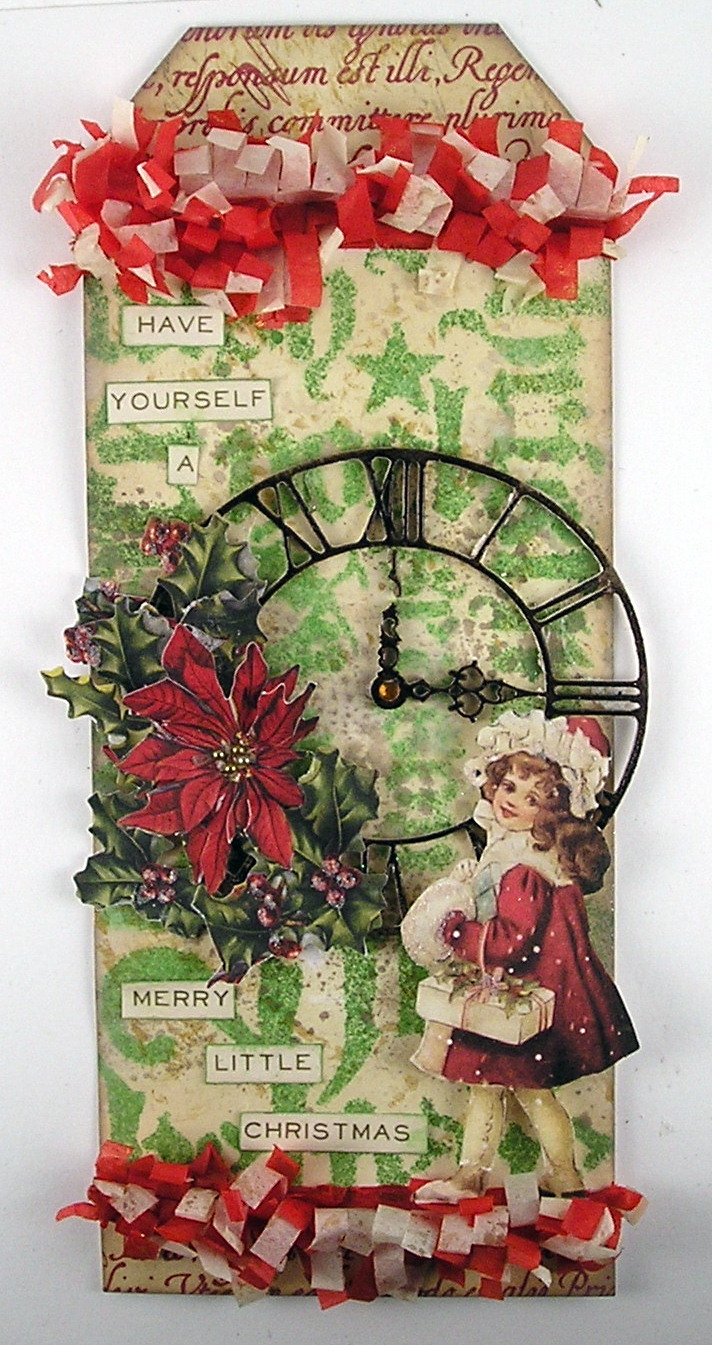
Merry Little Christmas

Hi!  I have been very busy with work and getting ready for the holidays.  I am now taking a few days off and hope to finish up all my tags for Linda The Funkie Junkie's Twelve Tags of Christmas.  Her boutique The Funkie Junkie sponsor's the challenge and there are randomly selected prizes if you follow along with the guidelines provided. 


Today's tag is inspired by Week #11.   I started by stenciling in green on the background to emulate the lovely background on Linda's tag. I also tried to follow Linda's lovely design with a main focal point of the clock.  But then I wandered into my own design. :) 
I misted the background with mowed lawn.  I then added a layer of pattern paper on the top and bottom. Once I did that then the background didn't match so I had to distress it with Antique Linen and some spotting of brown dye ink.

I then found the fun fringe (courtesy of the Funkie Junkie)  and added that as a divider between my background and pattern paper.  I added the fun lasercut clock and layered in the ephemera.

I hope you enjoyed my tag. I will be back with a few more of these before Christmas.

Thanks for stopping by!

Suzz

Friday, November 3, 2017

Deck the Halls

Today I am back with a tag and a card inspired by Linda's 12 Tags of Christmas Week #4.  This is a weekly challenge hosted by Linda and sponsored by The Funkie Junkie Boutique with wonderful prizes.  You just need to play along for all 12 weeks and have an opportunity to win.

Linda's lovely tag had black die cut images with music behind them and that had me thinking about this vintage gent and how I haven't used him very much. 

 I die cut a few different ones and then decided to play around with him on a tag and a card.   I didn't quite get there with either.  A lot of times I let things sit for multiple days until I get an inspiration on what to do to finish it off.
I tried something different on each of these so I was happy with my playing sessions.  On the tag I ended up smearing a layer of black embossing paste along the bottom and the top to give it a gradient effect. (A mistake I was trying to fix)  I like how it gave a nice dark shadow. 

On my card I had shadowed my image and sentiment with watercolor and black pencil but decided to add texture and outline it with a mix of black and gold glitter. 

Something fun and different.  Please go check out Linda's blog and her challenge!  Every week she delights us with a new tag and inspiration!

Suzz

Wednesday, October 18, 2017

Halloween

The current Frilly and Funkie Challenge is "'Tis Near Halloween " hosted by the extremely talented Sara Emily.  She describes the challenge as:

"The theme for the challenge is " 'Tis Near Halloween". It's no secret. I.Love.Halloween. With Halloween just a few weeks away, I challenge you to create a vintage or shabby chic project with a Halloween theme. If Halloween isn't your thing, that's OK--just be sure to include orange, black and purple in your vintage or shabby chic project (These colors are not required if your theme is Halloween.) It would be a grave mistake to miss this challenge!"

Well with that inspiring challenge theme I was off and playing with my new and old Halloween stamps! 
I started with a manilla folder scrap... These were leftover from some banners I made for a family member for an event.  She gave me leftover manilla folders and I cut out banners.  I then had pieces left from those folders and I started to use them for tags.


For this challenge I cut the tag out.  Next up was the background.  Inspired by Sara Emily's colors I sponged on purple and wild honey ink over a new Wendy Vecchi stencil. It required a bit of masking but I got the effect I wanted.

Next was the funky bird.  I used the die cut to cut him out of manilla folder and added some text to him.   I then stamped the square over the background.  I placed the bird and the branch over the stamped area.  I shadowed with watercolor pencil and water brush.

Next I stenciled with black embossing paste the word Halloween along the right side.  I also stamped the sentiment along the top line of the box. After it dried I stamped the haunted house on tissue paper and carefully placed it in position and cut out the section where the sentiment was and then decoupaged it into place.  I highlighted the letters with white gel pen after it was dry to make sure they popped.


The final detail was a little spider crawling down his black twine thread. He is highlighted with Wendy Vecchi's enamels. (We did this in a class I recently took with Wendy which was fantastic!)


I hope you will come join in  the challenge and share your stamping with us!

The team will choose their top four picks with the winner being invited to join us in a Guest DT spot here at Frilly and Funkie and the next three will receive badges to display on their blogs. Everyone who enters and follows the rules will be entered into the draw to have the chance to win a $25 spending spree at The Funkie Junkie Boutique.

Get inky!

Suzz

Friday, October 13, 2017

Golden Texture

I am back with my week 2 tag inspired by Linda at the Funkie Junkie's week number 2 tag from her  annual 12 Tags of Christmas!  If you play along with her for the 12 weeks leading up to the holidays you have a chance to win gift cards at her wonderful boutique The Funkie Junkie Boutique. 

The fabulous inspiration from Linda for week 2 had me thinking of how to create a similar background follow her lead with the snowflakes / design.   
Linda's tag has this soft white patina built with crackle and soft shabby golden brown hues.  This had me pulling out the crackle embossing paste along with a variety of stencils. 

I created about 4 different tags using different stencils and the crackle paste.  After they dried I decided to go with gold  and brown mists to show off the texture in my background.

Inspired by Linda's design/layout I started searching for an image/focal point for my tag.   I wanted to make sure you could still see the beautiful design and texture on the background.  After digging through my leftover die cuts, I was lucky to find the weathered clock (already bronzed up) and the deer which fit perfectly into the center of the clock. 

I sponged the deer with brown dye ink and then put it inside of the clock and attached it off-center onto the tag. I found all the snowflakes in my die cut extras. (I really don't like die cutting so I will usually die cut a bunch of any image and then store them for future use) The snowflakes were spritzed with the gold mist lightly so they remained mostly white with touches of gold.

The sentiments were stamped in coordinating brown ink on a gold misted background.  I took a few vintage buttons and threaded them with gold thread.  I added a hint of gold ink to the buttons and attached them to the snowflakes. The best part is I also have two or three more backgrounds to play with! 

Thanks for stopping by!

Suzz

Monday, February 27, 2017

Words that are Special

A Vintage Journey's Challenge this month has been words that are special. One of my favorite things is sentiments/words stamps.  I was part of the Verses Rubber Stamps team for a long time because I love that all their stamps are quotes and sentiments. 

I decided to pull out one of my stamps from Verses and create a tag.

 This was a lot of layering of papers, dies and ephemera and the only stamping is the lovely verse from Verses Rubber Stamps. 

The paper and ephemera is from Prima Marketing and the image is Darkroom Door.  The dies are form Memory Box and Simon Says Stamps.

Happy Monday to you all...

Suzz

Thursday, December 8, 2016

Believe in Joy

Howdy!  The wind chill is fierce today and going to be very cold for the next few weeks.  I am bundled up crafting in my cozy craft room.  Having so many supplies lining the wall gives me extra insulation. :)

I was working on Tim's tag for December. It took me awhile and I came up with my take on his inspirational tag. 

I created about 6 pieces of burlap backgrounds and couldn't get the effect I wanted. I moved onto canvas and was happy with the way the stencil showed up on a golden background.  This set the tone for the tag a mix of Aged Mahogany and Gold.

The background was sprayed with gold mist and let dry.  I then sponged the dye ink over the stencil on the background.

To emulate the letterpress technique:  1. Sponged on dye ink on the embossing folder and embossed the paper.   2. Stenciled with embossing paste and when dry dragged the dye ink over the surface to add a shadow of color.


The charms were all colored using a Krylon pen to give them the golden tones.  The finishing touch was a sprinkling of Stampendous Luxe mixture of glitter and mica flakes.

Thanks for stopping by!

Suzz

Friday, November 4, 2016

Gold & Kraft

Hi!  I am working on three different projects right now and several of them are for Linda The Funkie Junkie 12 Tags of Christmas Challenge which is sponsored by the Funkie Junkie Boutique.  This tag is for week # 5 which is a gorgeous tag in kraft and gold.  I love how the gold glows next to the neutral of the kraft.


 My tag is a pretty close case of Linda's beautiful tag.
I love this Merry Christmas definition stamp.  This is a small stamp that comes in a set of 3 from Hero Arts.(retired).  I used the Sizzix Holly leaves to cut the reverse image as well as the individual holly.

That's all for me today... I hope to get another tag or two done today!

Suzz

Thursday, August 18, 2016

Blues

Hello! Today's tag is a continuation of playing with my scraps the other morning.  

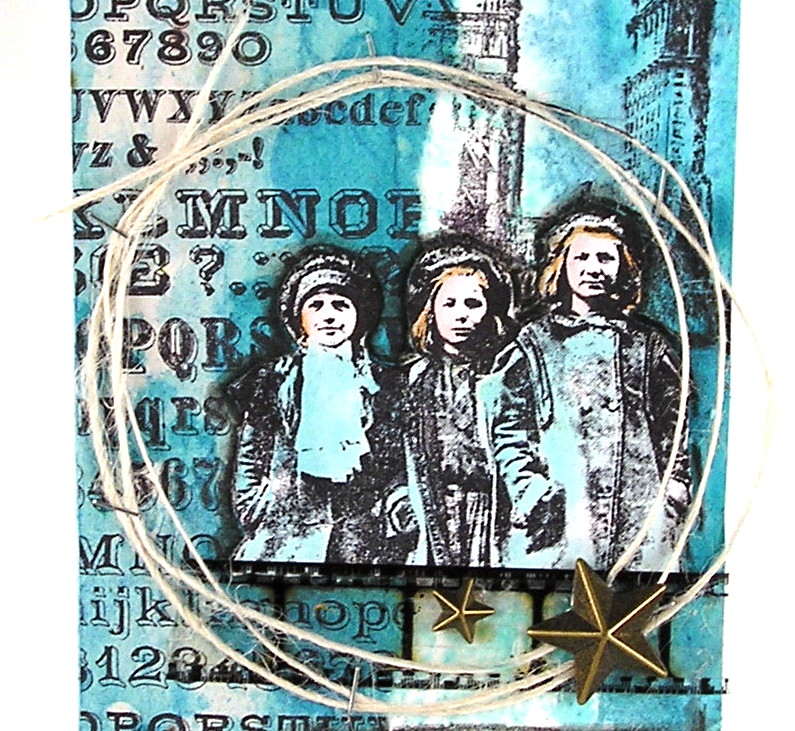
I loved how this torn background looked and wanted to play with my Artistic Outpost stamps so I just started laying in bits and pieces until I got what I wanted.

The tag is covered with half newsprint paper from Wendy Vecchi and the other half the tag. I ripped off the newsprint after I had sprayed and stamped.  I then came back in with more spray on the right side to give the effect.

I stamped the girls on another piece of paper and then cut them out and attached them. Added a touch of shading around them and then added the skyline and sentiment.

Products:  Stampers Anonymous - Tim Holtz - Alphabet,  Artistic Outpost - PaperBoy, Tattered Angels - Turquoise Glimmer Mist.

Thanks for stopping by!

Suzz

Thursday, June 16, 2016

Faith in Dreams

Happy Thursday!  Longest week ever... :)  I am back playing with a tag and some flowers. Trying to de-stress with a little flower power.

I combined A Vintage Journey's Texture Challenge with the Mixed Media Monthly 2nd Year Anniversary Challenge of which I am  using the "Texty" Challenge.

I started with a tag that was lightly spritzed in green ink. I had it in my scraps and pulled it out to play. Whilst creating another project to be shared next week I picked up the pink and brown ink along the edges.

I wanted to  use the flowers so I stamped them and colored them with watercolor. They weren't popping the way I wanted them to so I came back in with a charcoal pencil and added the black shading to make them stand out.  I then added some splotches of white paint, gold embossing paste through a stencil and the test stamped over the background in brown.

It should have been a quick tag but I won't tell how long it took me! :)

After I finished I thought it might look better horizontally:

What do you think?

Have a great one!

Suzz

Challenge Photo: