Showing posts with label Copics. Show all posts

Saturday, June 22, 2013

Snapdragons

Happy Saturday!  I have been busy creating this week.  I have not shared anything because they are all projects for future hops, challenges or publication. :(

I am sharing a sweet card using the Stampendous Snapdragons.  I love Snapdragons and this stamp is a beautiful spray of flowers.  I even pulled out my much neglected Copics to color the flowers. 

I die cut the cardstock.  Stamped the image using Memento Black ink on the die cut. I colored the beautiful flowers and butterfly with Copics.  I highlighted the flowers with white gel pen.  I embossed the background panel and done. :) The Stampendous DT is sharing very cool etched glass projects this week. If you hop over to the Stampendous blog you can see the links to all the projects from this week.  If you hop along and leave comments before Sunday night you will have an opportunity to win some excellent prizes!

Hope you have a wonderful weekend!

Suzz

Saturday, June 30, 2012

Mary Mary Quite Contrary

Today is the last day of the blog hop week with  Stampendous, Clear Scraps, and  Tsukineko. For all the details, head over to the Stampendous Blog, you still have time to enter to win prizes! 

We were provided some beautiful Send It Clear Cards and Clear Scraps Album and StazOn Inks to create our projects.  For my project today I used the Clear Scraps Album to create a garden album.
This is the closed view of the album.  I cut cardstock or pattern paper to fit behind my acrylic pieces to highlight the beautiful colors captured with copics and StazOn.

The cover page has the gorgeous Jumbo Cling HollyHocks stamped using StazOn Stone Gray Ink. This makes the lines softer than if I had used the black StazOn.  I had to flip the acrylic cover over and color on the reverse side using my copics.  If you tried coloring over the stazon the copics would erase the stamped image.  I used a oranges and yellows on the flowers and green on the leaves from my copics.  The beautiful Stampendous Butterflies were stamped using black ink and colored with the same copics used on the flowers.  

Behind the acrylic page I traced a piece of white cardstock to the same shape and stamped the Dream Text using brown ink over the page to provide better visibility to the acryclic page and flowers when closed. When you flip through the album your see all the wonderful effect of the acrylic colored flowers!

The first page of the album:

On this page I covered the chipboard with some beautiful Bo Bunny Paper from the Country Garden collection and added the Cottage Rose flowers using black StazOn ink. I colored the flowers using watercolor pencils and white gel pen highlights.  The butterflies are from Stampendous and are also colored with watercolor pencils. I finished it off with the sentiment stamped with the Altered Type Alphabet letters.


The next set of flowers are tropical and warm... I used the beautiful Tropical Garden and backed the page with Bo Bunny paper in the background.  The images were stamped with black StazOn.


The next page:
On this page again I worked with the Bo Bunny paper in the background and stamped the Jumbo Iris several times using the StazOn black ink and colored with glimmer mist and waterbrush. The sentiment was added with the Altered Type Alphabet.


The last page uses the Stampendous Chrysantheum  stamped in the background using the StazOn Ink - Black.  The flowers were colored on the reverse side using copics.

The pages have all been left open to add pictures, pockets or other details.
To see some other fabulous inspiration hop over to:


Thanks for stopping by!
Suzz

Saturday, May 12, 2012

Happy Mother's Day!

Happy Mother's Day!  I forgot that my card this week for the beautiful CR84FN54 colors would be on Mother's Day here in the U.S.  Funnily enough it seems very appropriate for some of us who have had children who might have acted a little like this when overtired. 

I decided to play around with a Mo Manning image and my copics:

I used some beautiful Memory Box paper in the background and stamped the new Artistic Outpost Secretary Pool background in the panel behind the main image.

The Mo Manning image is from Stamping Bella.  I colored with copics and added shading with my watercolor pencils.   


Here are the pretty colors (love that they work for masculine or feminine cards):


For all the details on the challenge this week go to the CR84FN blog. 

For more inspiration the CR84FN Design Team:

Deborah Frings * Sue Lelli  * Andrea Matthews *  Suzanne Czosek (me)  *  Heather Jensen * Mona Pendleton  * Lisa Somerville * Shannon White* Pauline Pollington

Happy Mother's Day!  I hope it is a wonderful day for all of you!

Suzz

Wednesday, July 21, 2010

Moxie Fab World - Let's Do Fun & Cute and 2S4Y Kazan's Sketch 57

Wow what a long title. :) I decided to incorporate Kazan's sketch 57 from 2S4Y this week and the Moxie Fab World - Let's do Fun & Cute Style Challenge into one card. 

Here is Kazan's sketch...


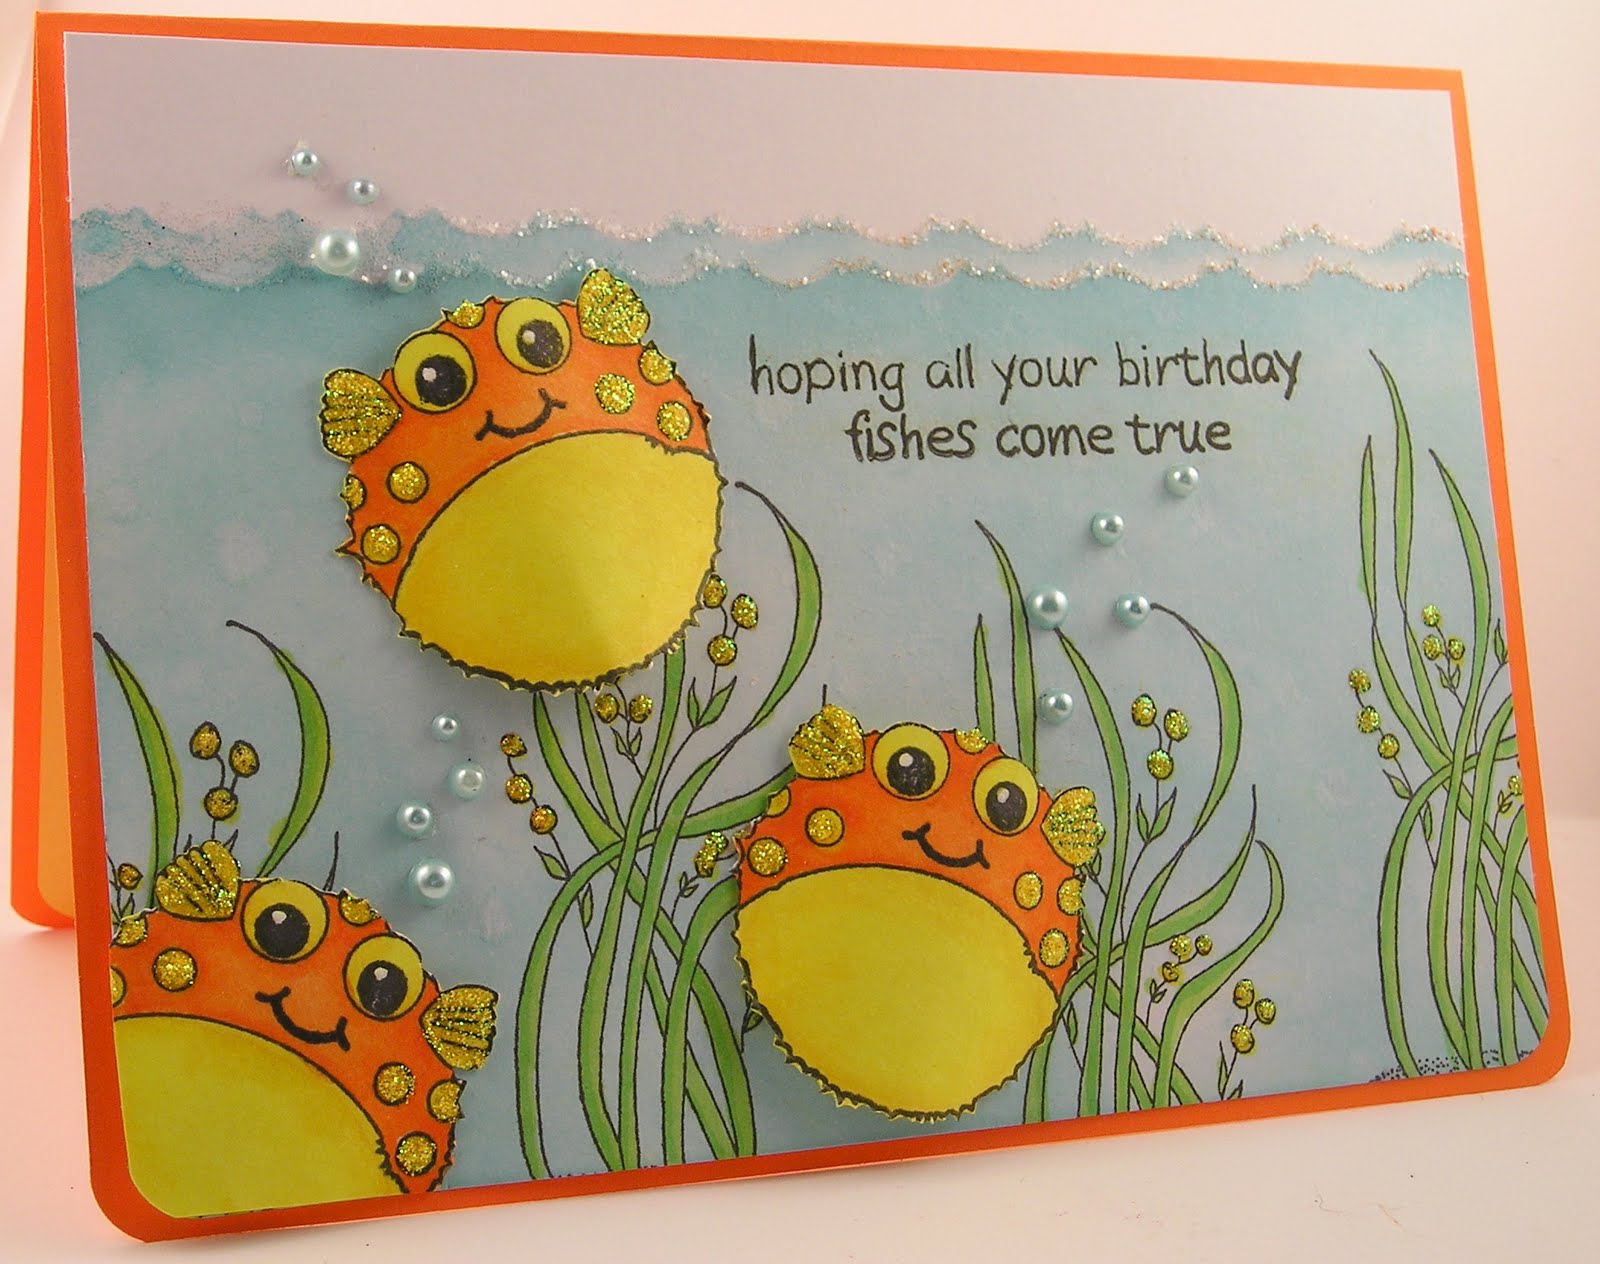
Here is my take on the sketch and a fun and cute card.


These little fish are from Imaginisce and are Blow fish. I loved how cute they were and had to put them in the shopping basket when I saw them at the store. When I saw the sketch I immediately thought of these little guys. I had fun coloring them and creating a little aquarium for them to float around in.

I even tried to help them puff up!  Here is an angled view of my fish. :)


Isn't that too funny!  They must have been upset with me to puff up! I keep thinking of Ms. Puff on Spongebob!

The Seaweed stamp is from Great Impressions. The fish and seaweed are colored using Copics.

The background is sponged on using Ranger Distress Inks Tumbled Glass.

The sea foam is created using an EK Success punched border as a mask two times and varying the depth of the color sponged on.  I added a line of glue and glitter to create a little foam along the top line of the water.

I enjoyed creating this card and now have a fun and cute card on hand for the next birthday that pops up!

Thanks for stopping by!

Suzz

Wednesday, January 6, 2010

Mojo Monday Challenge 120

Mojo Monday blog has a lovely sketch created by Teresa Kline for the challenge this week. Here is my take on the sketch:


The little puppy dog is from Hero Arts and my youngest daughter wanted it and picked it up when we went to the store last week.

I am always needing practice with my copics and this was a great image to practice on! She thought it was funny that I gave the puppy the Target eye as she calls it...

The paper is from the Merrymint collection from American Crafts. I was lucky enough to win it from the Moxie Fab Blog and thought it would look lovely with the puppy.

Well.. my real puppy is whining to play now, so I must go throw her the ball.

Thanks for stopping by..

Suzz

Saturday, December 19, 2009

Cracked Glass

This was inspired by an ornament I saw online where they had the picture under a layer of glaze. These are some of the new stamps from Hero Arts. I went out yesterday and picked up some of the new sets. The rose comes with two beautiful sketched birds. The butterfly is part of a clear set called Antique Engravings and it has other butterflies, dragonfly and shells.

After I applied the yellow dye ink background, I wish I had chosen another color but once it was down I had to keep going.

The main panel was stamped in memento and the flowers were colored with my Copics. I then stamped the butterflies and dragonflies and used my watercolor pencils to color them. The background is sponged with yellow dye ink and around the edges with brown dye ink.

I than stamped the entire image with versamark watermark ink and heat embossed with clear embossing powder. I repeated that process 4 times and then cracked it. I then applied a layer of brown dye ink and wiped up the excess.

The rest is just piecing the background together.

Thanks for stopping by...

Suzz

Monday, December 7, 2009

Our Christmas Card

This is our family Christmas card or at least half of them. I usually like to have 2 different cards to send out to our family and friends. This is one of them.
I had this idea to use this stamp and color it and then take it to our local copy store and replicate it to save some time.
The stamp is from Serendipity Stamps. I used my copics to color the main images and sponged the edges with Memento Soft Plum.
Products:
  • Serendipty Stamps
  • Memento Soft Plum
  • Copics
  • Ranger Stickles - Crystals
  • Nestabilities - Labels
  • Cuttlebug Embossing Folder - Snowflakes
Going to be a little slow on the creativity this week as I am working in another town in all day meetings which means long commute times. :(
Thanks for stopping by..

Suzz

Monday, November 9, 2009

Winter Birdhouse

I had visions of a row of birdhouses all looking different similar to the famous houses in San Fran. The painted ladies... Well only one made it onto my card. This card was created for the Caardvarks Circle of Friends challenge.


The background was sponged on the bottom and top. The bottom was sponged with a purple and blue dye ink. The top was just the blue.

Recipe:

  1. Stamp Flourish on white cardstock with versamark and heat with clear embossing powder.
  2. Sponge with blue and purple dye inks.
  3. Cut out circle and rip across the edge.
  4. Rip little piece for snow drift on the post.
  5. Cut out other circle and sponge lightly with blue dye ink.
  6. Stamp snowflakes randomly with versamark and heat emboss with clear embossing powder.
  7. Sponge over snowflakes with same dye ink.
  8. Punch snowflakes from purple dye ink background.
  9. Cut 1 1/4" x 2" rectangle of white cardstock.
  10. Stamp swirls on rectangle using plum dye ink.
  11. Stamp definition stamp on white cardstock using blue dye ink. Cut 1/8 " strip.
  12. Cut two 1/8" x 1 1/4" pieces for the roof. Glue the tips together and attach to top of the birdhouse. Trim corners of birdhouse off.
  13. Punch border of blue stamped definition and trim to fit bottom of the bird house.
  14. Use hole punch to create bird hole!

So easy and addictive. I still have 3 other fancy birdhouses that didn't make it onto the card. It is too much fun making creative birdhouses... (victorian, ranch, tudor...)

Products:

  • Hero Arts - Artistic Windows
  • Hero Arts - Flourish Background
  • Hero Arts - Friends Definition
  • Ranger Distress Inks - Broken China, Dusty Concord
  • Memento - Soft Plum, Black Tuxedo
  • EK Success - Snowflake
  • Fiskars Border Punch
  • Versamark
  • Clear Embossing Powder
  • Amuse - Holiday Bird
  • Memory Box - Merry Christmas
  • Copics
  • Versafine - Purple
Have a lovely day!

Suzz

Tuesday, October 6, 2009

Tag Tuesday Challenge # 19

Tag Tuesday Challenge over at Louise's blog is Shabby Chic. I immediately went online and googled some images for inspiration. Love love love shabby chic. The thing that caught my eye right away was the roses. I have one really beautiful rose background stamp that I pulled out to use.
I tried a new technique that I was experimenting with. I hadn't seen this before but had an idea of what I was trying to achieve. Didn't happen but I was okay with the end result.


Simple instructions:
  1. Stamped background stamp on white cardstock using Memento Black Ink.
  2. Colored image using my Copics.
  3. I wanted an overlay of something soft and wrinkled. I thought I would try tissue paper but wanted it to be transparent.
  4. I crinkled the tissue paper. Flattened the tissue paper out.
  5. Applied Versamark to the entire tag and the tissue paper.
  6. Sprinkled clear embossing on the tag and the tissue paper. Lay the tissue paper on top of the tag and heat emboss the tissue paper onto the tag.
  7. This is going to give you a very shiny coating on the tag.
  8. Emboss using a CB embossing folder.
  9. Sponge StaZon brown ink over the surface to add a vintage color.
  10. Stamp words over the top using the StaZon.
  11. Add the lace, velvet ribbon and pearls.

Products:

  • Versamark
  • Clear Embossing Powder
  • Tissue Paper
  • Velvet Ribbon
  • Lace
  • Rubber Stampede - Wild Rose Background
  • Copics
  • StaZon - Timber Brown
  • Memento - Tuxedo Black

On to my second project tonight... My younger daughter wanted a bookmark since her sister received the last one I had created. So I decided to create this bookmark for her:


She wanted something fun and she said she liked the Asian dolls. I dressed them in fancy Basic Grey Autumn Indian Summer.

Have a great day!

Suzz

Monday, October 5, 2009

Caardvarks - Take a Bow Challenge

Caardvarks challenge is Take a Bow and is hosted by May Arts. The challenge is to use ribbon on your card in an unusual way. I have been wanting to make a Christmas tree from ribbon for a long time.

I decided to use some velvet ribbon I have to create my tree. I tried a few techniques on the velvet but didn't like how they turned out. You can see a few dots on the tree as I embossed the ribbon using my swiss dots folder. If I had any hairspray i would have spritzed it up and embossed it and let it dry. Alas... no hairspray for me in the house. :)

I precut the ribbon lengths and trimmed them off after embossing with the CB folder.
The trunk velvet ribbon was already a crushed ribbon with fun texture.
I stamped the Hero Arts Flourish in the background and embossed with clear embossing powder. The Sentiment is from Memory Box.
The little stamped bird is from Hero Arts and colored using Copics and a white gel pen.
The buttons were so fun to pick out and polka dot using my trusty white gel pen.
Just for the record... I have never been able to buy a real Christmas tree that stood straight! Many years we had a hidden string behind it pulling the tree upright. :) Guess that is why my DH insisted on a fake Christmas tree once we were married!
Have a lovely day!
Suzz


Thursday, September 24, 2009

Photo Card Challenge

Hero Arts Weekly Challenge is photo cards. This is not a strength of mine so perfect for a challenge. :)

These butterflies were made for the button flower I made earlier this week so they were all sitting on my desk. Spent some time looking through my flower pictures taken a couple of weeks ago and found this one of the birdbath out back.

Products:

  • Hero Arts Heart Winged Butterfly
  • Hero Arts Artistic Butterflies
  • Hero Arts - Everyday Sayings
  • Copic Markers
  • Cuttlebug Embossing Folders
  • Spellbinders -Shapeabilities

Thanks for stopping by..

Suzz

Wednesday, September 23, 2009

Tag Tuesday Challenge #17

This week's tag challenge is to create a tag with children. http://kardkrazy.blogspot.com/2009/09/tuesday-tag-challenge-17-children.html

Here is the tag I created for the challenge:

I actually had been coloring this image for awhile as part of my Copic practice. I would start on a section and play with the colors and then leave it aside and work on something else. I finished the boy's shirt and hair today to include it in this challenge. I love the image of the little boy and girl holding hands and walking outside. I like to think of it as a brother and sister and one of them protecting the other as they walk.

The main image is layered on a tag with a Stampers Anonymous field grass and cattails background. There are some real twigs mixed in with the twine and buttons.

Products:

  • Stampers Anonymous U1-1344
  • Hero Arts - Wood Finish
  • PaperBag Studios - Always Young
  • Impression Obsession - Lofty Dreams
  • Memento - Rich Cocoa, Black Tuxedo
  • Copics Markers
  • Twigs, Twine, Buttons, Raffia
Thanks for stopping by...

Suzz

Friday, September 4, 2009

How Do you Do?

This little bird was colored last week and I just finished his nest this week. He had a long tail which I cut off and made into his hairdo... He reminds me of Elvis a little and prompted me to put the little pun on the front.


I also gave him short little stubby legs when he should have long legs. I felt very mean making him short as I am definitely height challenged as they say. But he sits in his little nest nicely.


I hope you enjoyed my little friend. I am going to send him off to someone special who might need some cheering up.


Products:

  • Hero Arts - CL388 Be Yourself
  • Spellbinders Nestabilities - Scalloped Circles
  • Fiskars Circle Template
  • Copic Markers
  • Adirondack Brights - Citrus
  • Cuttlebug Embossing Folder
  • Ranger Stickles - Eucalyptus

    Thanks for stopping by....


Suzz

Sunday, August 30, 2009

Butterfly Sunday...

This is another one of the stamps I colored while playing with the Copics. I love my butterflies... So I decided to color a few using the copics.


I purposely tried to keep the color palette simple because I wanted the butterfly to shine! I thought about stickling or gemming it up but restrained myself! :)

Products:

  • Hero Arts - Heart Winged Butterfly
  • Hero Arts - Heart Flourish
  • Cuttlebug Embossing Folder
  • Clear Embossing Powder
  • Versamark
  • Copics
  • Versafine - Deep Lagoon

I am teaching this afternoon a template class and a family party after that... So no more crafting today. Although I shouldn't have snuck in this card...

Have a blessed Sunday!

Suzz

Saturday, August 29, 2009

Color It Challenges

The Hero Arts Challenge this week is Color It... http://heroarts.com/blogs/club/2009/08/24/a-new-colorful-challenge/ Jennifer McGuire is hosting and has several videos with great tips on quick coloring techniques. This is perfect timing for me as I just took my Copic class and added markers to my collection. So a great time to practice and play.

Here are two cards I colored and created over the last several days.

These little children were patiently waiting for me to finish the card. I couldnt' figure out what they should be doing and decided that she would hold a little flag to finish off the card.


The vellum is embossed with one of the new CB embossing folders. So pretty!

Products:

  • Hero Arts - K5193 Flower Word, Special Moments, All Occasion Messages, LP146 Asian Dolls, K5232 Dot Flourish Border,
  • Rubber Stampede 3258R Wild Rose Background
  • Versafine - Vintage Sepia
  • StaZon - Cactus
  • Memento - Black Tuxedo
  • Copic Markers
  • Spellbinders Nestabilities - Labels
  • Cuttlebug Embossing Folder

Thanks for stopping by...

Suzz

Wednesday, July 1, 2009

My mother...

I never do scrapbook layouts. The space is too intimidating for me. But a couple of things led to this layout. The challenge this week for Hero Arts is to use a photo in a project and my youngest sister Jodie had printed this adorable pictures of my mother and I wanted to honor my mother with a layout.


I didn't do any journaling and left a little spot for my sister to put in my mother's name.


I apologize for the picture. This is too big for my light box I created and it is gloomy outside today. So the lighting is limited. I used the flash but it lost the true colors so I stuck with this picture because it shows the real colors even if it is a little dark.

I used my copic markers on the black and white picture which was printed on glossy photo paper and was really pleased with the effect.

Products:

  • Tattered Angels - Butterfly Chipboard
  • Lace - (Provided my little Sis Jodie)
  • Prima Flowers
  • Hero Arts - Anytime Messages
  • Hero Arts Raindrop Background, F4281 Petal Lace, K5232 Dot Flourish Border, F4321 Graceful Leaves, H2365 Old French Writing
  • Stampers Anonymou s - U3-1414
  • Rangers Distress Inks - Dusty Concord, Peeled Paint, Antique Linen
  • Basic Grey - Wisteria
  • Copics

Suzz