Why do I create? I started creating cards as time spent with a friend doing something fun together. It transitioned into a way for me to explore, de-stress, express myself, learn, get messy, create something( sometimes anything) and to grow and try something new.
Having said all that I like to look at a snapshot from the year to see if I have grown at all in my artistic efforts.
Overall I noticed a trend of people blogging less and posting more on instagram? I haven't jumped to the instagram to post things but definitely have posted less. I have also created less this past year.
In January my favorite project was inspired by Tim's tag:
I love the foil effect and mixed it with an image underlying all in grays.
I joined the Frilly and Funkie Challenge this year. (yeah!) One of the February challenges inspired me to create a series of postcards. I loved doing this because it let me layer images in a one-layer format.
I see I didn't post much in March but there were two projects I loved one was a series of ATC's which I always love to create and they were based on a color challenge. I love color challenges. Something about certain color combinations have me thinking of how to show off the colors in different ways. The other project was a trios challenge and I created a tag separated into three pieces.
Sometimes projects seem to just flow naturally out and they tend to be the ones most pinned or get the biggest response online. This tag in April was one of those pieces of art that was easily created and I loved it when it was done. I think because it is very much in the Tim Holtz style that it got a big response. I loved this tag but didn't feel I tried anything new or grew at all in creating it.
In reviewing May I have to say I loved every project I created. That doesn't happen very often. I picked this card because of the image within the butterfly shape.
I like playing along with challenges as it has me thinking of how and what to use within a constrained challenge. The Anything But Cute and A Vintage Journey were the starting point for my June inspired card. This project made me feel uncomfortable because I used a girls face on a bee stamped image. I kept thinking of the old horror movie of "The Fly".
Tough decision in July as a I created a golden undersea canvas that I loved. I decided instead to share a card which I created a new technique. I like looking at something and thinking how could I represent that with my inks and stamps.
For August I decided to share a trio of tiny tags that were made for the Funkie and Frilly Challenge where the project had to be tiny. I don't often use pattern paper (but I have a lot of it on hand!). I loved this vintage baby paper as it reminded me of the baby cards that our parents had.
September was a lean month for blog posts. I found this pocket watch butterfly that was for a challenge. Something a little different from my usual tags. :)
October had many more posts and there was a lovely selection of cards but I decided on my current blog header. These leaves were a happy accident while playing around on my desk with some embossed leave.
November was full of inspiration from Linda at the Funkie Junkie. I picked one of my cards inspired from her 12 tags of Christmas challenge. Linda runs this challenge every year and posts a tag every week leading up to Christmas. Her tags are phenomenal and gave me such an inspirational boost in November and December. Thanks Linda!
Another card inspired by Linda using my beloved Artistic Outpost stamps.
Sorry for the length of the post. I hope it was enjoyable. I want to wish all of you a very blessed, healthy and happy 2017!
Suzz
Saturday, December 31, 2016
Sunday, December 25, 2016
Glory to God
Merry Christmas!
I love layering images and stamps and creating the illusion of shadows.
This card is a mix of stamps and a traced star from a spellbinder die. I used my watercolor pencils to add shadows and layering of stamped images.
Merry Christmas! Glory to God in the Highest!
Suzz
I love layering images and stamps and creating the illusion of shadows.
This card is a mix of stamps and a traced star from a spellbinder die. I used my watercolor pencils to add shadows and layering of stamped images.
Merry Christmas! Glory to God in the Highest!
Suzz
Labels:
Christmas,
Glory to God,
Hero Arts,
STAEDTLER,
Stampendous,
Stampers Anonymous
Saturday, December 24, 2016
Luke 2:11
Happy Christmas Eve to everyone! I have been playing in my craft room to finish up two cards to share with you today and tomorrow in celebration of the birth of Jesus.
I wish for you and yours a beautiful Christmas with all those you love.
Suzz
I wish for you and yours a beautiful Christmas with all those you love.
Suzz
Labels:
Christ,
Christmas,
Mary and Child,
Stampendous,
Stampers Anonymous
Thursday, December 22, 2016
Believe in Peace
Hello... I have been utterly lacking any creativity. I have been busy preparing for the holidays and other things but no creative time. I have many unfinished projects on my desk again. This little piece of journaling fell out of a scrap.
I have been playing with the words and paintery December Challenge colors:
I adore these colors and have been splattering, inking and embossing with a variety of mediums. I took one of those backgrounds and started added pieces and ended up here.
I hope your holidays are blessed and filled with family and friends.
Suzz
I adore these colors and have been splattering, inking and embossing with a variety of mediums. I took one of those backgrounds and started added pieces and ended up here.
I hope your holidays are blessed and filled with family and friends.
Suzz
Thursday, December 15, 2016
12th Tag of Christmas
Hello! I am happy to say I have finished my final tag in Linda's 12 Tags of Christmas challenge. Her challenge is sponsored by The Funkie Junkie Boutique. I have had fun playing along as Linda is always inspiring in her beautiful artwork. Week #12 tag had a pocket and some fun inserts.
I decided to go with my neutral colors again just because I love how they look. I did layer my background following Linda's inspiration.
I took a jumbo tag and folded the bottom up. I stamped the holly in the background and embossed with ivory embossing powder. I then stamped a script across the background. I mixed a variety of sprays over the backgrounds of all my pieces.
The bottom flap got a layer of embossing paste spread over the surface. I then laid the concerto stencil into the paste to create an imprint.
To apply the sentiment I stamped it onto tissue paper with versamark and heat embossed with the ivory embossing paste. I then used fast finish to collage it over the bottom.
Well I hope you are all staying warm. We are below zero right now with the wind chills.
Suzz
Labels:
Artistic Outpost,
Christmas,
Funkie Junkie Tags,
Pocket Tag,
Ranger,
Sizzix,
Tim Holtz
Sunday, December 11, 2016
Joyeux Noel
Happy Sunday to you! Linda at the Funkie Junkie 12 tags of Christmas is winding down. We are on Week #11 and tomorrow she will post her 12th tag. The challenge stays open til Dec. 19th with lovely prizes sponsored by The Funkie Junkie Boutique. If you have some time you should join in the challenge!
Linda's tag this week inspired me with the strong colors and design.
I loved that she paired the white, and red with a strong black.
I decided to pull out my favorite Artistic Outpost stamps and use them as the focal point of my card.
Linda's many layers on her tag had me layering up my stamps and papers. I was so happy to ink up and stamp many backgrounds!!
The main image is from Artistic Outpost Snowy Woods as well as the sentiment. The background stamps are from retired Hero Arts stamps. (Map and Christmas Definitions)
I used a new stencil I just received from The Funkie Junkie Boutique to give my pop of red in the background.
Thanks for stopping by!
Suzz
Labels:
Artistic Outpost,
Christmas Card,
Funkie Junkie Tags,
Hero Arts,
santa
Thursday, December 8, 2016
Believe in Joy
Howdy! The wind chill is fierce today and going to be very cold for the next few weeks. I am bundled up crafting in my cozy craft room. Having so many supplies lining the wall gives me extra insulation. :)
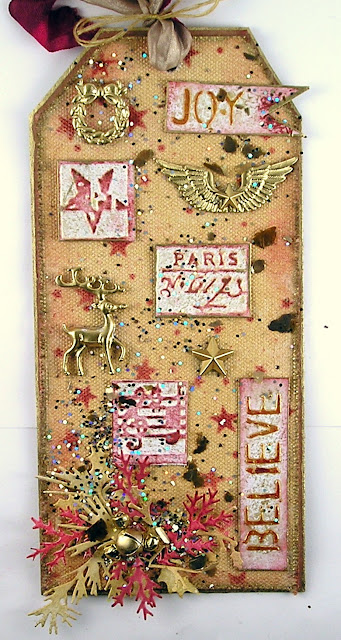
I was working on Tim's tag for December. It took me awhile and I came up with my take on his inspirational tag.
I created about 6 pieces of burlap backgrounds and couldn't get the effect I wanted. I moved onto canvas and was happy with the way the stencil showed up on a golden background. This set the tone for the tag a mix of Aged Mahogany and Gold.
The background was sprayed with gold mist and let dry. I then sponged the dye ink over the stencil on the background.
To emulate the letterpress technique: 1. Sponged on dye ink on the embossing folder and embossed the paper. 2. Stenciled with embossing paste and when dry dragged the dye ink over the surface to add a shadow of color.
The charms were all colored using a Krylon pen to give them the golden tones. The finishing touch was a sprinkling of Stampendous Luxe mixture of glitter and mica flakes.
Thanks for stopping by!
Suzz
Labels:
Christmas,
Gold,
Joy,
tag,
Tim Holtz Twelve Months of Tags
Wednesday, December 7, 2016
Winter Wonderland
Happy Wednesday! The Funkie Team at the Frilly and Funkie Challenge Blog is sharing their projects for the Home for the Holidays Challenge. Kathy is hosting the challenge and here is how she describes the challenge. "Let's get ready to Deck the Halls by creating some home decor for the
holiday season. You can make centerpieces, wreaths, banners, ornaments,
wall hangings, or little vignettes ...basically anything BUT a card
for this challenge. If you don't celebrate Christmas or Hanukkah or
Kwanzaa, then just make some home decor with a wintry theme."
At the end of the challenge the team will choose their top four picks. Our first place winner will be invited to join us in a Guest DT spot here at Frilly and Funkie. Three additional talented participants will receive badges to display on their blogs. Everyone who enters and adheres to the challenge guidelines will be entered into a drawing to win a $25 spending spree at The Funkie Junkie Boutique!
I have had a few glass jars with metal tops sitting on my craft table for awhile and that inspired me to create a mini winter scape intended only for an electric tea light as I have flammable items inside my jar.
I didn't take many photos of the steps along the way but I will share a few tips.
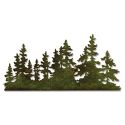
1. I die cut the trees from a lightweight cardboard which gave me flexibility in setting them around the edges inside my jar. I painted them white and then added snow along the bottom with tape.
2. The snow is a mix from Stampendous which I love because it has white embossing powder, mica flakes, and glitter all mixed together. It gives a beautiful wintery mix for you all ready to spoon out and layer the bottom of the jar. (Again highly flammable and not intended for wax candle!!) I have linked up products from the store that will make a pretty snowy mix as well!
3. I painted the top of the metal jar with a light white wash and then actually heat embossed the mix on the top. I repeated this multiple times.
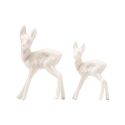
4. I then glued my deer onto the top and while the glue was wet I threw more snow mixture onto the glue.
4. I painted my trees with white paint and then rolled them in crystal glitter while wet.
5. I painted my stars which were blue gem stars to match the trees.
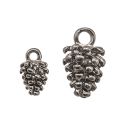
6. I coated my pewter pine cones and Christmas token with white paint.
7. I attached the trees with glue and added a layer of glue on the base and sprinkled the magical snow all around the trees.
I didn't take a picture of the tree lit up as getting the shot is tough to show off how it lights up. If you want more translucence you could cut the trees from vellum.
Don't forget to pop over and see all the other beautiful projects by the design team!
Suzz

Subscribe to:
Comments (Atom)


