

My project is a 1.99 Plastic Charger Plate from Hobby Lobby:

It started looking like this:

I measured the diameter of the inside and cut a circle to fit in the opening.
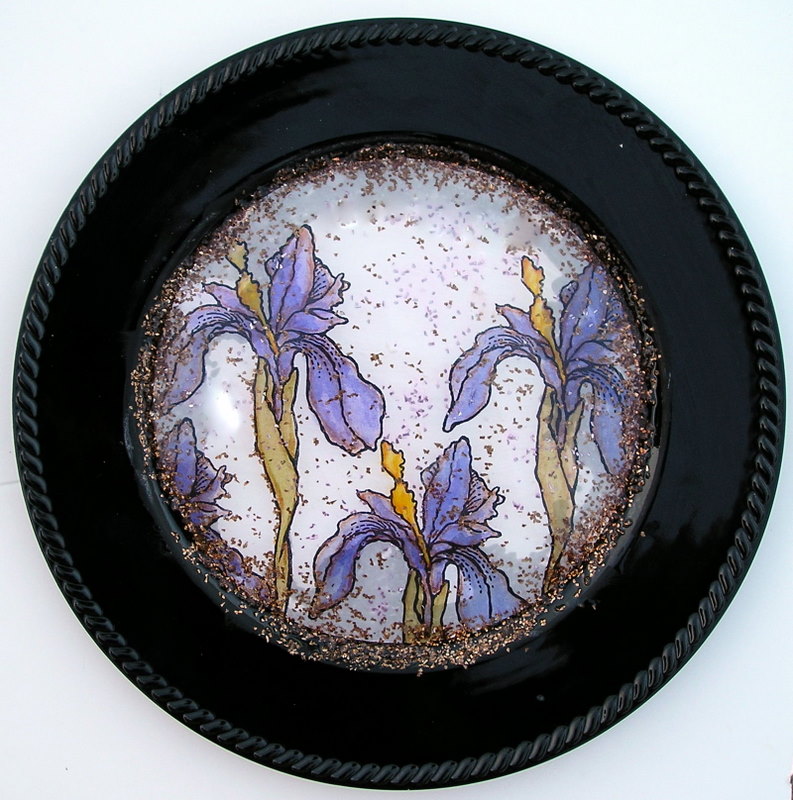
I added in the resin to the center and let it cure. After it was finished I decided I wanted to add a touch of gold to the project: (I had no problem with mixing my resin and having it cure.) I followed the instructions and was in air conditioning so no humidity issues)
I used versamark to add Aged Gold Embossing Enamel around the edges and stamped the flourish around the edges and heat embossed using the Aged Gold Embossing Enamel. My biggest compliment was when my son came into the craft room and was looking around for it as he liked it! :)
I created a second plate using my Stampendous stamps and StazOn inks:

Stamps: Cling Jumbo Songbird, Charm Collection
As you visit each blog, you'll be entered in our drawing for a great prize package when you leave a comment! If you don't tell us you were there by commenting, we can't include you in the drawing! We'll pick a winner from today's comments separate from the comments throughout the week.
Thanks for stopping by!
Suzz

Suzz, your plates are fabulous!...nothing like mine. Oh how I love your coloring on your irises! It is truly incredible. How ever did you stamp those tiny flourishes so cleanly? You must have a really steady hand. Bravo, my friend! Fantastic projects.
ReplyDeleteVery nice. Would make some fun holiday items like this
ReplyDeleteGorgeous!
ReplyDeleteWOW! These are stunning!
ReplyDeletesometimes I see projects and i'm just like...uh wow...how did someone think of this?? This is one of those..just wonderful!!
ReplyDeleteI loved how your plates came out! What a great idea!
ReplyDeleteWhat a good idea! I love the stamping around the edges.
ReplyDeleteyou are featuring 2 of my 3 fav flowers! love them and thank you for the blog hop.
ReplyDeletehttp://www.facebook.com/#!/designsbysusan
So pretty Suzanne! You always do such beautiful work!
ReplyDeleteWhat amazing transformations ... who would have thought that these beautiful pieces of art were just ordinary plates? Love the iris and that little bird is so lovely!
ReplyDeleteThese are just gorgeous projects. Amazing to think something so fabulous can come from such inexpensive beginnings! Love everything you make!!
ReplyDeleteYour plates are gorgeous!
ReplyDeleteWhat a great idea. For birthdays, Christmas, Easter, etc.
ReplyDeleteThose flourishes that are stamped along the edges look amazing. It would have taken me an entire set of dishes to get that right.
ReplyDeleteGorgeous use of that charger!
ReplyDeleteAwesome job, especially on the first plate, great stamping!
ReplyDeleteI'm blown away by your projects! They look amazing and certainly not like a $1.99 charger! Amazing transformation!
ReplyDeleteOMW, I'm totally speechless Suzz! The plates look amazing and I am in total awe of the gold accents on the black one. Stunning work!
ReplyDeleteThese are awesome plates! Thrift store would be a great place to pick up so super cheap :)
ReplyDeletevery professional looking!
ReplyDeleteGorgeous projects and another fun blog hop! Thanks for the inspiration!
ReplyDeleteCarol B
ciaoitalia2007(at)gmail(dot)com
These are fabulous! Love carmi for all her ideas and help!
ReplyDeleteWOW! What a wonderful idea. So creative my friend.
ReplyDeleteHugs~
What delightful plates Suzz. So talented. I just bought some resin so must check out the site for some tips.
ReplyDeleteThis is an amazing project, Suzanne. What a clever project and did it ever turn out beautifully.
ReplyDeletecool idea - thanks!
ReplyDeleteWonderful transformation of both plates! Fab use of the resing, very inspiring!
ReplyDeleteWhat a fantastic idea Sue. These are both wonderful. I love the way the blue of the iris pops against the black plate. I'm surprised the plate didn't melt whilst you were heat embossing but I'm glad it didn't as the effect is great. The delicate stamped edging on the second plate is lovely and the little bird is so pretty.
ReplyDeleteHugs
Lesley Xx
I love the charm collection It was bueatiful
ReplyDeleteYour plates are beautiful!
ReplyDeleteDefinitely something new and different and fun to stamp on!
ReplyDelete